
How To Do EASY Calligraphy [Tutorial + Practice Sheet]
Is the term “easy calligraphy” an oxymoron? We don’t think so! But we know that it feels that way when you’re a beginner.
To the untrained eye, it might seem like there’s no such thing as easy calligraphy. Let us assure you: calligraphy isn’t a talent that only manifests after endless practice.
Practice is an important piece of every calligraphy hobby, passion, or business, but you don’t need to wait until you’ve logged countless hours to start enjoying the art of calligraphy.
You can start today, and we’re going to show you exactly how!
Don’t forget to pin it so you can find and reference later! ↓
Even if you’re brand new, we’re going to teach you the first steps you can take on your calligraphy journey. With just a few simple tricks you can turn your normal handwriting into something beautiful.
Even if this isn’t your first time stepping up to the page, the techniques we’re going to go over are also a perfect style addition to your calligraphy repertoire.
Using normal supplies that you already have at home, we’re going to show you how fun and easy calligraphy can be.
Table of Contents
What Is Calligraphy?
Before we pick up our pens, let’s set ourselves up for success by taking a closer look at the end goal of doing real calligraphy.
In a nutshell, calligraphy is the art of writing beautifully. Technically speaking, the big difference between calligraphy and other types of penmanship is that the writing utensil leaves the page more often as you write.

Hello written in calligraphy
If you think of cursive writing, you’ll see the contrast between those approaches.
In cursive, an entire word is written without your pen leaving the page. In calligraphy as you’ll see, we lift the pen multiple times per letter.

Hello written in cursive
Learn more about the difference between calligraphy and cursive.
There are many different styles of calligraphy, with some of the most popular being traditional and modern calligraphy.
Through proper technique, a calligrapher is able to write beautifully, elegantly, and seemingly effortlessly. They don’t need to go back to illustrate, color in, or otherwise embellish their writing because the special tool they use allows them to do it as they go.
The type of easy calligraphy that we’re going to do together today involves writing words, then going back to enhance them.
Anytime one goes back to illustrate their writing, they’re not *technically* practicing calligraphy.
Instead, what you’re really doing is practicing a form of hand lettering, sometimes referred to as faux or fake calligraphy.
Prefer to watch instead of read? We also have a video explaining easy calligraphy! ↓
With hand lettering, or illustrating letters, you make letters more beautiful after you write them. It’s precisely the art of getting it right all in one go that makes calligraphy the (fun!) challenge it is.
Despite the fact that this by definition isn’t technically calligraphy (hence then name “faux calligraphy”), it’s still an important stage of learning.
Just like a musician learns to read music before playing an instrument, we will learn to recognize the different fundamentals of calligraphy before getting into precise execution.
How To Do Easy Calligraphy
Rather than doing real calligraphy from day one, the easiest thing to get started with is faux calligraphy.
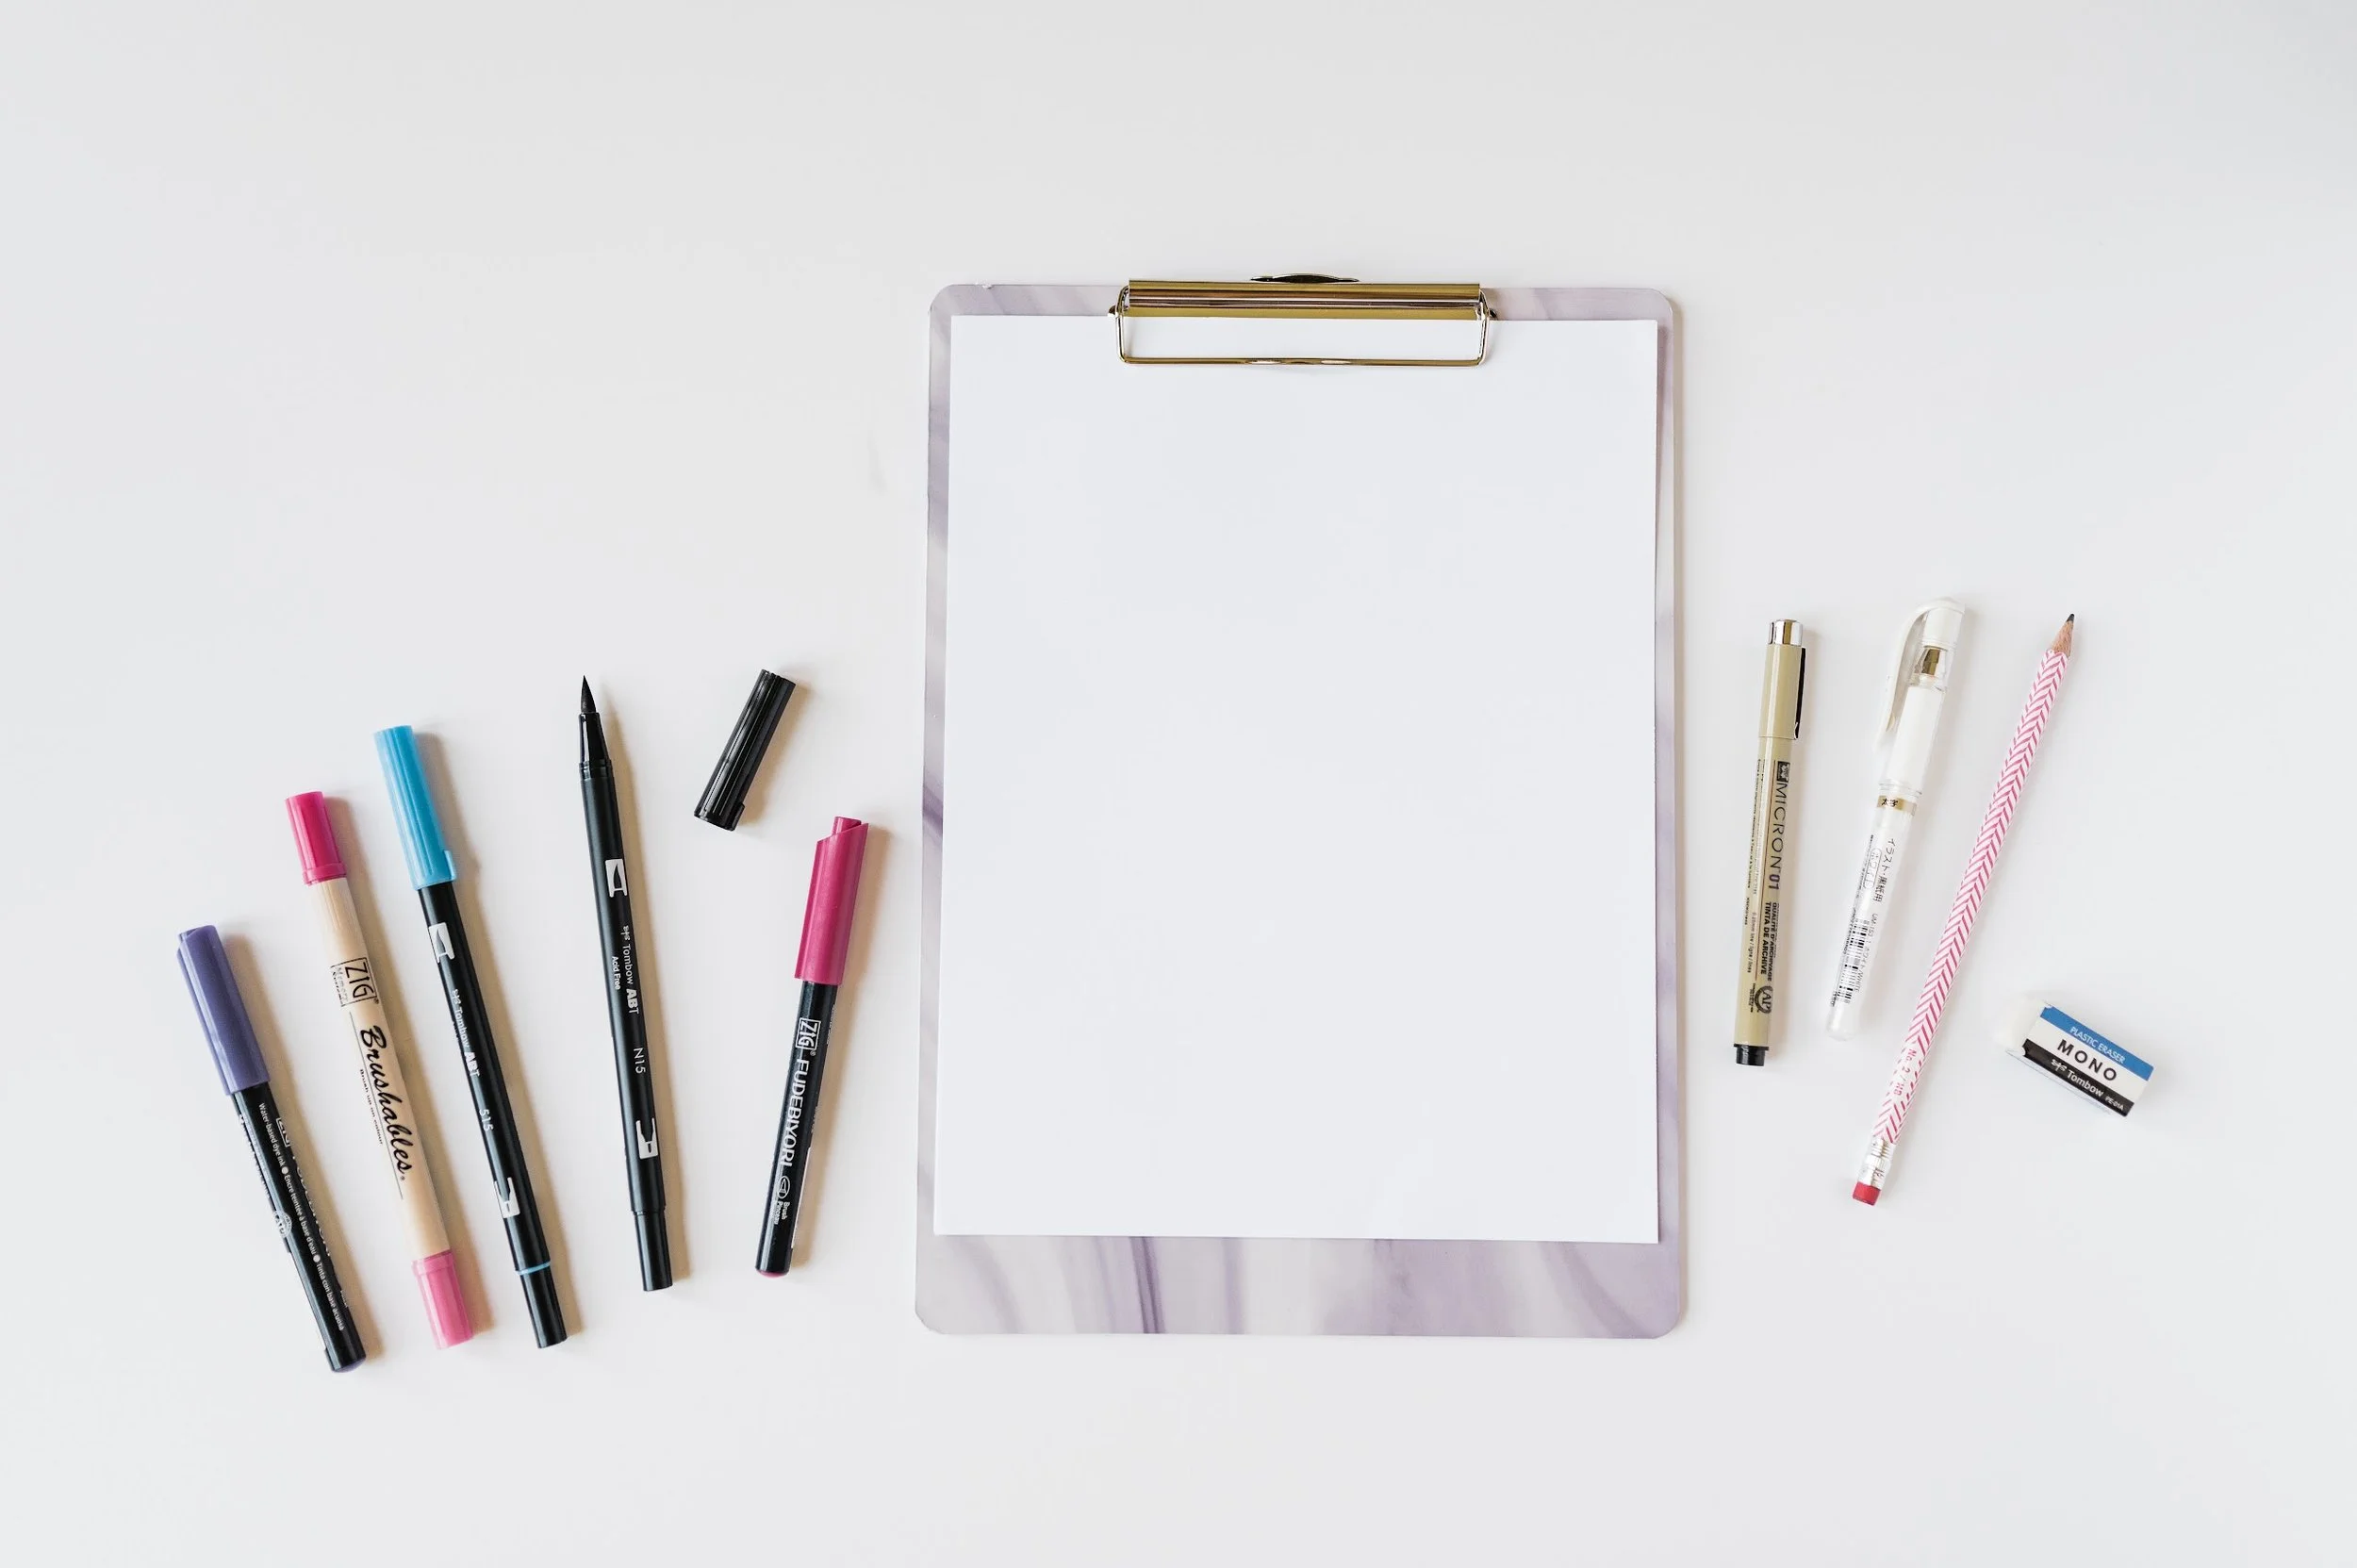
Faux calligraphy is the perfect introduction to calligraphy because it builds on skills you already have, and also uses tools that are already at your fingertips. A seasoned calligrapher has a full set of specialized tools, including various pens, inks, and brushes at their disposal.
Beginners, thankfully, need much less fuss to start practicing. All you need today is two things: a piece of paper and something to write with.
Want to take an entire free faux calligraphy course for beginners? We’d love to see you in there!

Reach for whatever utensils are nearby: a pencil, pen, even a piece of chalk! This type of easy calligraphy is extremely flexible.
Besides something to write with, you need something to write on. Although this version of faux calligraphy can be done on any piece of paper, getting something that’s at least college-ruled will help with getting your writing more consistent.
If you have a printer nearby, we welcome you to pause for a minute and print out some of our free practice sheets.
With your supplies ready, it’s time to get writing. Here’s an easy calligraphy prompt for you to start with:
Start by writing the lowercase letter j in cursive
Pay attention to how you write: do you notice how the movement of the pen alternates between an upward and downward?
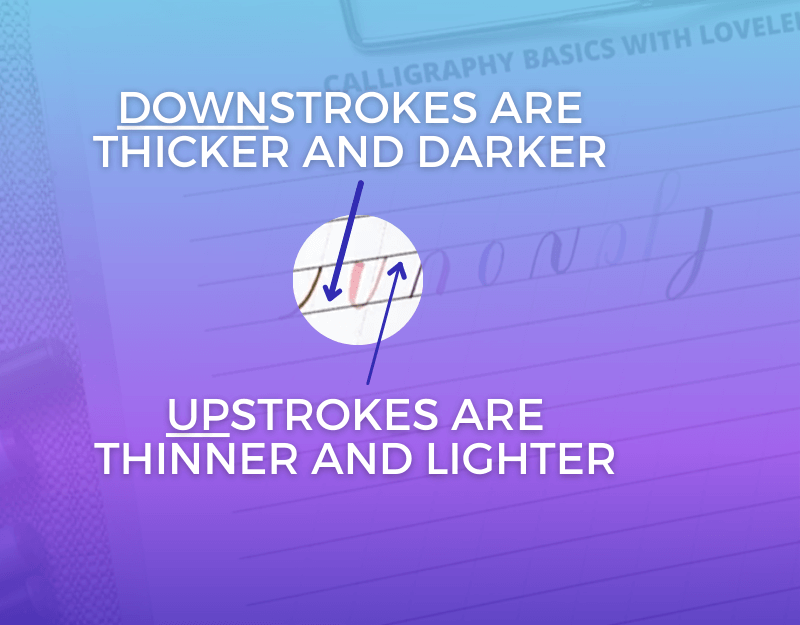
In calligraphy, one fundamental principle is the difference between upstrokes and downstrokes. Upstrokes are created when you draw upwards on the page, away from your body. In calligraphy, these are the thinnest parts of the letter.
Downstrokes are created when you draw downwards on the page, towards your body. These are the thickest parts of the letters.
You can see this here in the u-shape:
You may also like: The 8 Basic Calligraphy Strokes
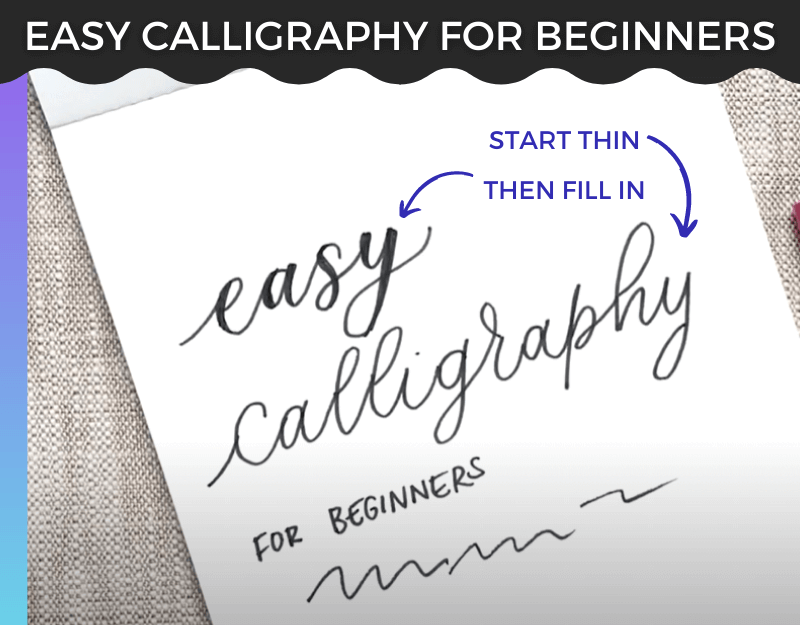
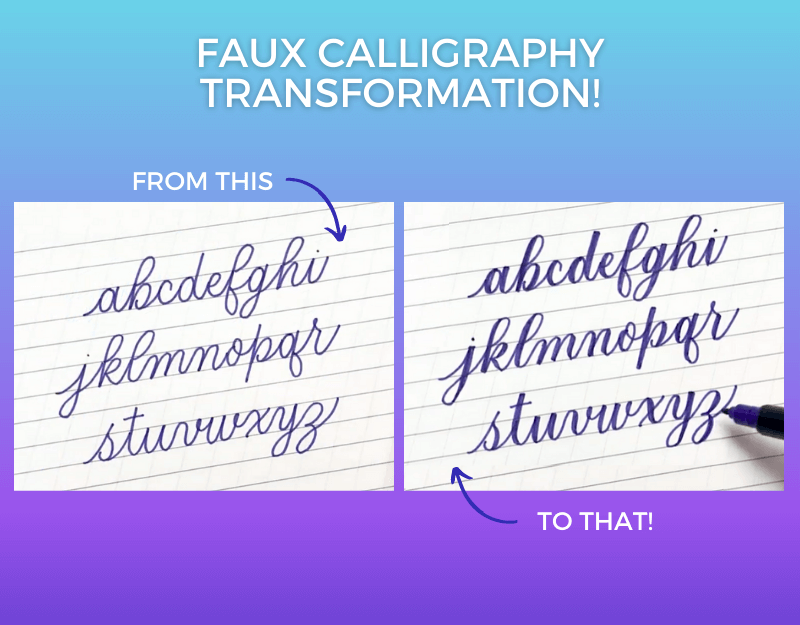
This is the fundamental difference between calligraphy and easy faux calligraphy: instead of the thicker downstroke being created by more pressure on the utensil, our downstrokes will be thickened manually.
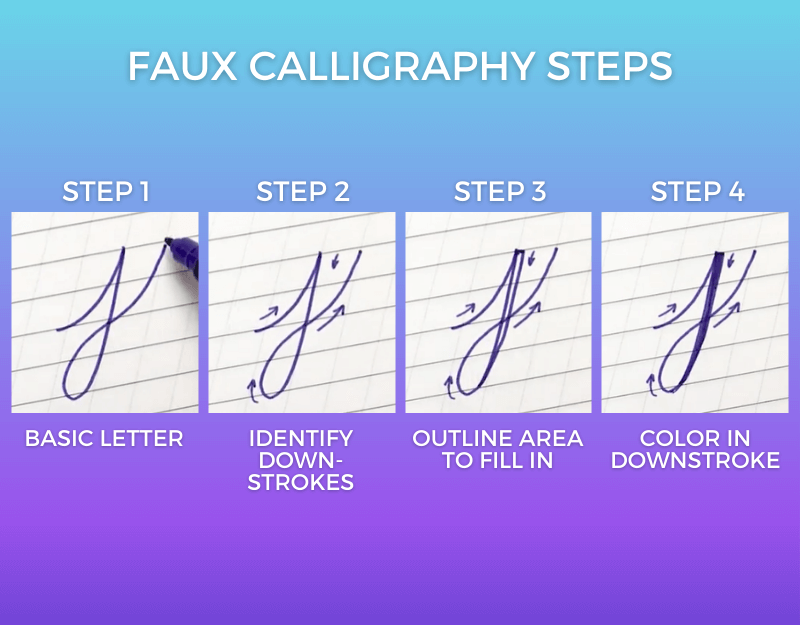
In practice, this looks like identifying the downstrokes in each letter, outlining the downstroke, and filling it in:
Does your j have clean, thin upstrokes and a thick, tapered downstroke? Practice a couple times, and make your letter bigger on the page if you find your lines getting too close to each other.
Don’t be afraid to repeat this step. If you don’t write cursive very often, it may take your muscles a couple of tries to get your hand muscles going.
Pay attention that you don’t make the downstrokes too thick. The goal of your calligraphy is for the letters to look elegant and smooth, as opposed to thick and chunky.

You may also like: Free + Paid Calligraphy Course List
This is called overshading, and is avoided by tapering your shading off by the time the direction of the stroke reaches its peak, not a hair further.
Let’s get back to our practice sheets and pick a simple word to practice, such as “cat” or “cow.”
Follow these steps:
Write the word in cursive first, or use the basic calligraphy strokes if you’ve already learned them.
With your utensil hovering above the paper, trace over the letters again with your utensil in the air. Have you identified the downstrokes?
Now outline the downstroke in each letter, starting thicker at the top and tapering off near the bottom.
Color in the area between the lines, adding thickness but not chunkiness. Aim for consistency in thickness.
easy calligraphy letters a-z
You may also like: 60 Calligraphy Alphabet Examples
This practice of writing and then adding details retroactively is actually the process of drawing words instead of writing them. This easy calligraphy style is actually a form of hand lettering.
If you’re interested in learning true calligraphy, you’ll eventually learn to create thicker downstrokes all in one go while you write. Let’s see how that looks in motion.
From Faux Calligraphy To Real Calligraphy
One of the major benefits of starting with faux calligraphy is that you get a very clear idea of what the end result should look like. This clarity can help with knowing what and how to practice.
When you’re ready to push your calligraphy skills beyond hand lettering, you should start by choosing an intentional tool.
Upgrade Your Writing Tool
Upgrading your writing tool is the first step for anyone interested in making the transition from faux calligraphy to the real deal.
Don’t worry: it’s not expensive and you may already have a perfect tool in your home.
A simple Crayola marker will work perfectly. With a marker, you’ll see that it becomes a lot easier to get a consistent thickness in your downstrokes.
You may also like: How To Do Calligraphy With A Normal Pen
You can also apply shading as you write, going lighter on the upstrokes and pressing harder on the downstrokes. So begins your transition from faux calligraphy to genuine calligraphy!
Apply Shading As You’re Writing
In true calligraphy, the contrast between up and down strokes is made as you’re writing. In order to get away from faux calligraphy, you need a writing tool that can make both thick and thin strokes.
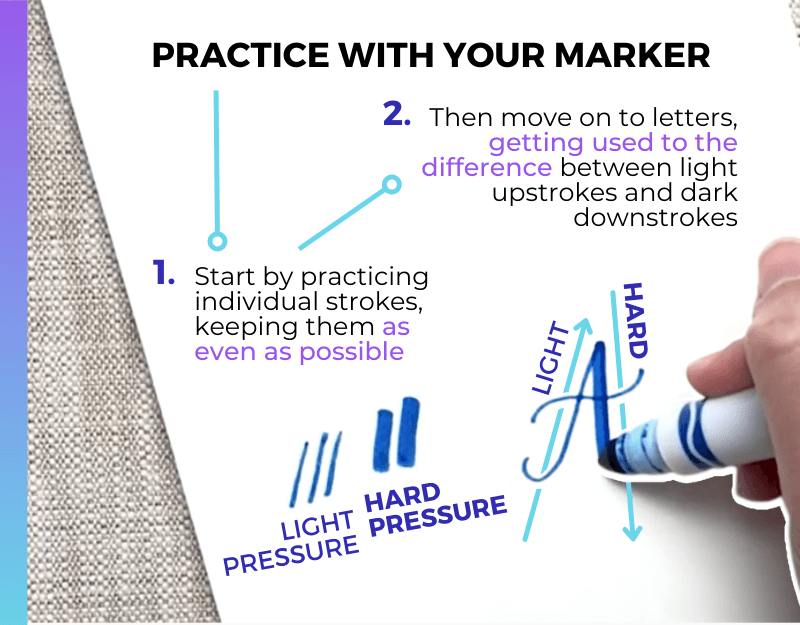
This is why we recommend a Crayola marker. Start by practicing thin strokes and thick strokes.
Then, after you’re getting strokes that are even and generally uniform, try the capital letter A.
Pay attention to the light, thin uptroke, and the heavier and darker downstroke.
Does it feel a little tricky?? This takes practice in the beginning.
Writing this way gives you a good insight into the challenge of calligraphy, developing the control needed to do it well. It won’t take you long to start building muscle memory, which is such a big part of calligraphy.
Invest In A Brush Pen
If you want to take the hobby a step further, your next step is to get your first real calligraphy tool.
An extremely popular and versatile calligraphy tool is the brush pen. A brush pen is a pen with a tip that functions as a brush. Beautifully simple!
It combines the flexibility of a brush with the ease of use of a pen. No need to constantly dip it in ink.
Brush pens come in a wide variety of shapes and sizes and you should be able to pick one up for a couple of dollars. Generally, big pens make big letters so adjust the size of your writing accordingly.
We have our own pens that you can purchase here: Loveleigh Loops Brush Pen Collection.

Study The Fundamental Strokes
Once you’ve written a few words, trying to remember every upstroke and every downstroke, you’ll notice that even a simple word poses quite the challenge.
This is why calligraphers break down each letter into separate strokes so they can practice each of these basic strokes individually. You get the best results by building up muscle memory through repetition.
Grab your free practice sheet right here to focus your practicing.
How To Practice Easy Calligraphy
Never forget that success is nothing but lots of small things done well. This old adage is true for many things, including calligraphy.
When you break down lowercase letters into their basic strokes, you can work on perfecting each individual element. With some practice, you’ll discover how easy calligraphy can really be.
Instead of squandering time by practicing too much at once and then walking away with making real progress, work on consistency and perfecting little details. Although they might be boring, having strong fundamentals will get you further in the long run.
Use a pen that’s thick enough to make downstrokes. If you only have a small pen, make your letters smaller to save yourself some time as coloring in long, large thick strokes can take forever.
Although your shading might show perfect consistency in thickness, too much shade can make your letters look clunky and less elegant.
Writing Simple Calligraphy
Besides adding shade, calligraphy also requires a slightly different way of writing. In order to illustrate this, let’s look at this difference by writing down the word ‘hello’ first in cursive, then in calligraphy.
Many of us learned handwriting in cursive at a very young age as it used to be a part of the elementary school curriculum. Cursive, or writing without lifting the pen off the paper, yields a version of handwriting that’s different from what we want in calligraphy.
When you look at the example of cursive, you can see letters tend to be tall and narrow and that the loops look more vertical and less round than the calligraphy version.

As a final practice, try writing your name in faux calligraphy and apply shade where needed. Add thick strokes on the downstrokes and leave your thin strokes alone!
Next Steps
Congratulations! You have a new hobby.
How did your first exercises go? Is your hand warmed up?
It’s amazing how much you can do with only a little bit of practice and instruction. Just by adding something as simple as shade, you can make your writing look so much more elegant.
We have endless tutorials on the Loveleigh Loops blog and YouTube channel. If you’re ready to dive into all things calligraphy, get instant access to any of our calligraphy courses.
