
How To Blend In Procreate (Easiest Way + 2 Alternatives)
Procreate is an incredibly powerful tool for digital lettering and calligraphy, but that can also make it discouraging to learn! Today we're going to make this software less intimidating by showing you exactly how to blend in Procreate.
Blending is a surprisingly easy way to elevate your work. It requires very little technical skill to do it well, and is really just a matter of navigating some basic settings!
Besides showing you exactly how to blend in Procreate, we'll also discuss some of the pros and cons of using each of the 3 different methods.
Let's dive in!
Table of Contents
Pause now and save for later!

Blending In Procreate
In modern calligraphy, blending colors with brush pens is a skill that takes some practice to master. Blending requires several quick brush strokes where you drag color A into color B. Creating the soft transitions requires a light touch which takes time to learn.
Fortunately, the iPad makes life a lot easier since blending in Procreate is simply a matter of understanding software settings!
Procreate gives you 3 options to create the blending effect:
Gaussian blur: blends an entire layer
Airbrush: automatically blends the edges of strokes together
Smudge tool: manually blends individual areas

The road to learning Procreate may feel long, but don’t give up! We’re here to help you go from zero to designing the compositions of your dreams
Each of these blending techniques lets you blend nicely but they give you different levels of control over the amount and texture of when you blend.
Let's look at how to blend in Procreate by going over each of them in turn.
You may also like: Procreate Calligraphy Beginner's Guide
Prefer to watch? Follow along in our Procreate blending tutorial:
Easiest Way: Blending Using Gaussian Blur
You can blend using a variety of tools in Procreate, so let's start with the easiest: the Gaussian blur!
Rather than having to learn how to use blending brushes, Gaussian blur is a setting that has a simple slider. Blending with this blur tool lets you blend an entire layer at once:

Watch the full tutorial here
Here are the steps to blend a layer with Gaussian blur:
1. Select A Brush
Start by choosing a brush you like from the brush library. In the video tutorial, I used the hard brush that can be found in the default Airbrushing set.
Keep in mind that we're not choosing a blending brush here. The brush we're using at this step will just help us fill up the background. Any brush size will work, but a larger brush size will help you fill the canvas faster.
You may also like: Top Procreate Shortcuts
2. Draw Stripes Of Color
Now take your Apple Pencil and draw a number of stripes across the page to fill up the entire page with color.
There's a seemingly endless number of colors in Procreate, but choosing analogous colors that are close to each other will give the best blending results.
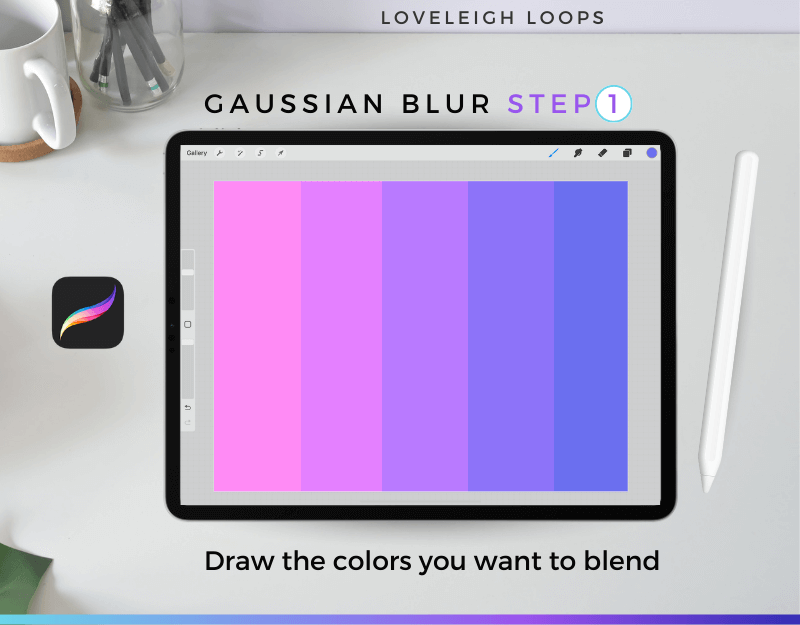
Gaussian blur step 1
Once you've colored the page, all that's left is to apply the blur effect.
3. Find Gaussian Blur
Click on the magic wand icon to open the Adjustments menu to find Gaussian blur.

Gaussian blur step 2
Now place your Apple Pencil on the screen and move to the right and see the blending effect happen in real-time.
At the top of the screen, you can see a percentage that indicates the degree of blending.
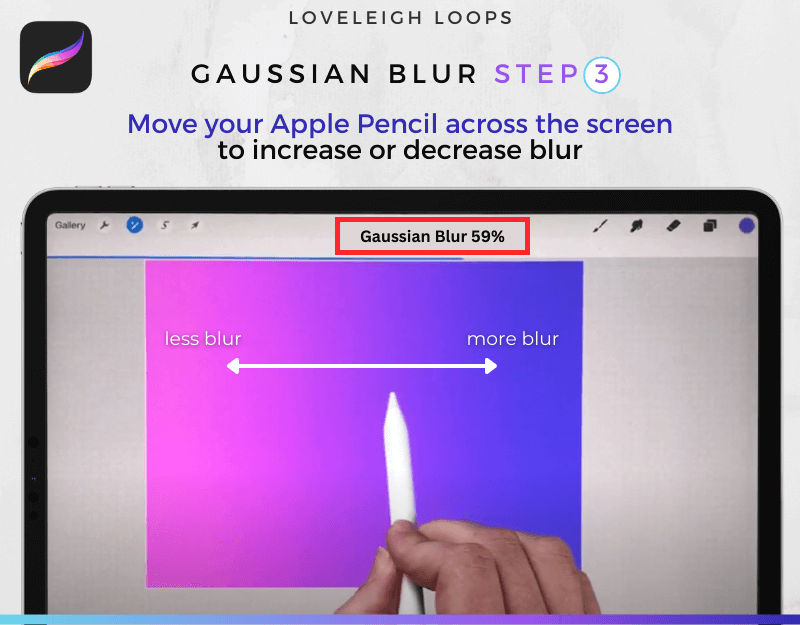
Gaussian blur step 3
When you slide it up to a hundred, you'll see a smooth blend across the whole page.
The higher the number, the smoother the blending.
But be aware that blending too much could create a muddy effect or even get rid of the color variation.
You may also like: Favorite iPad Accessories For Procreate
4. When To Use Gaussian Blur
The Gaussian blur tool is the easiest and fastest way to create simple blending effects for your composition.
With a single slider, you can adjust all the colors on the page, making the transitions as smooth as you like it.

Gaussian blur results in Procreate
However, using Gaussian blur doesn't give you a large amount of control over the effect and we use it primarily to blend larger areas such as the background. If more control interests you, then consider 1 of the following forms of blending.
You may also like: iPad Flourishing Guide
Blend As You Go: Soft Brush
If you want to have a little more control over blending colors as you go, then using a semi-transparent airbrush might be right for you.
This brush tool is similar to the blur tool we just looked at, but it has one major advantage: it lets you decide where you blend.
It's also very straightforward to use, so let's go!
You may also like: Intro To iPad Lettering

Watch the full tutorial here
1. Choose A Blending Brush
For this blending technique, we're going to select one of the brushes in our brush library.
In this example, I chose the soft brush from the Airbrushing set as these brushes make it easy to create natural, smooth gradients.

Procreate soft brush settings
You may also like: 20+ Free Lettering Worksheets
2. Draw Stripes Using Analogous Colors
Similar to the previous blur tool, you start by drawing a series of vertical stripes.
However, the difference in blending styles becomes apparent right away. Look at the edges of the soft brush:

The soft brush in action
With my soft brush, the edges of my stripes are faded and they start to blend together naturally when you draw more stripes overlapping with each other.
You may also like: Improve Your iPad Lettering

Soft brush results
3. Experiment With Brush size
The demonstrations we’ve shown are background blurs, meaning that the blends are large and uniform, but that doesn't mean you have to blend on a large scale.
When you blend in Procreate, using different brush types and sizes can alter the texture and feel of the blended effect.
Here's a simple cheat sheet:
Bigger brushes create big stripes that work well for the background
Using a light touch with a smaller brush creates subtle effects within letters
An artist doesn't limit themselves to just one painting brush. Why should you use the same brush over and over in digital art?! Experimentation here is key and will yield the best results.
Want to dive deeper into Procreate calligraphy and lettering? Get our free brush and practice sheets!
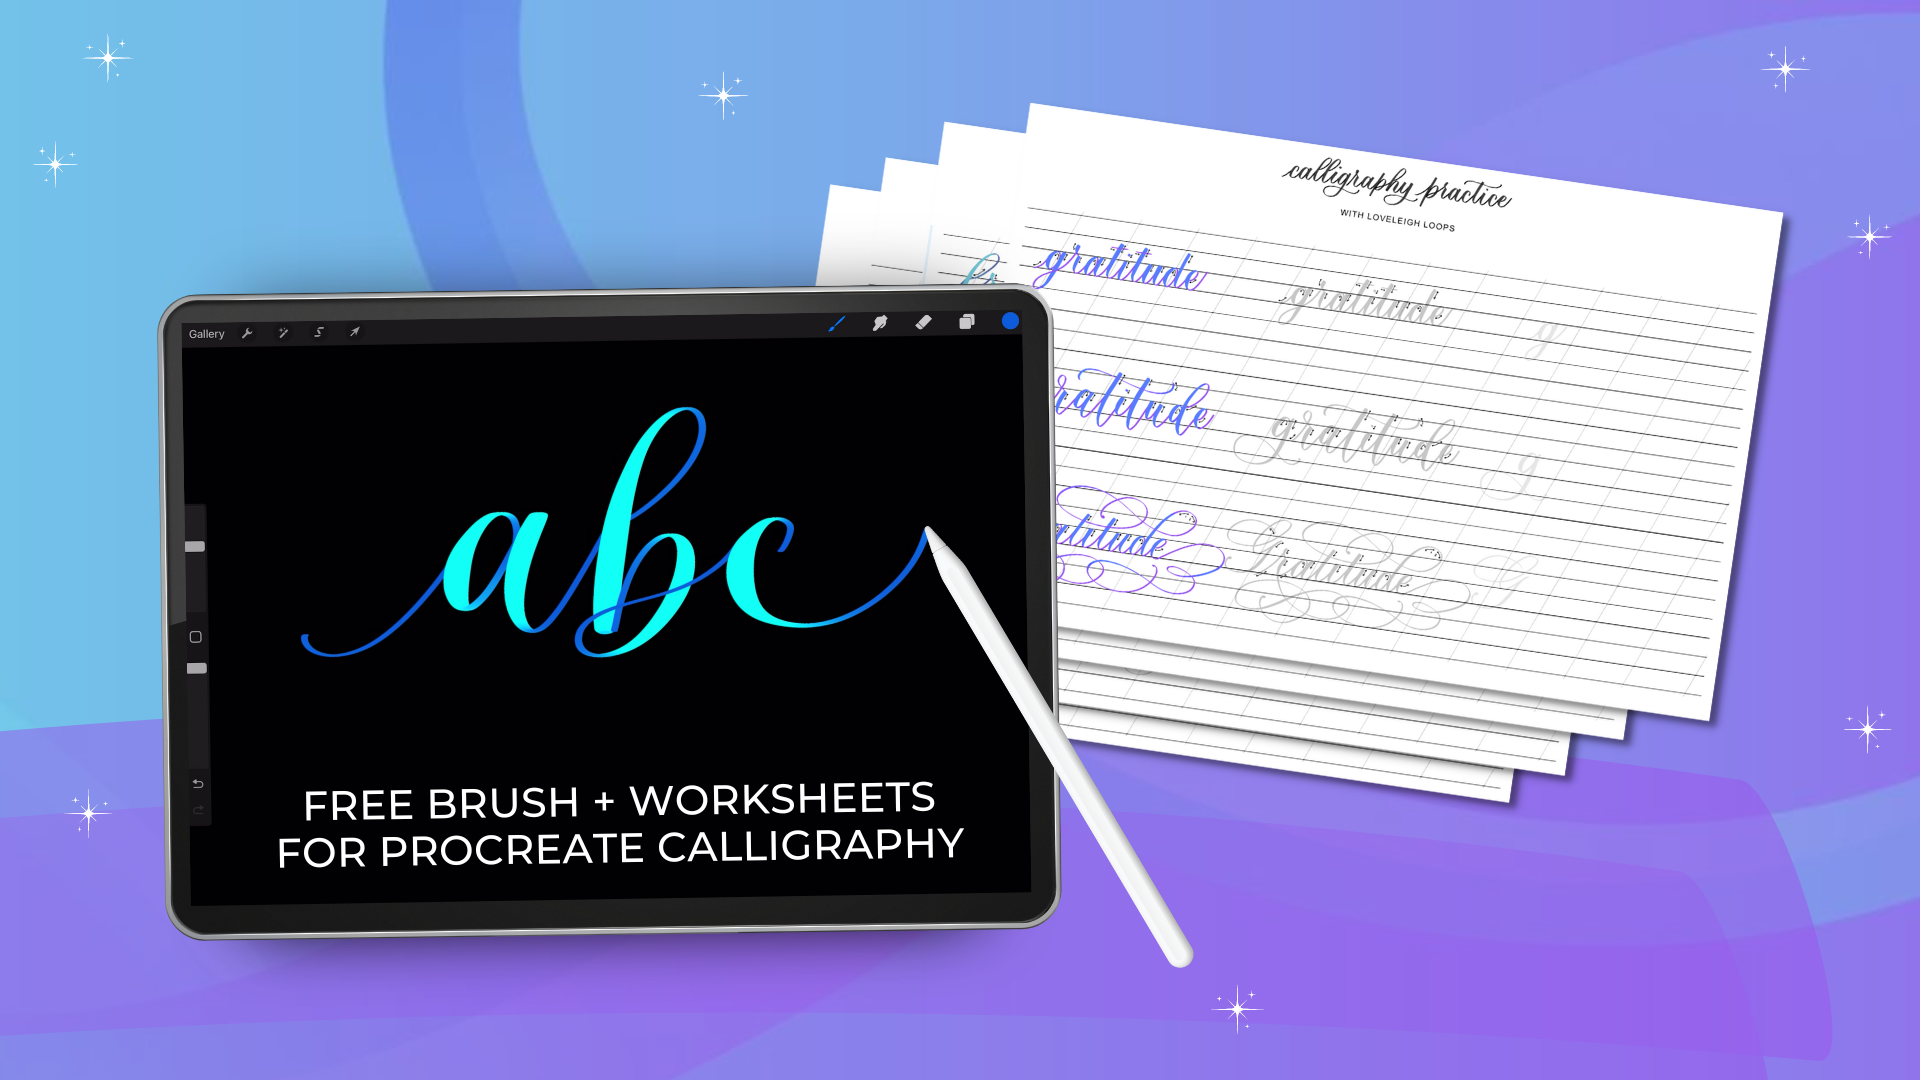
Free Procreate brush and calligraphy worksheets
You may also like: iPad Buying Guide For Procreate
4. When To Use Soft Brushes
Soft brushes are best used when you want a little more control over where you blend instead of doing a uniform blend at the end.
With a soft brush, you have more precision control than you would with Gaussian blur. You get to decide:
The intensity and amount of blending
Individual sections rather than blending one layer all at once
If this amount of control isn't enough, then the smudge tool is the best way to go for your blends.
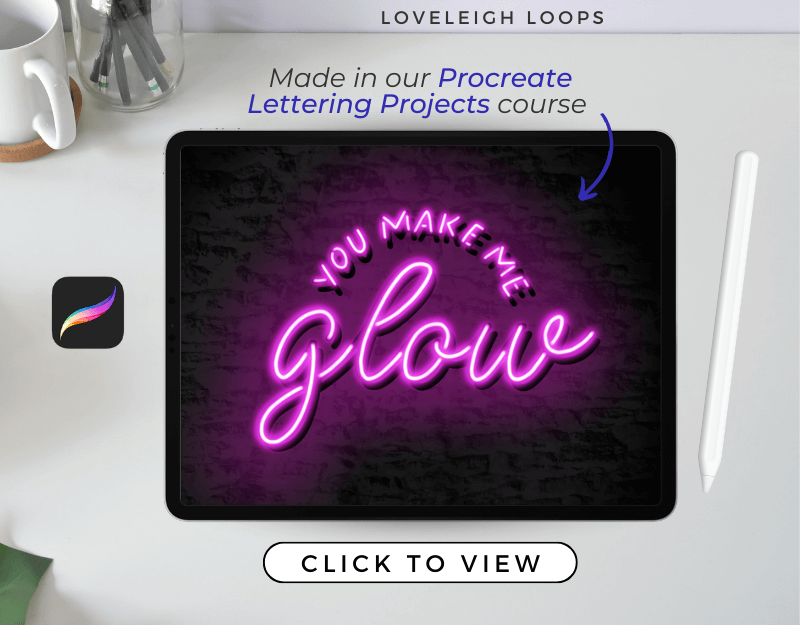
Procreate lettering projects
You may also like: Why Try Digital Lettering
Most Control: The Smudge Tool (AKA Blending Brushes)
The smudge tool, also known as blending brushes, puts you firmly in the driver's seat of your blends and gives you full control in Procreate.
Unlike the other blending techniques, using the smudge tool lets you blend manually to create your desired effect. Thanks to its precision, you can also use it to create varying effects and add details all within a single layer.
When you first use smudge brushes, you'll see that they don't paint any color. Instead, a smudge brush lets you "move" paint as if you were using your finger.
Watch the full tutorial here
Here's how to try for yourself.
1. Open The Smudge Tool Library
To access the smudge tool, open the library by clicking the finger icon next to the brush icon.
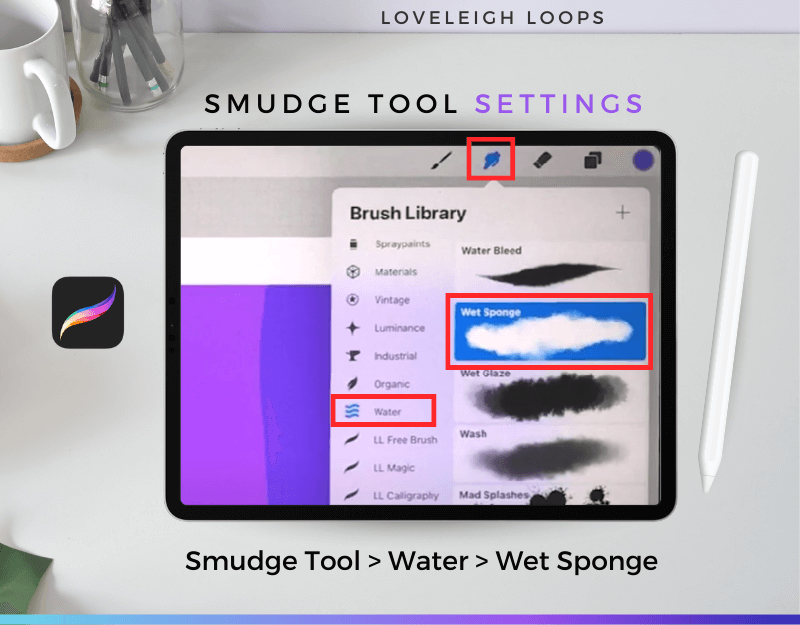
Smudge tool settings in Procreate
Now select a brush. In this example, I used the Wet Sponge brush from the Water set.
You may also like: Which iPad To Get For Procreate
2. Start Blending Colors
Using the smudge tool, you blend by moving the Apple Pencil across the colors.
Lightly drag your pencil back and forth between colors to mix tones and create gradients that are as smooth or as textured as you want them to be.
You may also like: Make Money With Procreate
Jillian writing in Procreate
3. Try Different Brushes And Sizes
The smudge tool is a great tool to experiment with, largely because of its flexibility. Try blending with different brushes of various sizes and textures to discover your own style!
4. When To Use The Smudge Tool
A smudge brush is the most versatile way to blend in Procreate and lets you dictate every aspect of your blends.
Since you blend colors by physically moving the pencil, you get to decide:
Where to blend
How smooth you blend
The number of colors you blend together
Which brush and effect you use
The best thing is that you can do all of this AFTER you've laid out your colors. Out of all the blending techniques, the smudge brush gives you the most organic-looking effects.

Procreate lettering projects
How To Use Blending INSIDE Letters
So far, we've talked about how to blend in Procreate by going over general blending techniques.
However, there's more you can do with this simple but stunning effect!
Besides using blending to create colorful backgrounds, you can also insert your gradients into your letters by using a clipping mask.

Adding a graident to words in Procreate
It's simply a matter of following these 3 steps:
Go to the layers panel
Grab the blended color layer and move it above your letters
Tap on the blended layer and choose clipping mask. Now you'll see the blended colors come through your letters!
Move the clipping mask layer around until you find your desired effect
Clipping masks are incredibly powerful! Here’s a quick tutorial on how they work:
The Color Theory Of Blending
Are your gradients looking off? This bit of color theory might explain why.
Blending is a subtle effect that works best when you blend colors that are similar.
Not all colors work together when you blend them and the blending effect loses some of its magic when combining colors that are too far apart.
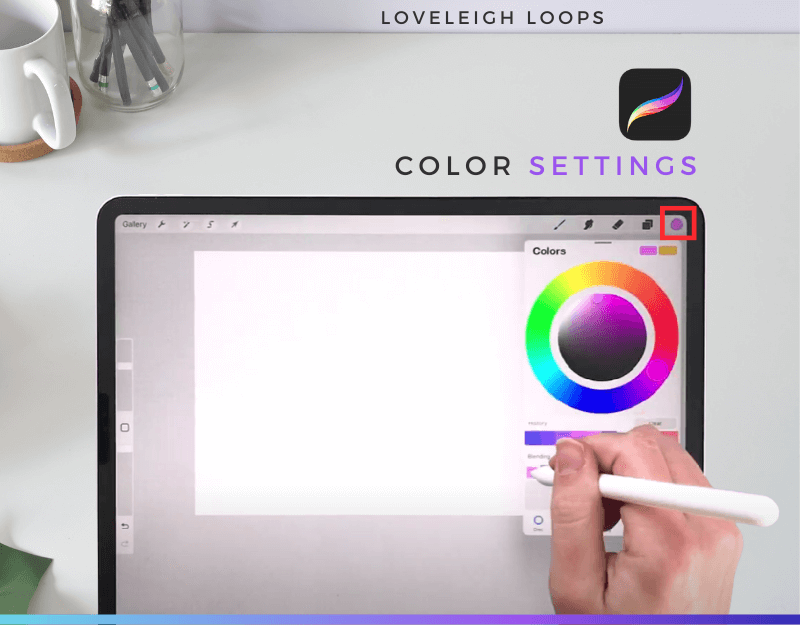
Where to find the color settings in Procreate
Digital blending is easy as colors in Procreate can be selected from the color wheel. Just click on the color button in the top right corner of your screen.
For the best result, use analogous colors for blending and avoid complementary colors that are on opposite sides of the color wheel. Blending complementary colors could look muddy.
You may also like: How To Print From Procreate
Procreate Beginner Resouces
Are you eager to learn Procreate for your lettering? We have more resources to help you learn both digital hand lettering and digital calligraphy!
Procreate YouTube Series (FREE)
We know that learning new software can feel like a huge headache. It can leave you Googling every single setting and feature like clipping mask, adjustments window, opacity settings and selection tool.
...instead of actually creating and having fun, which is the whole point of learning Procreate!
We've answered all of the beginner FAQs around Procreate settings and features and assembled them all in bite-size video tutorials on our YouTube channel.
You can jump right in with our tutorial on how to add text:
Procreate Calligraphy Brush (FREE)
Is your current brush designed for writing calligraphy? Most aren't - that's why we made the Loveleigh Brush, a free Procreate brush that's specifically designed for calligraphy.
This brush is…
Specifically designed for digital calligraphy
Pressure sensitive
Color changing (colors change with pressure!)
Get thicker strokes with more pressure and thinner strokes with less pressure.
iPad Calligraphy Basics Course (FREE)
We're so excited for you to build confidence in Procreate that we've created an entire free course that will teach you the fundamentals on lettering on your iPad.
Included you'll get…
The Loveleigh Brush
A workbook
Step-by-step video tutorials
Plus more!
Procreate Lettering Facebook Group (FREE)
Come meet your new friends in our Procreate lettering Facebook group! In this group, you can ask questions, share your work and learn.
Final Thoughts
Blending in Procreate is an amazing way to add depth and dimension to your lettering. We hope that this Procreate blending tutorial made this process simple and easy to implement!
We're here to support you on your Procreate journey in any way that we can. Make yourself at home here at Loveleigh Loops!
