
Brush Pen Lettering & Calligraphy [Complete Beginner's Guide]
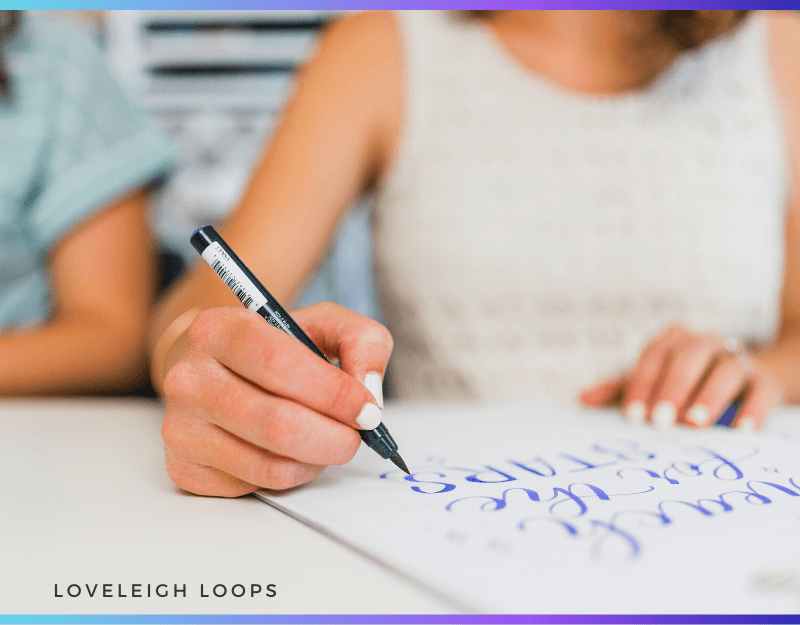
As treasured as the traditional calligraphy tools are, there’s a beautiful convenience to brush pen calligraphy. All of the different sizes, colors and brands make brush lettering feel like visiting a visual candy shop.
Brush pen calligraphy is perfect for anyone who wants to practice calligraphy without using ink and nibs, and the good news is that you can get started right away (even if you’re learning from scratch).
Brush pen lettering lends itself well to being creative and spontaneous without spending a lot of time on getting your supplies ready, or (even better!) cleaning up after you’re done.
But brush pens are more than just markers and there’s a slight learning curve, but we’ll give you all the guidance you need to cruise through it.
Pin it for later! ↓
In this beginner guide, you’ll get:
Steps to get started from absolute zero
Reviews of the best brush pens for beginners
Free worksheets to practice
Brush lettering FAQs
Let’s start with some basics first because learning brush pen calligraphy is easier when you understand the true goal of calligraphy.
Table of Contents
What is calligraphy?
Calligraphy is the art of writing beautifully. This is achieved by creating words out of small intentional strokes with varying thicknesses.
Calligraphy is sometimes confused with other writing styles, but each style has unique characteristics:
Calligraphy: letters are written piece by piece
Cursive writing: words are written in 1 continuous line
Hand lettering: words are drawn instead of written (this includes faux calligraphy)
In order to create beautiful words, a calligrapher breaks down letters into individual elements and takes the time to perfect each individual stroke of their writing:
The basic strokes are the foundation of every type of calligraphy, including brush pen calligraphy
When you’re writing normally (your day-to-day handwriting), every line you create has the same thickness. The most common writing utensil is a ball-point pen (also called a monoline pen) that’s been designed to facilitate fast and smooth writing, creating these even strokes.
You may also like: How To Write Calligraphy With A Normal Pen
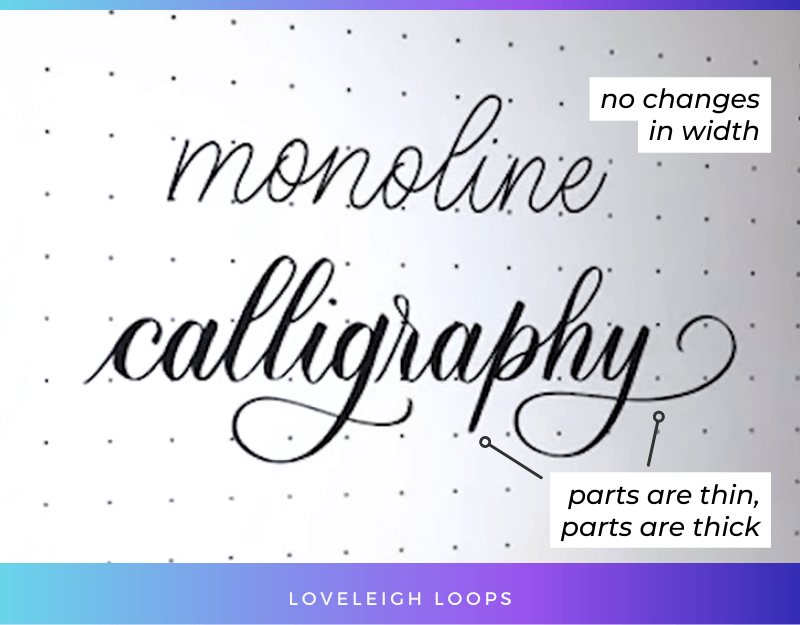
The word “monoline” is all the same width, but look at the word “calligraphy” and you’ll see the changes in stroke width
However, an essential part of calligraphy is using both thick and thin lines in your lettering.
These even have their own names:
A thin stroke is called an upstroke, and occurs when your brush pen is going up the page
A thick stroke is called a downstroke, and occurs when your brush pen is going down the page
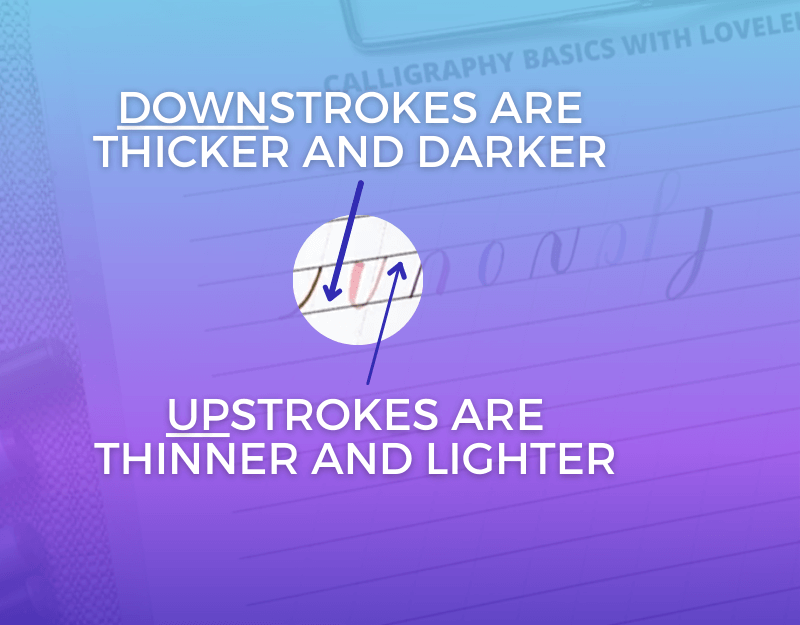
Upstrokes and downstrokes are the secret behind calligraphy’s unique aesthetic
By applying different amounts of pressure on the pen, you create elegant contrast within your letters and make them look more attractive than traditional handwriting.
You can practice calligraphy with a number of different writing utensils:
Pointed pen (also called a dip pen)
The Apple Pencil (iPad calligraphy)
And of course, brush pens!
These tools range from traditional to modern, and there’s no wrong tool to start learning calligraphy with.
To beginners, a brush pen can represent the best of both worlds as it combines the ease of a marker pen with the traditional skill of a dip pen.
What’s the difference between brush pen lettering and brush pen calligraphy?
Since a brush pen is a pressure-sensitive writing utensil, it can be used for calligraphy. Brush pen lettering and brush pen calligraphy are often used interchangeably, but the technical difference is that brush pen calligraphy exclusively uses the basic strokes.
Brush pen lettering is an umbrella term that includes calligraphy as well as hand lettering done with a brush pen.
Brush pens are a modern calligraphy tool, which leaves a lot of room for creativity and experimentation
What is a brush pen?
A brush pen is a marker with a flexible tip. The tip can be short or long, and can vary in flexibility. As long as the tip is flexible enough to produce both thin and thick strokes, it’s suitable for brush pen calligraphy.
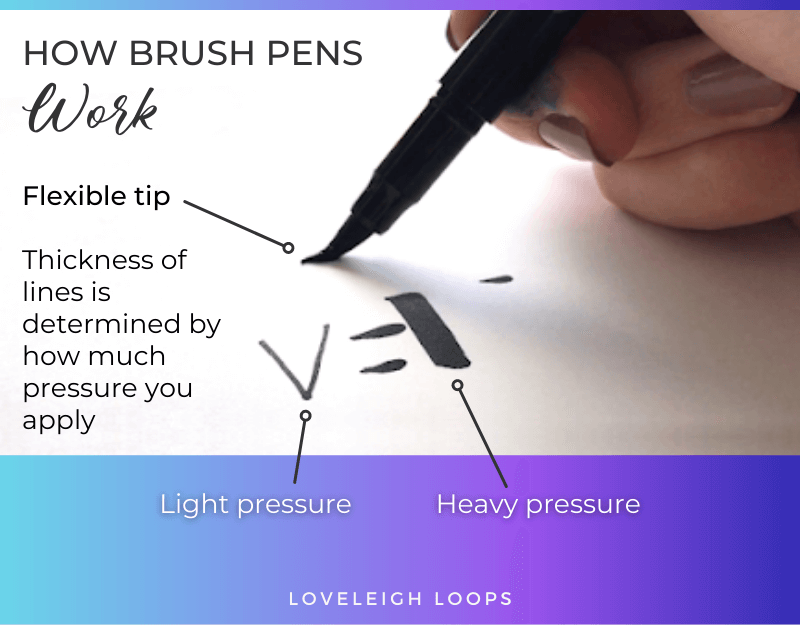
The ability to create thick and thin lines lies in the flexibility of the brush pen tip
The tip is the most important feature of a brush pen. The flexibility, width and length determine how your brush pen lettering looks.
You may also like: Brush Pen Comparison Guide
How much does a brush pen cost?
Most brush pens cost less than $5. On Marker Supply, the most you can spend on a single brush pen is $50+, though an investment on that level isn’t necessary.
Why use brush pens for lettering?
Besides being beginner-friendly, there are several characteristics that make brush pens the popular tools that they are today:
Budget-friendly. Brush pens typically only cost a few dollars, and beyond choosing the right paper and printing our free worksheets, you don’t need more tools to get started.
Easy to use. There’s a slight curve when it comes to learning how to use brush pens but it’s a very approachable form of calligraphy.
Quick and simple. You don’t need to budget time to prepare, let your work dry or clean up.
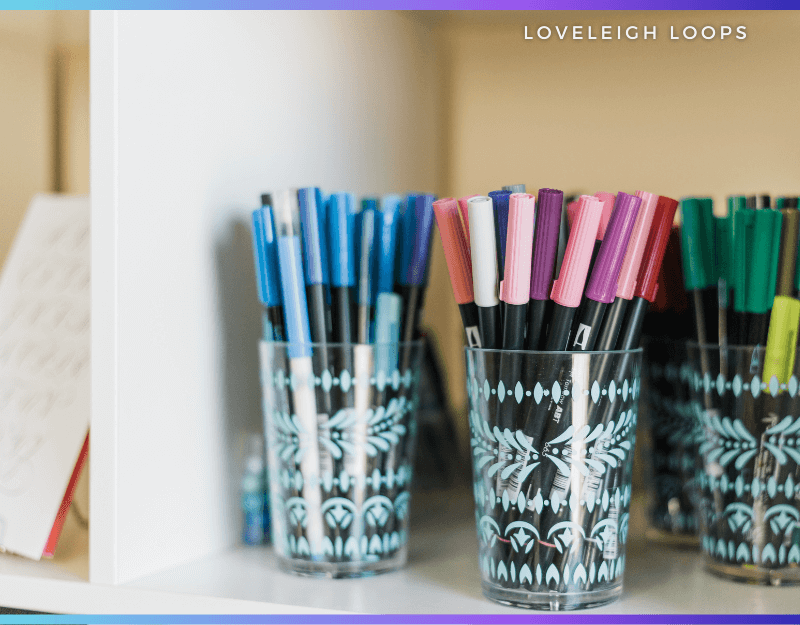
Variety. When you go into the store to buy brush pens, you’re presented with a large variety of all shapes, sizes, colors and special characteristics (more on this in a minute).
Versatility. Although a brush pen is a modern tool, you can still work on traditional calligraphy techniques. Using a brush pen involves mastering different levels of pressure to create your wide and fine lines which is a skill that transfers really well if you want to try pointed pen calligraphy next.
Portability. No need for piles of tools or worries about liquid inks! Just throw a few brush pens into your bag with some smooth paper and you’re ready to practice anywhere.
Like a candy store!
The creative range of brush pens is thrilling, and this is personified even further by the special effects some pens offer.
You may also like: Different Types Of Calligraphy
Brush Pen Special Effects
Brush pens offer the opportunity to make creative special effects that are unique to this tool.
Blending
One of the big draws of using brush pens is that you can blend colors together.
Learning how to blend colors together is a useful skill that allows you to add highlights, shadows or subtle color variations to make your work truly stand out.
Important note: blending works with water-based inks. See what type of ink your brush pen has by reading on along the side of the pen.
To achieve this effect, you need 2 markers of different colors and a colorless blender brush pen. You can either choose to blend vertically or horizontally.
For horizontal blending, start by choosing 2 different colors that work well together. For vertical blending, try choosing 2 shades of the same color.
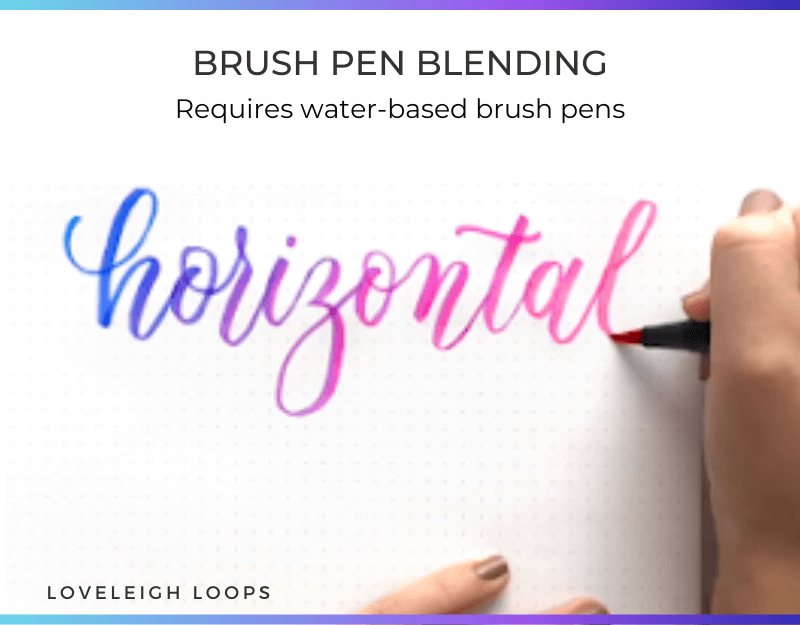
Brush pen blending is mesmerizing
You may also like: Easy Calligraphy Guide
Watercolor Effects
Achieving a watercolor effect with your brush pens is surprisingly simple and gives you stunning results! All you need are a few water-based brush pens, a plastic bag and some water.
Start by choosing a few colors that work well together. Although you may be tempted to go for shades of the same color, choosing at least one contrasting color really works wonders.
Next draw random blobs of color on your plastic bag. You’ll see that the ink doesn’t adhere to the plastic, which is exactly what we’re looking for.
Pro tip: Holding the brush pen at an angle that is a little more parallel to the paper makes this kind of scribbling a lot easier.
After you’ve put enough color on the plastic, spritz it with a little water. Try to add enough water to see some water droplets on the surface but be careful not to let too much water gather.
It’s time to flip the plastic and lay it on the paper. Do this step quickly; if you don’t flip it fast enough, the ink will just run off the paper!
There’s a lot more you can do with this and we encourage you to check out our entire watercolor brush pen tutorial for a more in-depth guide on this amazing hack.
You may also like: How To Hold Your Brush Pen
Ribbon Lettering With Brush Pen
A more intermediate brush pen lettering trick is ribbon lettering. It may take a while to get the hang of this style, but the end results are so worth it!
The success of creating beautiful ribbon letters rests on blending as well as overall calligraphy ability.
Start by writing your word with a brush pen. As always, pay special attention to the thick and thin strokes. When you’re happy with the way your written words look, it’s time to start turning your letters into ribbons.
The first step is to get an ordinary monoline pen and trace the outline of the letters, starting with the thick strokes. Anyone that’s uncertain can start by tracing faint lines with a pencil before moving on to the more permanent pen
Pro tip: Sometimes, defining the edges of the thick strokes can be tricky. Since one wrong line can ruin your piece, try using an actual ribbon to better visualize where to draw your lines. A simple belt or tie will do the job!
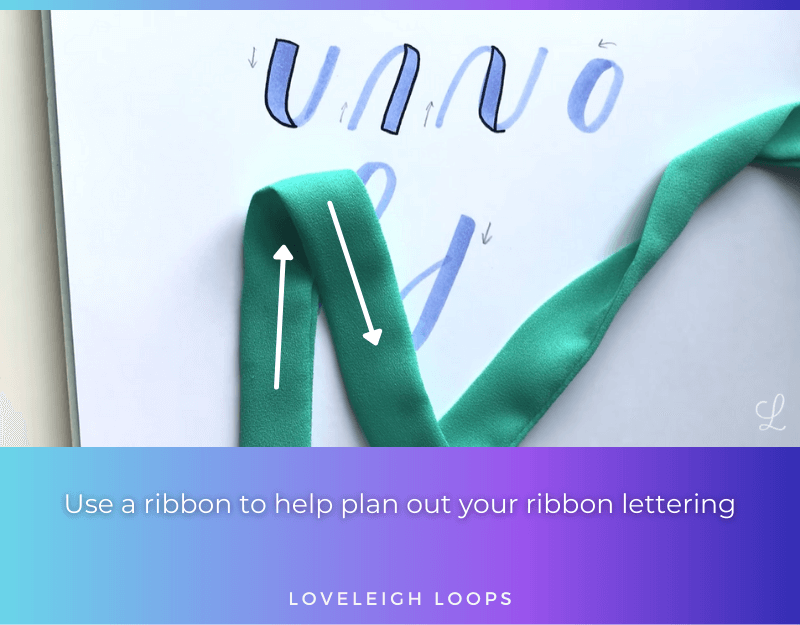
`Use a real ribbon to help you if you get stuck
Once the outlines are done, it’s time to bring some 3D magic to your writing. Add shadows to provide your letters with depth. Keep in mind that there are two areas that need to be darkened.
The first is any part of a letter where the ribbon seems to be behind itself, the second are all the parts that are close to a fold in the ribbon.
For the best results, imagine that the thick strokes are in the front and the thin strokes are in the back.
You may also like: How To Do Bounce Lettering
Shadows
By playing with shadows, you can make your brush lettering jump off the page!
Adding shadows to your letters can provide a cool 3D effect that adds even more depth to your lettering. This super easy trick works with any word you write but we especially love the way it looks when combined with ribbon letters.
Here’s a tutorial on day 2 of our Brush Pen Crash Course. Fast forward to 44:30 to jump right into shadows.
Get a gray brush pen and trace the sides of the letters to make it look like they’re floating in hovering above the page.
Brush pens are amazingly versatile.
Are ideas flying through your head?? It’s time to let you loose on the page!
You may also like: All About World Calligraphy Day
How To Practice Brush Lettering
You know those beautiful works of brush lettering art on Instagram and Pinterest?
Whoever made them started at zero and practiced. So congratulations are in order: you’re taking your first steps down the same road!
Put time aside to practice every day and expect the process to be a slow build-up of skill, rather than a flashy “before and after.”
Free Brush Pen Practice Sheets
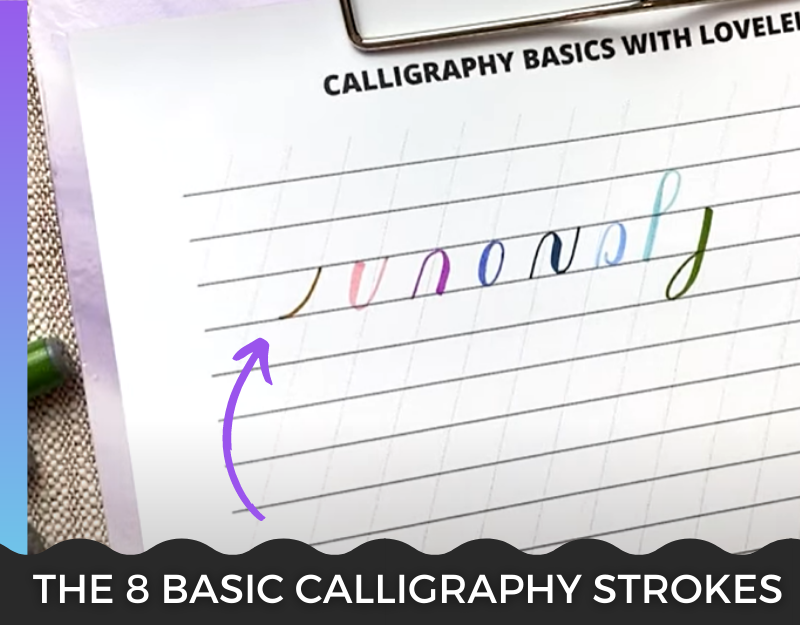
Rather than practicing letters, your lettering starts with the fundamentals, AKA the basic strokes that make up each letter.
Using the 8 basic strokes, you’re able to create every letter in the lowercase alphabet. The trick to achieving beautiful words is to build up the muscle memory on the basic strokes first.
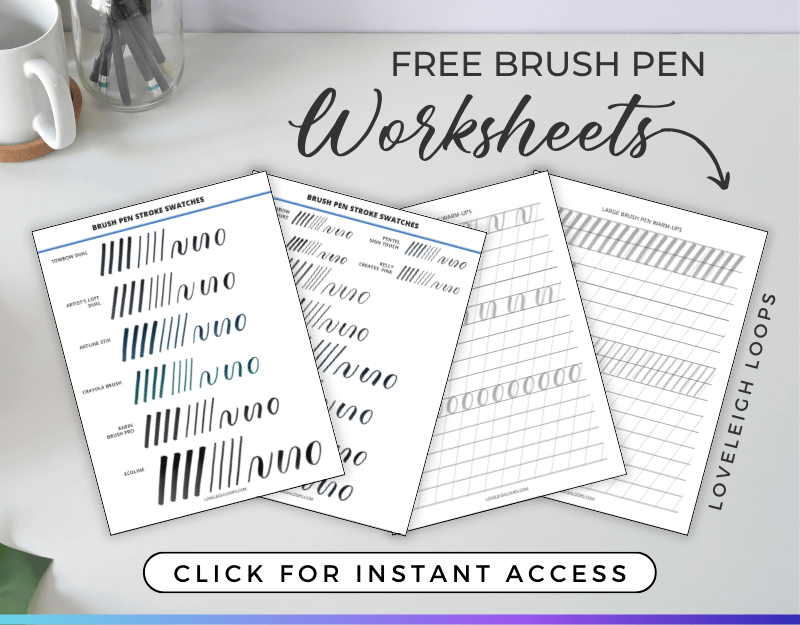
Use our brush pen worksheets to learn these. Our free practice sheets will walk you through the fundamental strokes based on the size of your brush pen’s tip:

Click for your free practice sheets.
Be sure to print these on smooth paper, otherwise you risk damaging your marker tip.
Once you have the basics down, you’re ready to practice the letters of the alphabet. As you go, routinely assess your letters critically to find any details that need improving.
Lettering Supplies
Like all markers, brush pens come in different shapes, colors and even tip sizes and materials. Some are filled with sparkling metallic ink, some are filled with blendable water-based ink; there are endless options.
Choosing your brush pens generally comes down to what style of lettering you want to try.
We’re going to walk you through the best beginner choices, but for a super deep dive, we highly recommend downloading our free supply guide:
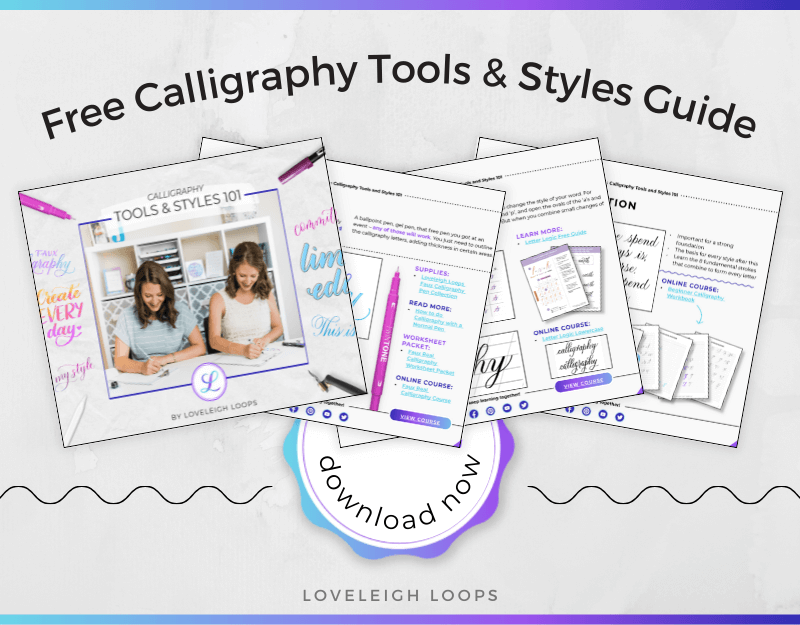
Our lettering supply guide is a mega-resource that provides an in-depth look at brushes, nibs, inks and more.
With so many different pens on the market, choosing the “right” pen can feel overwhelming.
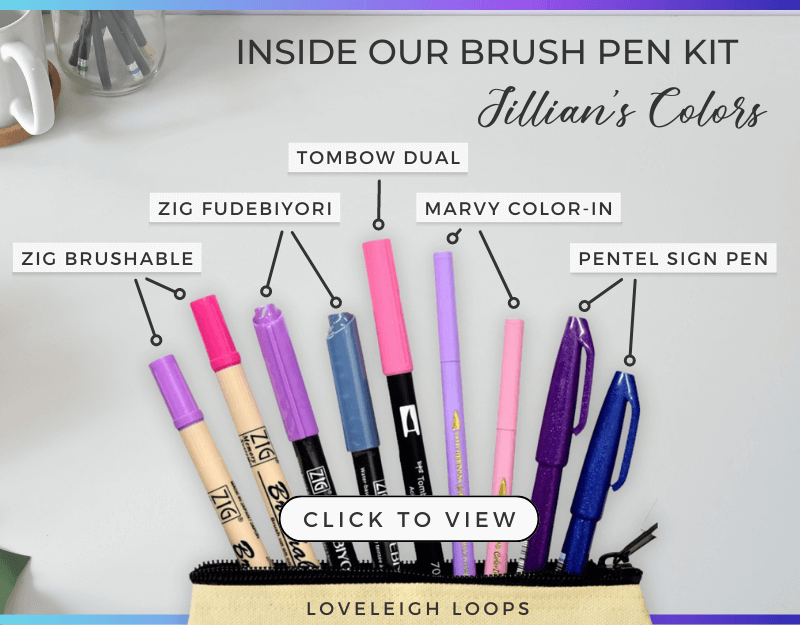
If you want to skip the research curve to get practicing immediately, then our pre-made supply kit is for you:
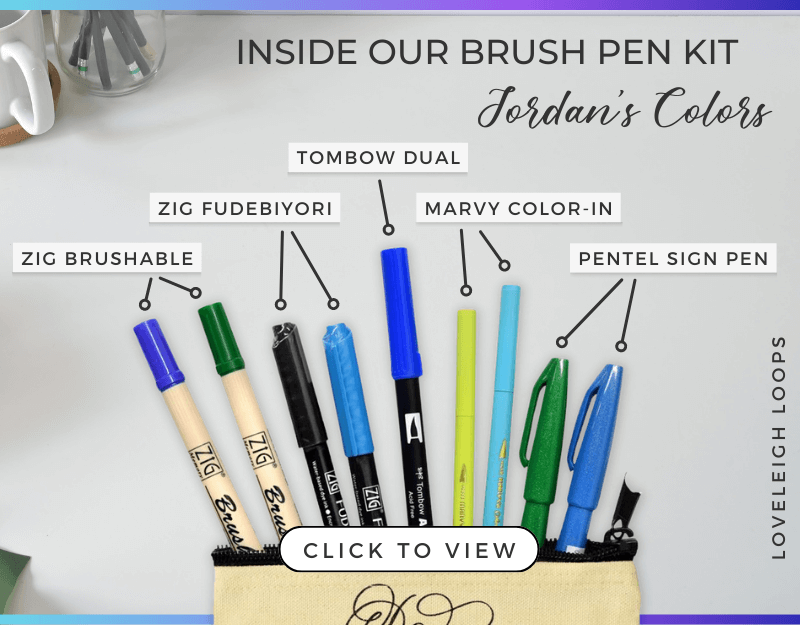
This brush pen kit contains all of the most highly recommended brush pens for beginners
You can choose blues and greens (Jordan’s collection) or pinks and purples (Jillian’s collection).
Best Brush Pens For Beginners Compared
In a minute we’ll share what we consider to be the best brush pens for calligraphy beginners, but here are some golden rules first:
For beginners, we recommend starting with a larger brush tip
A larger brush tip means increased flexibility
A bigger tip makes these brush pens a little bit harder to control, but it results in much bigger letters
Bigger letters mean that you can look at your letters as if through a magnifying glass
Mistakes are easier to spot and therefore easier to correct!
Plus, it’s a lot easier to go from writing with big brush pens to small brush pens than the other way around.
And finally, drumroll… onto the brush pens for beginner’s recommendations!
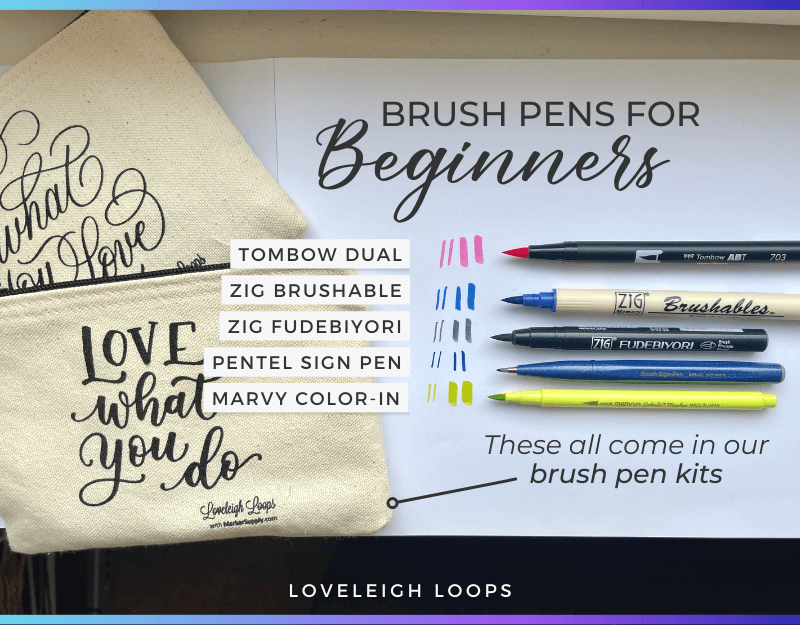
The 5 best brush pens for beginners, which all come in our brush pen kit
Tombow Dual Brush Pens
The Tombow Dual Brush Pen is a favorite brush pen among calligraphers. It’s an affordable pen that’s a good choice for beginners and professionals alike.
This Tombow is a dual brush pen, which means that each end has 2 tips that you can write from.
It has a brush tip on one end and a bullet tip on the other which makes it extremely versatile.
What makes the Tombow a favorite brush pen:
It has water-based ink
…which makes it perfect for blending
It comes in an impressive 96 different colors
Great ink flow
The dual ends offer versatility (2 pens for the price of 1)
Learn even more in our Tombow Dual video review:
Tip: the Tombow Dual Brush Pen has a reputation for fraying more easily than other brushes, so remember to use paper that’s labeled smooth.
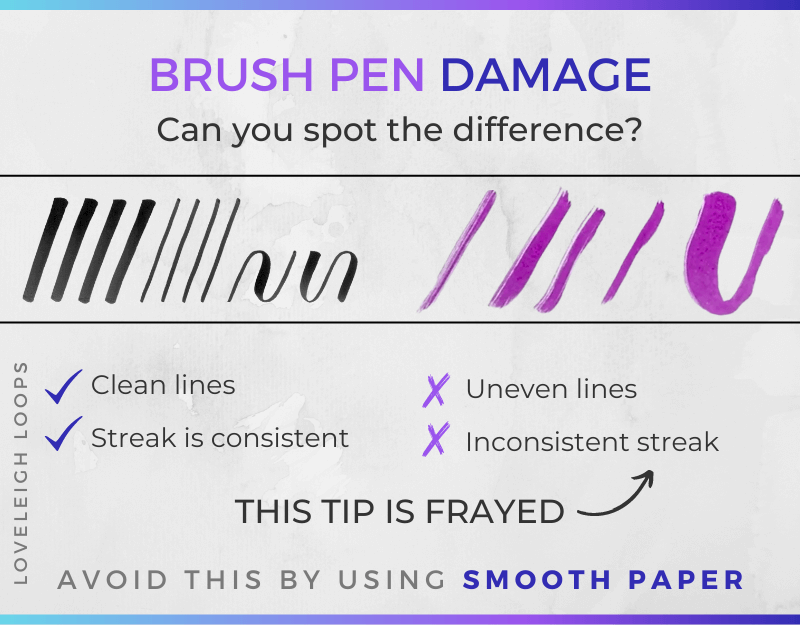
Even if paper feels smooth, it might be rough enough to ruin your brush pen tip. Look for the label “smooth.” We recommend this paper for brush pens
You may also like: How To Involve Kids In Calligraphy
Zig Brushables
Like the Tombow, the Zig Brushables brand is on the larger end, however it’s less flexible. We wouldn’t go as far as to say it’s firm, but it’s less flexible than the Tombow.
What we love about the Zig Brushables:
It uses pigment ink, which holds its color better over time
It has dual ends, featuring 2 different colors of brushes
Lots of beautiful color choices
Strong ink flow
Zig Brushables are a little bit pricier than the Tombows, but at less than $4 per pen, it’s still generally affordable.
Our video review goes even deeper:
Zig Fudebiyori
Here we have one of the cheapest brush pens on the market! The Zig Fudebiyori is a pen that’s a little smaller than the Brushables or the Tombow.
The brush tip is medium size and is less flexible when compared to the previous brush tips, which can make it easier to control if you’re heavy-handed.
What we love about the Zig Fudebiyori:
It’s a great budget option (less than $2 per marker)
Large color selection (48 options)
Great ink flow
Water-based ink, which makes it blendable
Also comes in metallic ink shades
Learn even more in our video review:
Pentel Sign Brush Pen
The smallest pen for today, the Pentel Sign Brush Pen, is a neat little brush pen capable of writing elegant letters on a smaller scale.
The Pentels come with a tip that feels firm and can create beautiful contrast between thick and thins.
Qualities to consider about the Pentel Sign:
Water-based and therefore blendable
However, the small tip makes this less ideal for blending
It comes in a variety of different colors
Smaller tip means smaller scale writing means fitting more on a piece of paper
Pro tip: the Pentel Sign comes in two varieties, a brush pen and a regular pen. Make sure you get the brush pen! Check for the words “flexible” or “fude”.
Watch the video review here:
A perfect resource for mastering your Pentel Sign Brush (or any small brush pen) is our Beginner Calligraphy Workbook.
This step-by-step workbook will help you learn brush lettering in just 15 minutes a day:
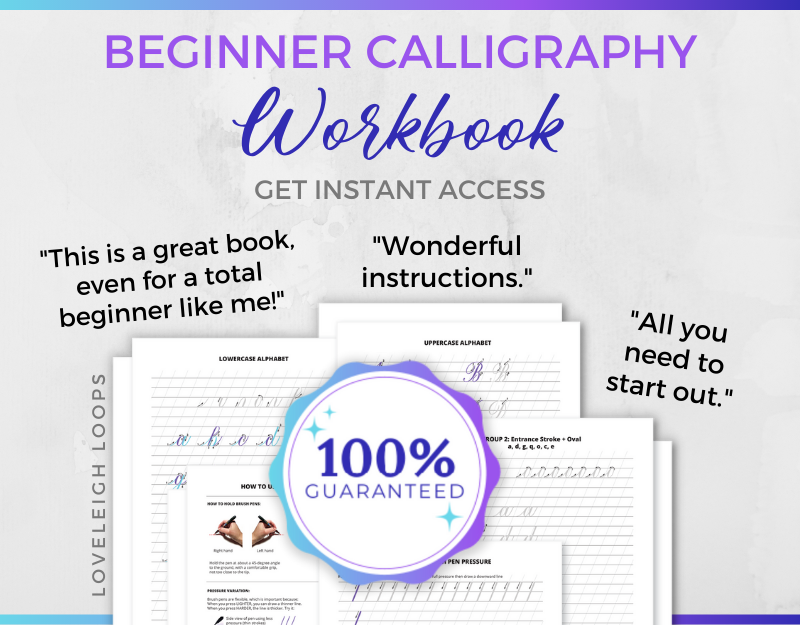
The perfect practice tool for a small brush pen
Marvy Color-In
The Marvy Color-In isn’t as well-known as say, the Tombow, but this pen will surprise you!
Compared to some of the other larger brush pens, this looks like a small brush pen, but don’t judge a pen by the size of its marker body.
When you take the cap off, you’ll notice that the tip isn’t small after all, and do a few practice strokes and you’ll be shocked at how big this marker writes.
Despite having the stature of a small pen, the Marvy Color-in packs a big punch.
Here’s what we love:
Quality ink flow
Soft and flexible tip
Blendable
Comes in 38 colors
Learn even more in our video review:
Brush Pen Characteristics
Why is one pen better than the next? What makes one pen good for beginners?? Is it just because it’s the cheapest???
Once you’re ready to move beyond the beginner pen recommendations, it’s important to know what questions to ask and which characteristics to pay attention to.
Let’s look at a few defining characteristics of brush pens so you can be sure that any pen you buy is just right for you!
Pen Tip Type
There are two main types of brush tips: felt tips and bristle tips.
A brush tip made up of bristles is practically a normal brush, whereas a brush pen with a felt tip is more like a marker.
Although it seems like an insignificant difference, each tip type creates different lines:
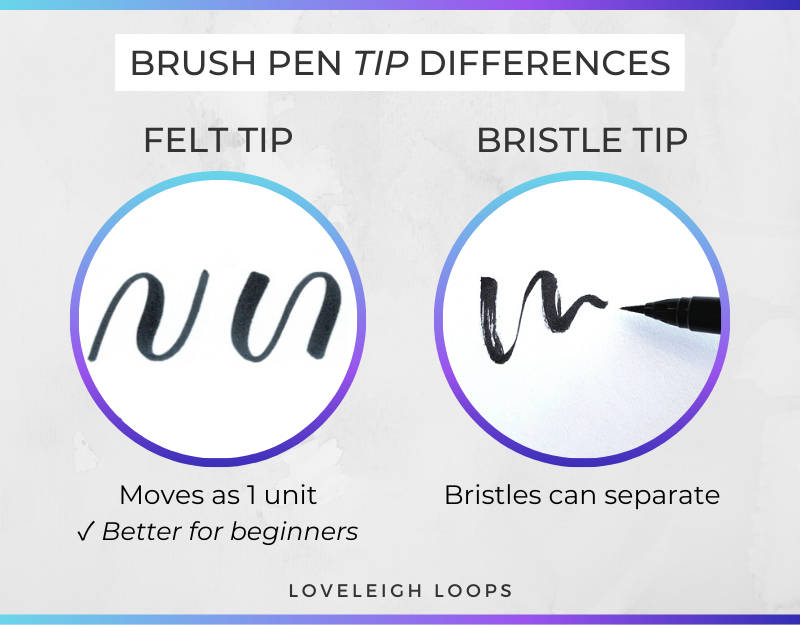
You can see the difference between the pen tips in the lines
Bristles create lines that look like they were made with an actual brush with fine hairs. This means that a bristle tip is a little bit harder to control, as the individual bristles can separate and create a frayed look.
A brush with a felt tip is one solid unit, which makes it firmer and easier to control. Felt tip brush pens are much more popularly used compared to bristle tips.
Brush tip quick reference:
Felt tip: firmer, better for beginners, more common
Bristle tip: softer, better once you have some experience, achieves a brushy look
You may also like: Modern Versus Traditional Calligraphy
Springiness (AKA Flexibility)
Springiness, or flexibility, is an indication of how flexible a brush tip is and it comes in a spectrum.
A firm brush tip requires significant pressure to create thicker lines whereas soft, fully flexible tips create thick lines with much less pressure.
Flexible brush tips require more control to create contrast between strokes and are generally more difficult to get thin strokes for beginners.
Tip flexibility quick reference:
Firm or hard tip: better for beginners
Flexible or soft tip: try once you’re more experienced controlling your pressure, or if you have a very light hand
Try pens with a variety of tip flexibility in our brush pen kit
Ink Type
Brush pens come with two different types of ink: water-based and pigment-based. While they might look similar when you write with them, they each have their different uses.
We’ve already looked at some of the creative things you can do with water-based ink. Blending colors and creating colorful backgrounds is useful, but water-based ink also has a shorter life span.
Both sunlight and time affect water-based ink, causing the colors to fade over time.
If you intend to create something with more longevity, choose pigment inks and make sure you also choose the right paper that will lock in the color over time.
Ink type quick reference:
Water-based ink: better for practice (will eventually fade)
Pigment-based ink: will maintain its color and permanence better over time
You may also like: Guide To Basic Calligraphy
Brush Size
When talking about the size of a brush pen, we’re really referring to the size of the tip. The size of the marker body (what you hold as you write) doesn’t influence the size of your writing.
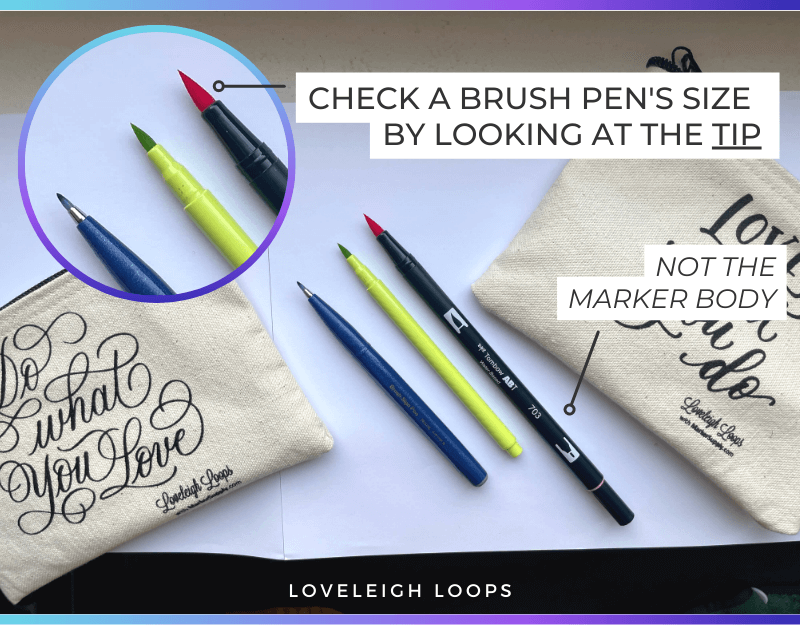
A brush pen’s size all comes down to the brush tip. Bags pictured here are from our brush pen collection
Big pen tips make big lines and therefore require paper with guidelines big enough for those big letters.
Also, keep in mind that the tips on bigger pens tend to be more flexible than those on smaller pens.
Brush pen size quick reference:
Big brush tip: more flexible, better for beginners and requires bigger guide sheets
Small brush tip: firmer and requires smaller guide sheets
Our brush pen worksheets come in different sizes for all different tip sizes.
Duality
Many brush pens are what’s known as dual brush pens and come with a tip on each end.
Sometimes the tips are of different sizes, different colors or even a combination of a brush pen and a normal pen.
You may also like: Cursive Versus Calligraphy
Overcoming Brush Pen Challenges
While brush pens are easy to use, they still come with a learning curve.
You don’t build up muscle memory in a day, but you’ll see yourself improve every time that you practice.
Over the years, we’ve helped thousands of calligraphy students learn from scratch, so we can already guess what challenges you’ll encounter as you’re learning brush calligraphy.
We’re going to walk through the common speed bumps, but if you have other questions along your learning journey, come drop them in our Facebook group!
We encourage you to join our free community of fellow budding calligraphers so you can learn together.
Learning together and seeing each other’s successes is so energizing!
Brush pens are incredibly fun to work with and many of the beginner problems look a lot more intimidating than they really are.
Let’s look at a few of the most common obstacles and how our students normally overcome them.
Pressure Control
Creating different-sized lines through pressure control is essential in all calligraphy.
Mastering pressure control has everything to do with muscle memory, which is something that you build up over time.
It’s one of the most difficult skills to learn for beginners.
Pro tip: you’ll develop muscle memory more quickly by practicing a little bit every day, versus practicing just once a week.
As you’re practicing:
Aim for consistency in thickness
Focus on smooth transitions
Check your strokes against the worksheet for accuracy
Don’t forget your free worksheets to help you develop consistency
How To Hold A Brush Pen
Although a brush pen looks like a pen and feels like a pen, you actually need to hold it differently than a normal pen to avoid damaging the tip.
There are two things that are important for using a brush pen:
Your hand position (hold your hand to the side, not underneath)
The angle between your brush pen and the paper
Applying extra pressure to get those thick lines doesn’t work when your pen is in an upright position; this results in damage to the marker tip.
It’s best to keep your pen at a roughly 45-degree angle.
See it here in action in our video tutorial:
Brush Lettering Bootcamp
Doing brush pen calligraphy is a lot of fun but learning it on your own can feel directionless.
You can DIY your learning through our tutorials and blog posts, or you can get an entire roadmap in our Brush Lettering Bootcamp online course.
In Brush Lettering Bootcamp (BLB), you can self-study your way to brush pen confidence in as little as 6 weeks:
Go from basic strokes all the way through the alphabet, symbols, blending, composition and more. Get instant access to Brush Lettering Bootcamp
Beyond the lessons, enjoy access to a digital portfolio where you can upload your work and we’ll provide feedback through the entire curriculum.
BLB students get:
Worksheets
Video lessons
Homework
Prompts
A start-to-finish system with everything you need
BLB means the end of guessing. Instead of feeling around in the dark, you’ll get a roadmap to go from beginner to producing the works of art that you’ve been admiring.
If you want to hit fast forward on the learning process and arrive at your “after” pictures sooner, get instant access to BLB right now:
Students rave about Brush Lettering Bootcamp. See what all of the hype is about!
We’ll even give you a section of the course for free so you can see if it’s right for you:
Next Steps
Brush pens are an amazing writing tool that makes calligraphy more fun, colorful and accessible.
With these recommendations on the best brush pens for beginners, free worksheets and tips, you can start learning and practicing right away!
We hope you’ll make yourself at home here at Loveleigh Loops, and use our blog and YouTube channel as your personal lettering library.
If you want to share your progress, ask questions and meet new hand lettering friends, join our Facebook group today. We can’t wait to see you in there and celebrate your success!
Become a formal student by joining any of our brush lettering, traditional calligraphy or iPad lettering online courses:
