
Bounce Lettering Beginner Tutorial and Analysis
Ever feel like your brush lettering needs a little skip in its step? Then it's time to add some bounce, friend!
Bounce lettering is a brush lettering style that presents a fun way to make your modern calligraphy more playful.
Playful doesn't mean spontaneous and unplanned, though.
There's much more to bounce lettering than simply adding dips and peaks to any letter in your writing composition.
That's actually a part of the bounce lettering charm: it looks playful and effortless on the surface, even though underneath there's a calculated (but easily replicated!) strategy.
We’ve done the analysis on why some bounce techniques look better than others and distilled it down into 3 rules, and we’re excited to share more with you in this guide.
Pause now to pin! ↓
Let's look at why that is and how you can add a little bounce to your own lettering.
In this guide, you'll learn:
What exactly bounce lettering is
What supplies you need
Our 3 rules of the bounce lettering effect
Which letters can bounce (and why others can't)
The strategy behind each bounce
Grab your pens and let's go!
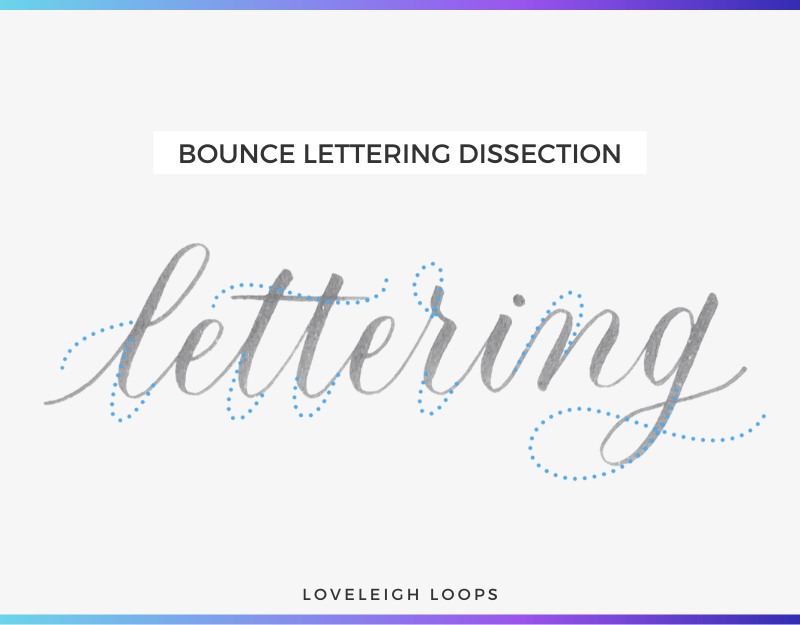
Table of Contents
What is bounce lettering?
Bounce lettering is a modern style of calligraphy and hand lettering where parts of a word extend beyond their normal form. This is achieved by some letters dipping below the baseline, and others extending beyond the normal x-height.
This gives writing a lively, fun style that can be used in any form of calligraphy and lettering. It's popularly used in bullet journals, iPad lettering and brush lettering, but even traditional tools like a pointed pen can achieve the modern bounced style.
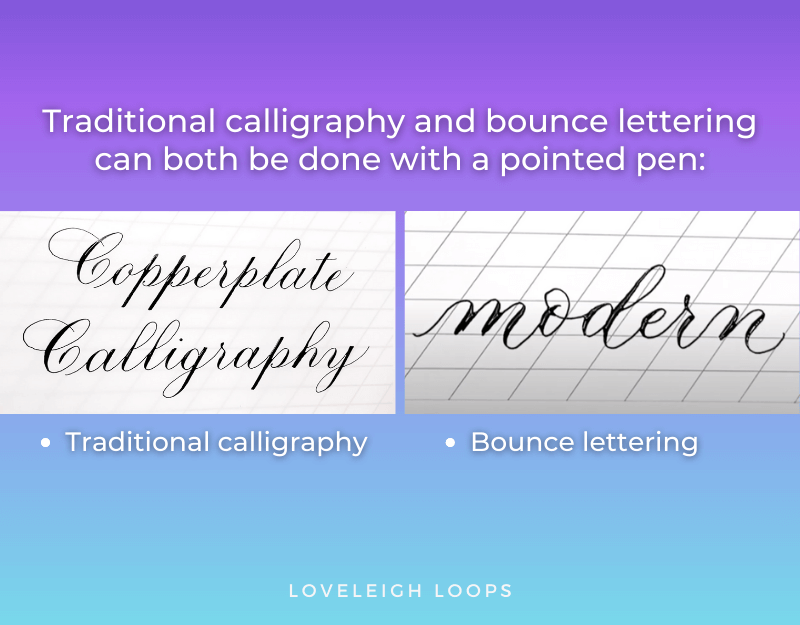
Image from our Copperplate nib guide
Bounce lettering shares the same fundamentals as traditional calligraphy, but since writers break the rules and explore their own personal style, it's classified as a modern calligraphy style.
You may also like: How To Put Together A Calligraphy Pen
Bounce Letter Dissection
Despite the free-flowing feeling of bounce lettering, there's a specific strategy behind each stylistic choice.
This bounce letter dissection shows just how much more there is to bounce lettering beneath the surface:
This is a snippet from our bounce lettering course
While it may be tempting to mimic the peaks and dips that you see in bounce lettering, you can't genuinely learn this as a new skill without understanding the basics.
Before you can turn your writing into bounce lettering, you need to first know:
How exactly is this effect achieved?
Where should the bounces be applied?
What supplies do I need?
We'll give the roadmap to make all of these decisions for your writing and not just COPY bounce lettering but master it as a new skill! But first, we have to start with the fundamentals.
You may also like: Complete Brush Lettering Beginner's Guide
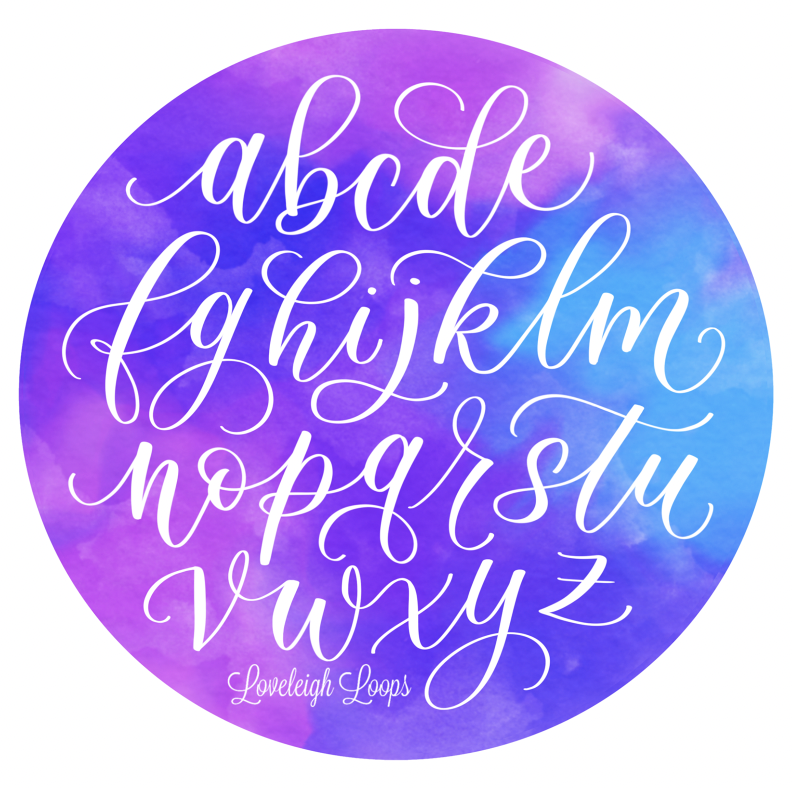
Bounce lettering alphabet
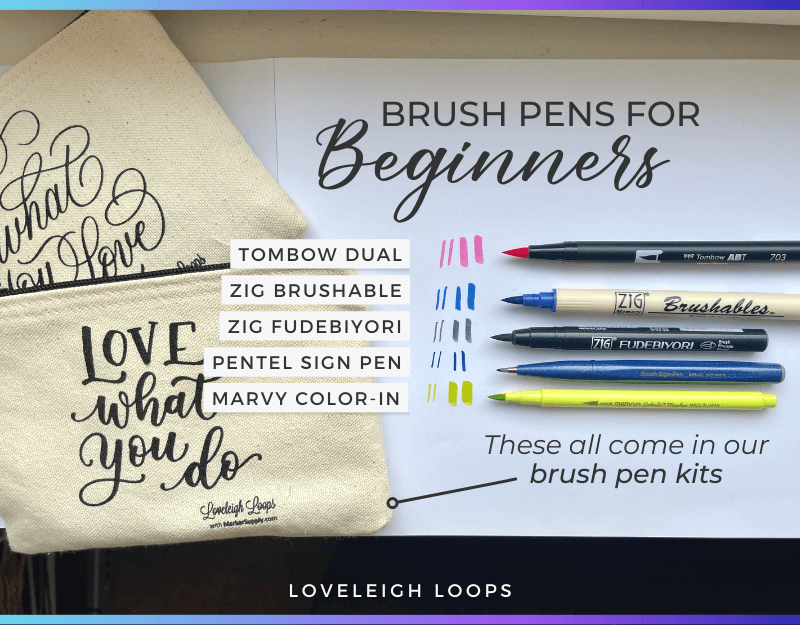
Bounce Lettering Supplies
One of our favorite things about brush lettering (in general) is that you can do it with minimal supplies, and this particular lettering style is no different.
It doesn't take much in terms of paper or writing utensils to give your hand lettering a little spring in its step.
There are three things that are essential for practicing bounce lettering:
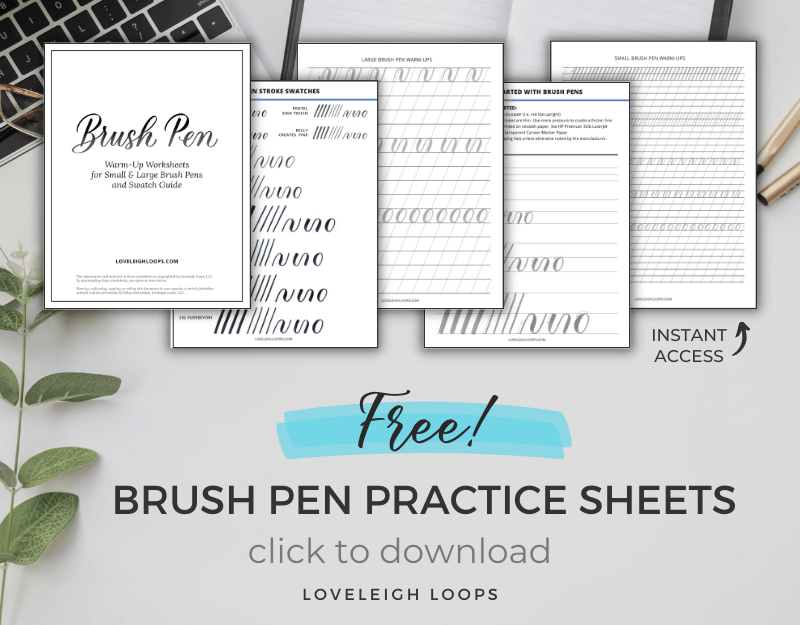
Tracing paper to practice on. We recommend Canson Marker Paper.
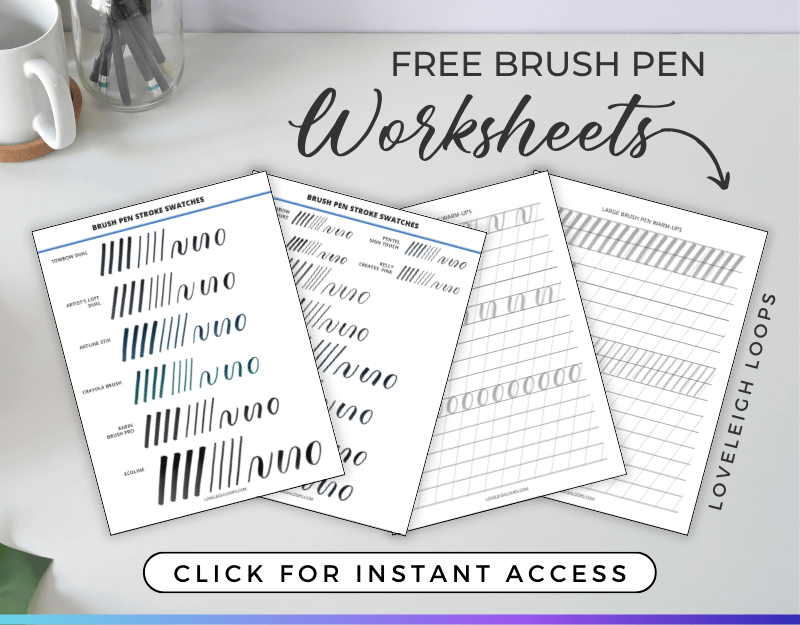
A practice sheet with guidelines. Since you won't actually be writing directly on this paper, any paper will do. You can use our free worksheets.
A brush pen. We think the Tombow Dual Brush Pen is a great option, but any marker with a flexible tip will do. Even a Crayola marker!
See a Crayola marker in action in our easy calligraphy tutorial.
Although we discuss bounce lettering as a style for brush pen calligraphy, it can also be applied to pointed pen and even faux calligraphy. In that case, any pen or even a pencil will do!
You may also like: How To Do Calligraphy With A Pencil
Brush Lettering And The Bounce
Despite being thrown in with modern calligraphy, brush pen calligraphy is actually firmly rooted in the same rules that govern traditional calligraphy, namely the basic calligraphy strokes:
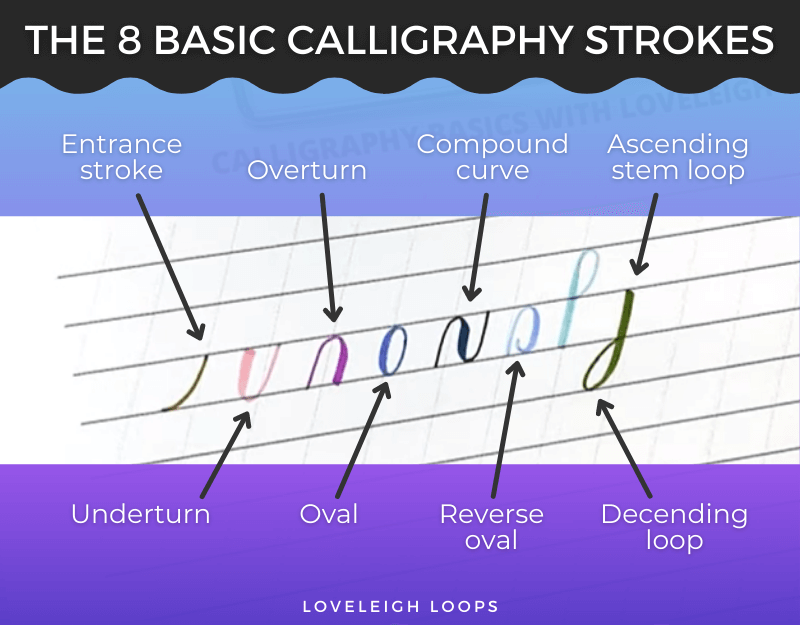
The 8 basic calligraphy strokes. Don't be intimidated if terms like "ascending stem loop" or "overturn" are new to you, they'll become second nature with time!
You may also like: Basic Calligraphy Beginner's Guide
Brush Pen Calligraphy
Like traditional scripts, brush pen calligraphy uses the basic strokes to create letters.
These letters follow a specific form, and also stick to the traditional x-height (how tall letters are). In traditional calligraphy, the x-height is the same for almost every letter:
The lowercase letters rest between the baseline and the headerline.
Only ascending stem loops go in the area between the header line and the ascender line.
The area between the baseline and descender line is home to descending loops and nothing else.
These terms are referring to the lines of a guide sheet, and if these terms are new to you, don't worry - we'll give you a cheat sheet in one minute.
Consistency is the most important goal when practicing calligraphy.
You may also like: 20+ Free Calligraphy Practice Sheets
A calligrapher tries to keep their lettering straight and often spends hours building up the required muscle memory.
Brush lettering is colorful and creative, and with all calligraphy, there's an overarching sense of neatness and order.
This gets shaken up when we add the bounce effect.
You may also like: Different Types Of Calligraphy
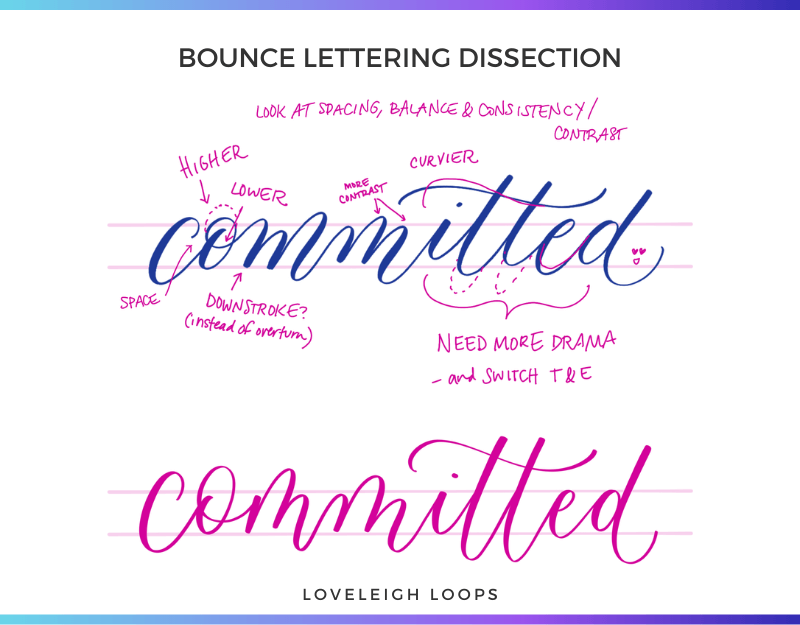
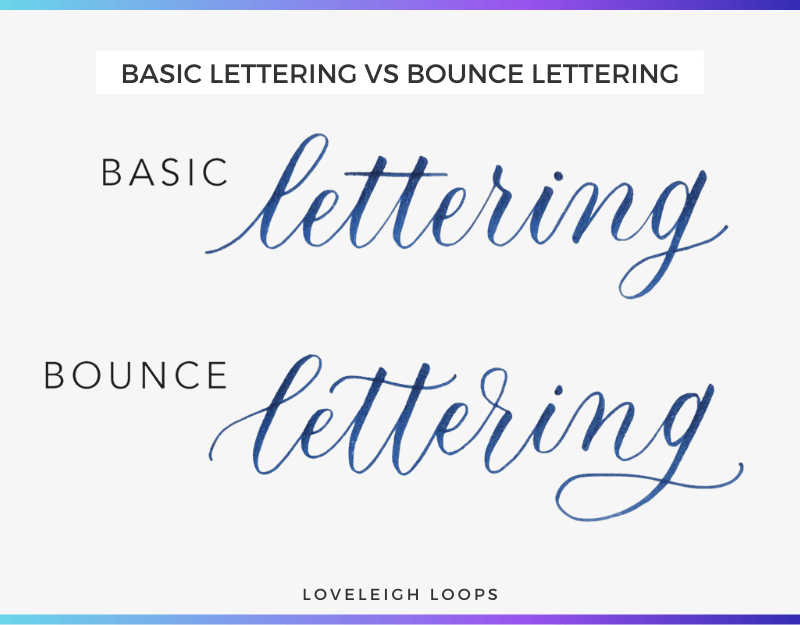
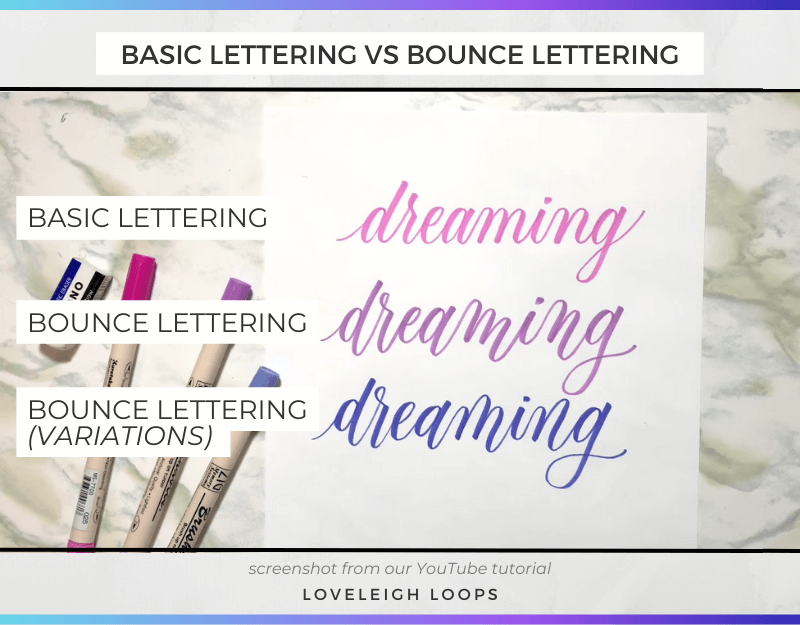
The Bounce Lettering Effect
With the bounce lettering effect, letters become a little more fun!
While most letters sit neatly on the baseline, certain letters in each word get to break the rules.
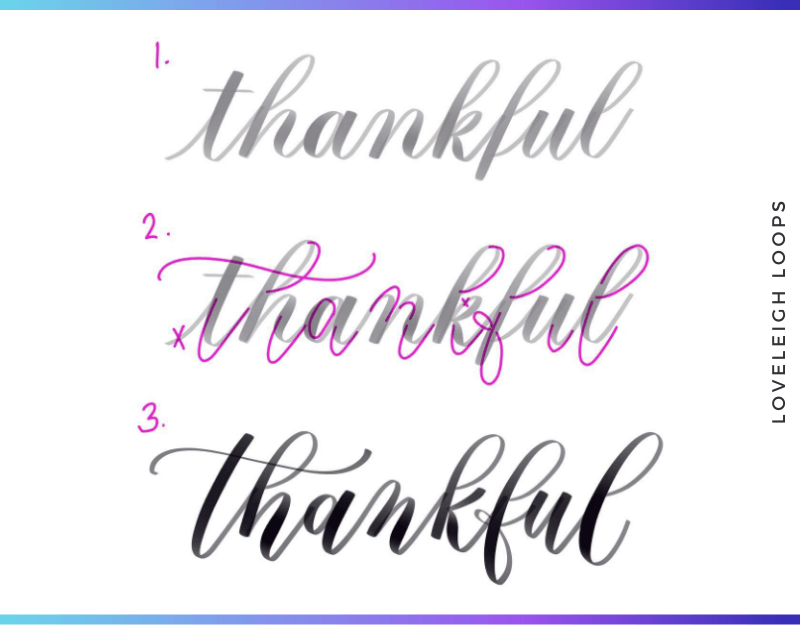
The word “thankful” transformed from basic to bounce
When compared to normal lettering, we see parts of letters sticking out and moving into places that are normally off-limits.
Yet, there are also strokes that observe the basic rules by staying neatly on the baseline.
This isn't random, which is actually a good thing for your writing! We’ve come up with rules for bounce lettering that make the style easier to implement in your own writing.
Let's take a closer look at what's happening within each word as the letters bounce across the page!
For real-time examples, watch out bounce lettering tutorial:
What Happens When Letters Bounce?
In order to answer this question, we need to grab a practice sheet.
Don't have one yet? Then get your free practice sheet here.
Most practice sheets come with guidelines and look surprisingly similar to the ones you used when you were learning how to write in grade school.
Let's quickly go over the different lines on the worksheet, this way we can see exactly where bounce letters break the rules.
On your guidesheet, you'll see the following lines:
Baseline: By making all letters rest on this line, you keep your letters straight.
Headerline: This line indicates the height, also called x-height, of letters and once again ensures you keep your letters uniform.
Ascender line: Used to indicate the height of any vertical lines in letters such as k or b. This line shows up as a dashed line on some lettering worksheets.
Descender line: Indicates how far the vertical lines, for example in j,g,y, go below the baseline.
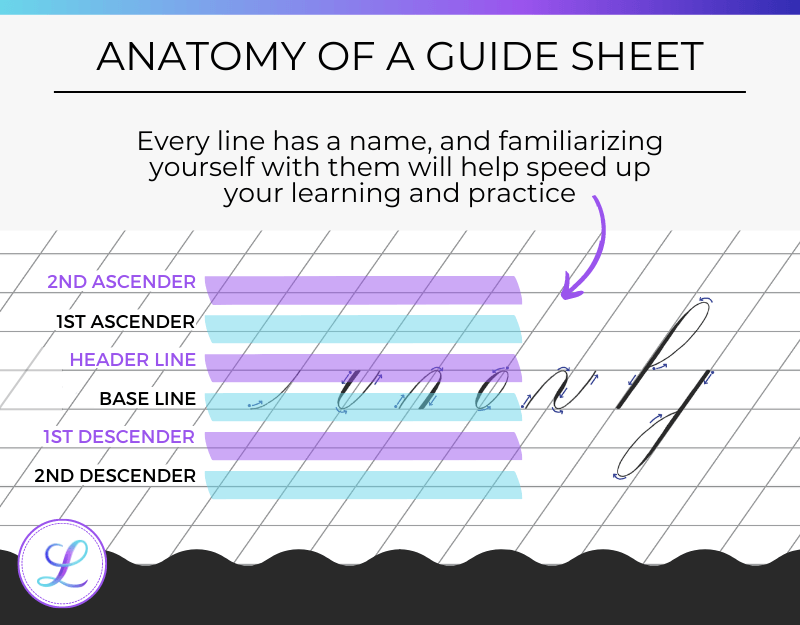
Our guide sheets come with the lines named, so you'll have a cheat sheet with you as you practice!
Breaking The Rules
In bounce lettering, letters primarily break the rules when it comes to the x-height.
Quick reminder: x-height refers to how far away from the baseline letters move.
Instead of staying between the baseline and header line, letters bounce by reaching above or below these guidelines.
Let's take a closer look at what specifically breaks the rules in this example:

Is each whole letter bouncing? Not quite.
A critical look reveals that it's actually NEVER the whole letter that bounces.
Instead, it's only individual strokes within a letter that break the rules.
If you're familiar with the fundamental strokes of calligraphy, you'll see that there are two strokes that lend themselves well to bouncing:
Letters that dip below the baseline when they end in an underturn.
A letter sometimes peaks above the header line when it ends in a compound curve.
This doesn't mean that all letters with underturns or compound curves bounce equally well.
In our example, the lowercase letter m bounces in multiple places whereas the next letter i has just one piece.
Quick recap: We've covered a lot so far!
Basic calligraphy strokes
Name of each line on a guidesheet
Fundamental understanding that strokes bounce, not entire letters
Time to get down to the level of individual bounce letter dissection.
Then we'll see when letters bounce so you can add bounce lettering in an effective way instead of overwhelming your composition.
You may also like: How To Use Brush Pens

How To Create Bounce Lettering (Our 3 Rules)
Although all letters are created equal, it's a fact that some letters bounce beautifully while others simply can't.
We've already seen that letters with a compound curve or an underturn can bounce, but there's more to add to that list.
To get a basic understanding of bounce lettering, we’ve developed 3 rules to keep in mind.
1. Lowercase letters only bounce when they consist of more than one basic stroke
Here we have the reason why letters like a or m look great with bounce yet the letter i does not.
The letter a consists of an oval and an underturn; in this case, the oval stays the same while the underturn extends downward past the baseline.
On the other hand, the letter i basically consists of an underturn and nothing else.
With this principle in mind, we can immediately separate letters that bounce well from letters that don't.

Here we have two sets of letters. The ones in purple are examples of normal letter formation and the letters in pink are bounce letters.
Looking at this example, we can see that there's no real point to bouncing the letter i, at least not when it’s on its own. It's hard to tell the difference between a normal letter i and a bounce letter i without the context of additional strokes.
And if the style isn't clear or your words aren't readable, then adding this style can work against your composition.
You may also like: Lettering Composition And Layout Secrets
This leads us to the second rule we’ve developed.
2. A letter bounces best when it touches a guideline more than once
Whether it's the baseline or headerline, a letter needs to have multiple points of contact.
Looking at the letters that bounce, they all share a common feature:

The letter m is a perfect example of this.
Ignoring the exit stroke, the letter m touches both the baseline and the header line 3 times. Compare this to the letter t which only touches each of the guidelines once.
When you add bounce to these four letters, it looks like you're bouncing the entire letter, rather than parts of them.
This is the second reason why bouncing the letter i doesn't work. A letter needs to contain multiple strokes so you can bounce one of them. Or rather, so that you can leave at least one stroke normal.
Quick recap: The best individual letters to bounce contain multiple strokes that cross guidelines on multiple points.
Lots of letters bounce... but does this mean that the other letters are useless?
Not quite!

Here's an example of bounce lettering on the cover of our book, Lettering for Planners
You may also like: Calligraphy And Hand Lettering Books
3. You need BOTH types of letters to create bounce lettering
In order for your bounce lettering to be successful, the words need contrast. Meaning, you also need strokes that DON'T bounce!
That’s right, we’re saying that you should purposely not bounce certain strokes to get bounce lettering. How does that work?
Well, if every letter bounces, it can looks like messy writing and isn't identifiable as the bounce lettering style anymore.
The letters that don't bounce act like anchor points within a word. They form the visual line that you can then bounce off of.
This mixture of letters is what makes the bounce lettering style work! You’ll start to see this better when you practice longer words and especially longer quotes.
You may also like: Different Types Of Calligraphy Pens

How To Practice Bounce Lettering
Although this style of brush lettering appears casual and playful, bounce lettering is less random than it may appear at first sight.
At Loveleigh Loops we firmly believe that anyone can do bounce lettering if they understand the 3 principles that we created above (and they practice!). Here's how to start.
1. Start With The Fundamental Strokes
If you want to add bounce to your hand lettering, then the first step is to get the basics down.
Bounce lettering is rooted in the fundamentals of calligraphy and it's important to have a good hold on them before you start experimenting.
When you're learning bounce lettering (or any lettering style variation), it's important to learn what the rules are before you start to break them.
Download one of our lettering practice sheets and start building up muscle memory as you practice your strokes, letters and words.
You may also like: How To Find Your Lettering Style
2. Practice LETTERS Before Practicing Words
Once you're comfortable with the basics, move on to practicing letters before you practice words.
Try to get all of your letters as even as possible while making sure the main body of your letters stays neatly between the baseline and header line.
Your goal at this step is to create that visual baseline that's essential for bounce lettering.
Building up muscle memory is a slow process so be prepared to practice!
You may also like: 7 Calligraphy Practice Prompts
3. Add Bounce To Your Practice Words
After a few rounds of practice, you can start experimenting with adding bounce.
To get the best results, start by writing down a practice word and looking for places where you can add bounce. Eventually, you can work up to longer quotes and phrases, which is where bounce lettering can really start to shine.
There's no real one-bounce-fits-all approach as there are plenty of variations for each bounceable letter!

Always critically analyze your own work. If you feel like your bounce lettering looks off, look for reasons why and adjust.
Bounce lettering is a fun style of brush lettering and it won't be long before you're bouncing with the best of them.
Pro tip: We believe that when you're looking to improve your lettering and calligraphy, it's best to use a larger brush pen so you write bigger letters. This way, mistakes are easy to spot and correct.
A great option is the Zig Brushables.
The Zig Brushables have a second brush tip on the other end!
You may also like: How To Do Ribbon Brush Lettering
Online Course
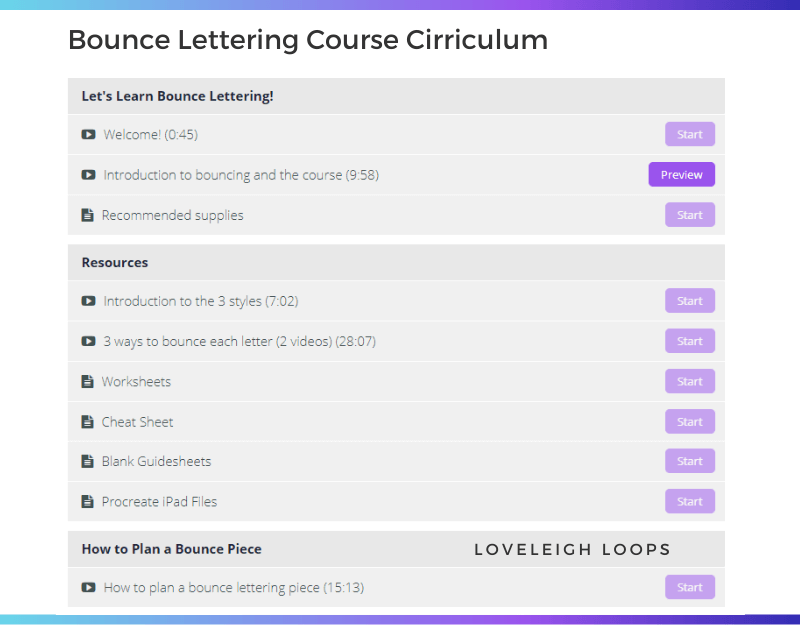
There's so much to say about bounce lettering, and believe us when we say that you're only just getting started!
If you want to learn and master bounce lettering as quickly as possible, we recommend enrolling in our online course: Complete Guide to Bounce Lettering.
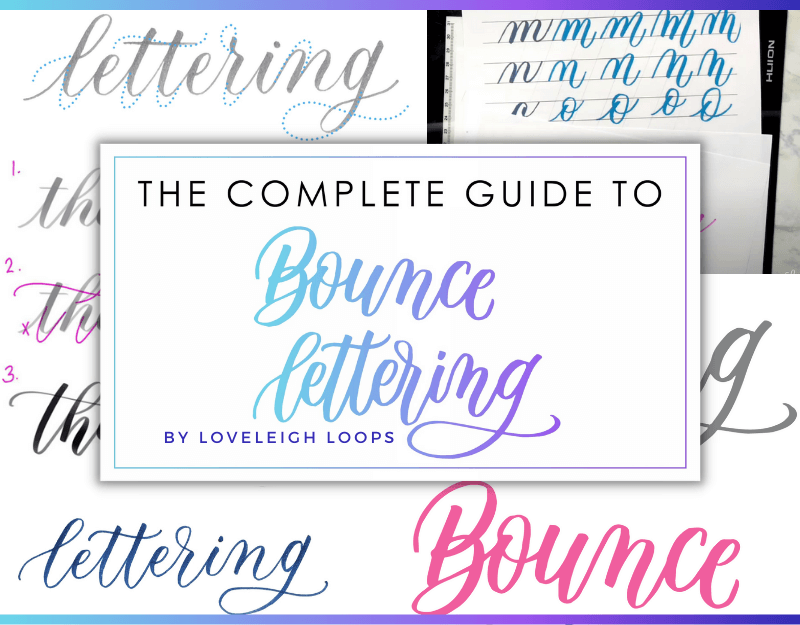
We've put together a collection of tons of examples, quick exercises and practice sheets that will help you add this new skill to your brush lettering repertoire as quickly and effectively as possible.
With our bounce lettering course, you get instant access to:
3 different styles of bounce for every letter
Lessons on how to create balance in your bounce letters
Traceable worksheets full of practice words
A bonus cheat sheet workbook full of different lettering ideas and alphabet iterations
You can read course testimonials here.
Learning lettering is technical, and by getting an entire roadmap with real-time examples, practice prompts and lettering workbooks, you make your practice more effective AND fun.
But we know that not everyone can make an investment in their calligraphy and hand lettering, so we also have tons of free resources to help you practice your bounce lettering:
Everything from deep-dive tutorials to quick exercises on our YouTube channel
Free practice sheets available for instant download
Written guides and tutorials on our blog
Final Thoughts
Bounce lettering is a sometimes misunderstood style of brush lettering that looks playful yet arbitrary to the beginner.
From the ascender line to the descender line, from the x-height to the different strokes... bounce lettering is more involved than it looks! But use this blog post as a guide and you'll be able to create beautiful bouncing words in no time.
All that's left is for you to give it a try.
We've shown you the door, all you have to do is bounce through it.
Focus on practice, muscle memory and having fun. That's the whole point of hand lettering!
And by having fun you'll achieve the best results for your writing, whether you're enhancing your bullet journal, your brush lettering or working on your iPad lettering.
As always,
Happy lettering, and we're here to help you in any way!
-Jillian and Jordan
