
How To Choose The Best Calligraphy Nibs [Guide]
Finding the best calligraphy nib is an important part of getting started with pointed pen calligraphy. However, the huge variety of calligraphy nibs on offer can make it feel like an impossible task!
When you’re a beginner, just knowing what to look for is a challenge. Not to mention that most calligraphy nibs are roughly the same price and it’s hard to understand the differences between them. We totally get it.
And we’re going to get you completely up to speed right now *snaps fingers*
Today let’s talk about everything related to calligraphy nibs: what makes them different from on another and how to choose one that’s right for you.
Let’s dive in!
P.s. Don’t forget to pin it so you can find it later ↓
Best Calligraphy Nibs For Beginners
A calligraphy nib is the pointed, detachable end of a pointed pen (also called a dip pen). This type of calligraphy pen is a very traditional utensil, and is used for the pointed pen or Copperplate styles (terms are used interchangeably).
The metal pen nib originated in Europe in the 19th century, replacing quills, which had been standard until that point. (source)
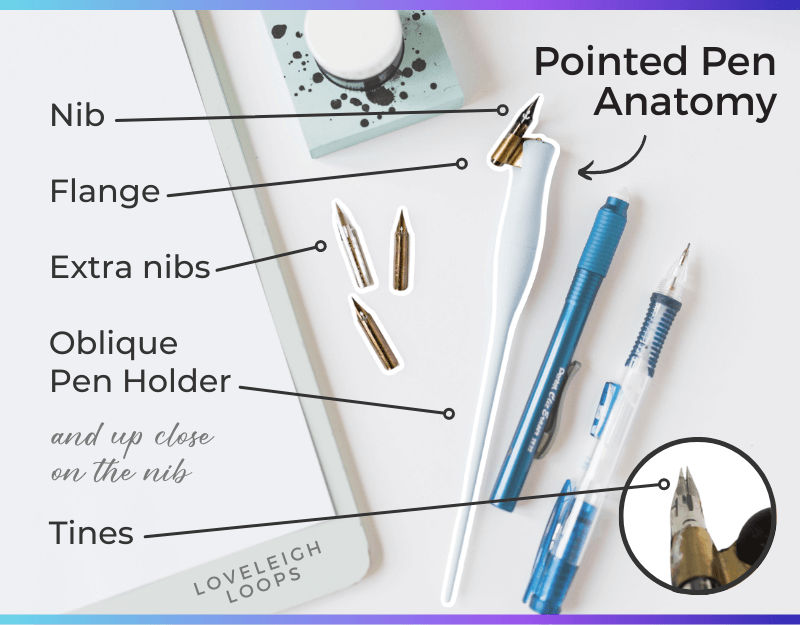
The anatomy of a pointed pen includes tines, the nib, the flange and the oblique pen holder. Need help putting your pen together? Use our guide: how to put together a pointed pen
Nowadays, there are hundreds of different pen nibs on the market. But before we get into which one to pick up first, there’s one important thing for you to know:
When it comes to choosing your nib, there’s no real “bad” choice.
You’re simply looking for the nib that fits your personal style and preference, which depends on how you want your script to look.
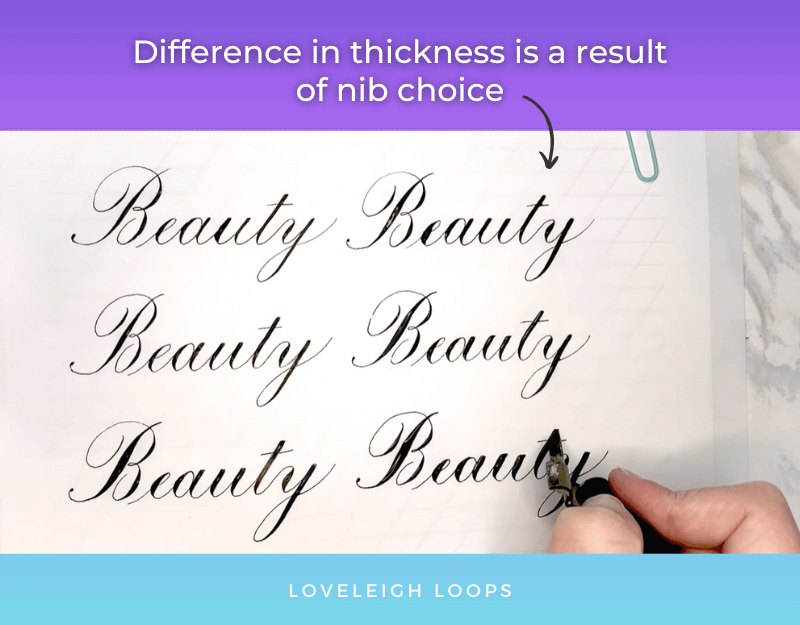
These stylistic differences are a result of nib choice
So if you’re feeling discouraged by the sheer number of options (or if you’ve ALREADY bought a nib and don’t know how good it is), rest assured that you can get started learning with any nib.
They’re all capable, but that doesn't mean that they’re all equally ideal for beginners.
In order to understand the difference between the various nibs on the market, there are two characteristics that we need to talk about.
Prefer to watch instead? Watch out best calligraphy nibs tutorial on YouTube:
Flexibility
When you first start playing around with different pointed pens, you’ll quickly feel that some pens seem easier to use than others.
Although some pens might feel more comfortable than others, it’s primarily a result of how heavy-handed you are.
Not all people have the same touch and some write with a heavier hand.
It doesn’t matter whether you’re light or heavy-handed (one isn’t better or worse than the other) but it will ultimately influence your choice of calligraphy nib.
The amount of pressure you put on the pen determines the thickness of your strokes and will ultimately determine your final results.
Applying more pressure will result in thicker strokes and result in a stronger contrast between thick and thin.
One side effect of creating thicker strokes is that you’ll use more ink. With a flexible nib, you will probably have to dip it after every few strokes.
The thicker the strokes, the more ink that gets used
On the other hand, using a nib that’s a little bit firmer allows you to write complete words without additional dipping.
Someone with a heavier touch will find that there is more of a contrast between their thick and thin strokes and that it’s more difficult to get the extra fine lines.
By paying attention to the flexibility of your nib, you can either make up for your heavy-handedness or embrace it.
You may notice that modern calligraphy often has thicker downstrokes than traditional calligraphy. It all comes down to what you want your calligraphy to look like!
You may also like: Copperplate Uppercase Alphabet Guide
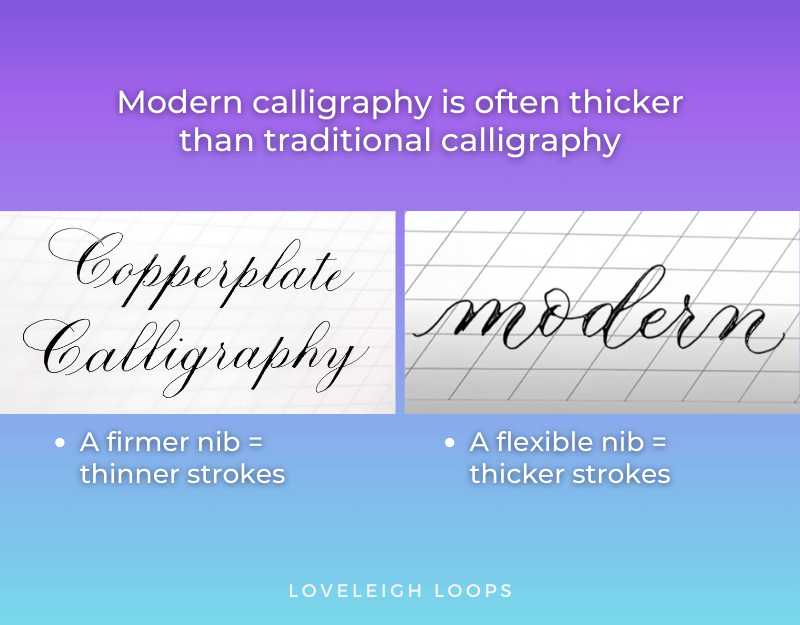
Which style do you prefer, thicker strokes or thinner strokes? On top of thicker strokes, the word “modern“ is also written using the bounce lettering style
Calligraphy nib flexibility cheat sheet:
A flexible pen nib = thicker strokes
A firmer pen nib = thinner strokes
You may also like: The 8 Fundamental Calligraphy Strokes
Onto the other important calligraphy nib characteristic to pay attention to: the sharpness of the nib.

See how the tines open to create a thicker line?
Sharpness
We just saw how a flexible nib is more responsive to differences in pressure and how that makes it easier to create thick lines. On the other side is nib sharpness, which plays a big role in creating thin lines.
For thin lines, the rule of thumb is very simple: sharper nibs produce thinner hairlines.
With a sharp nib, there’s simply a smaller surface that’s in contact with the paper.
With an understanding of the two primary characteristics of calligraphy pen nibs, it’s time to talk about choosing one for yourself.
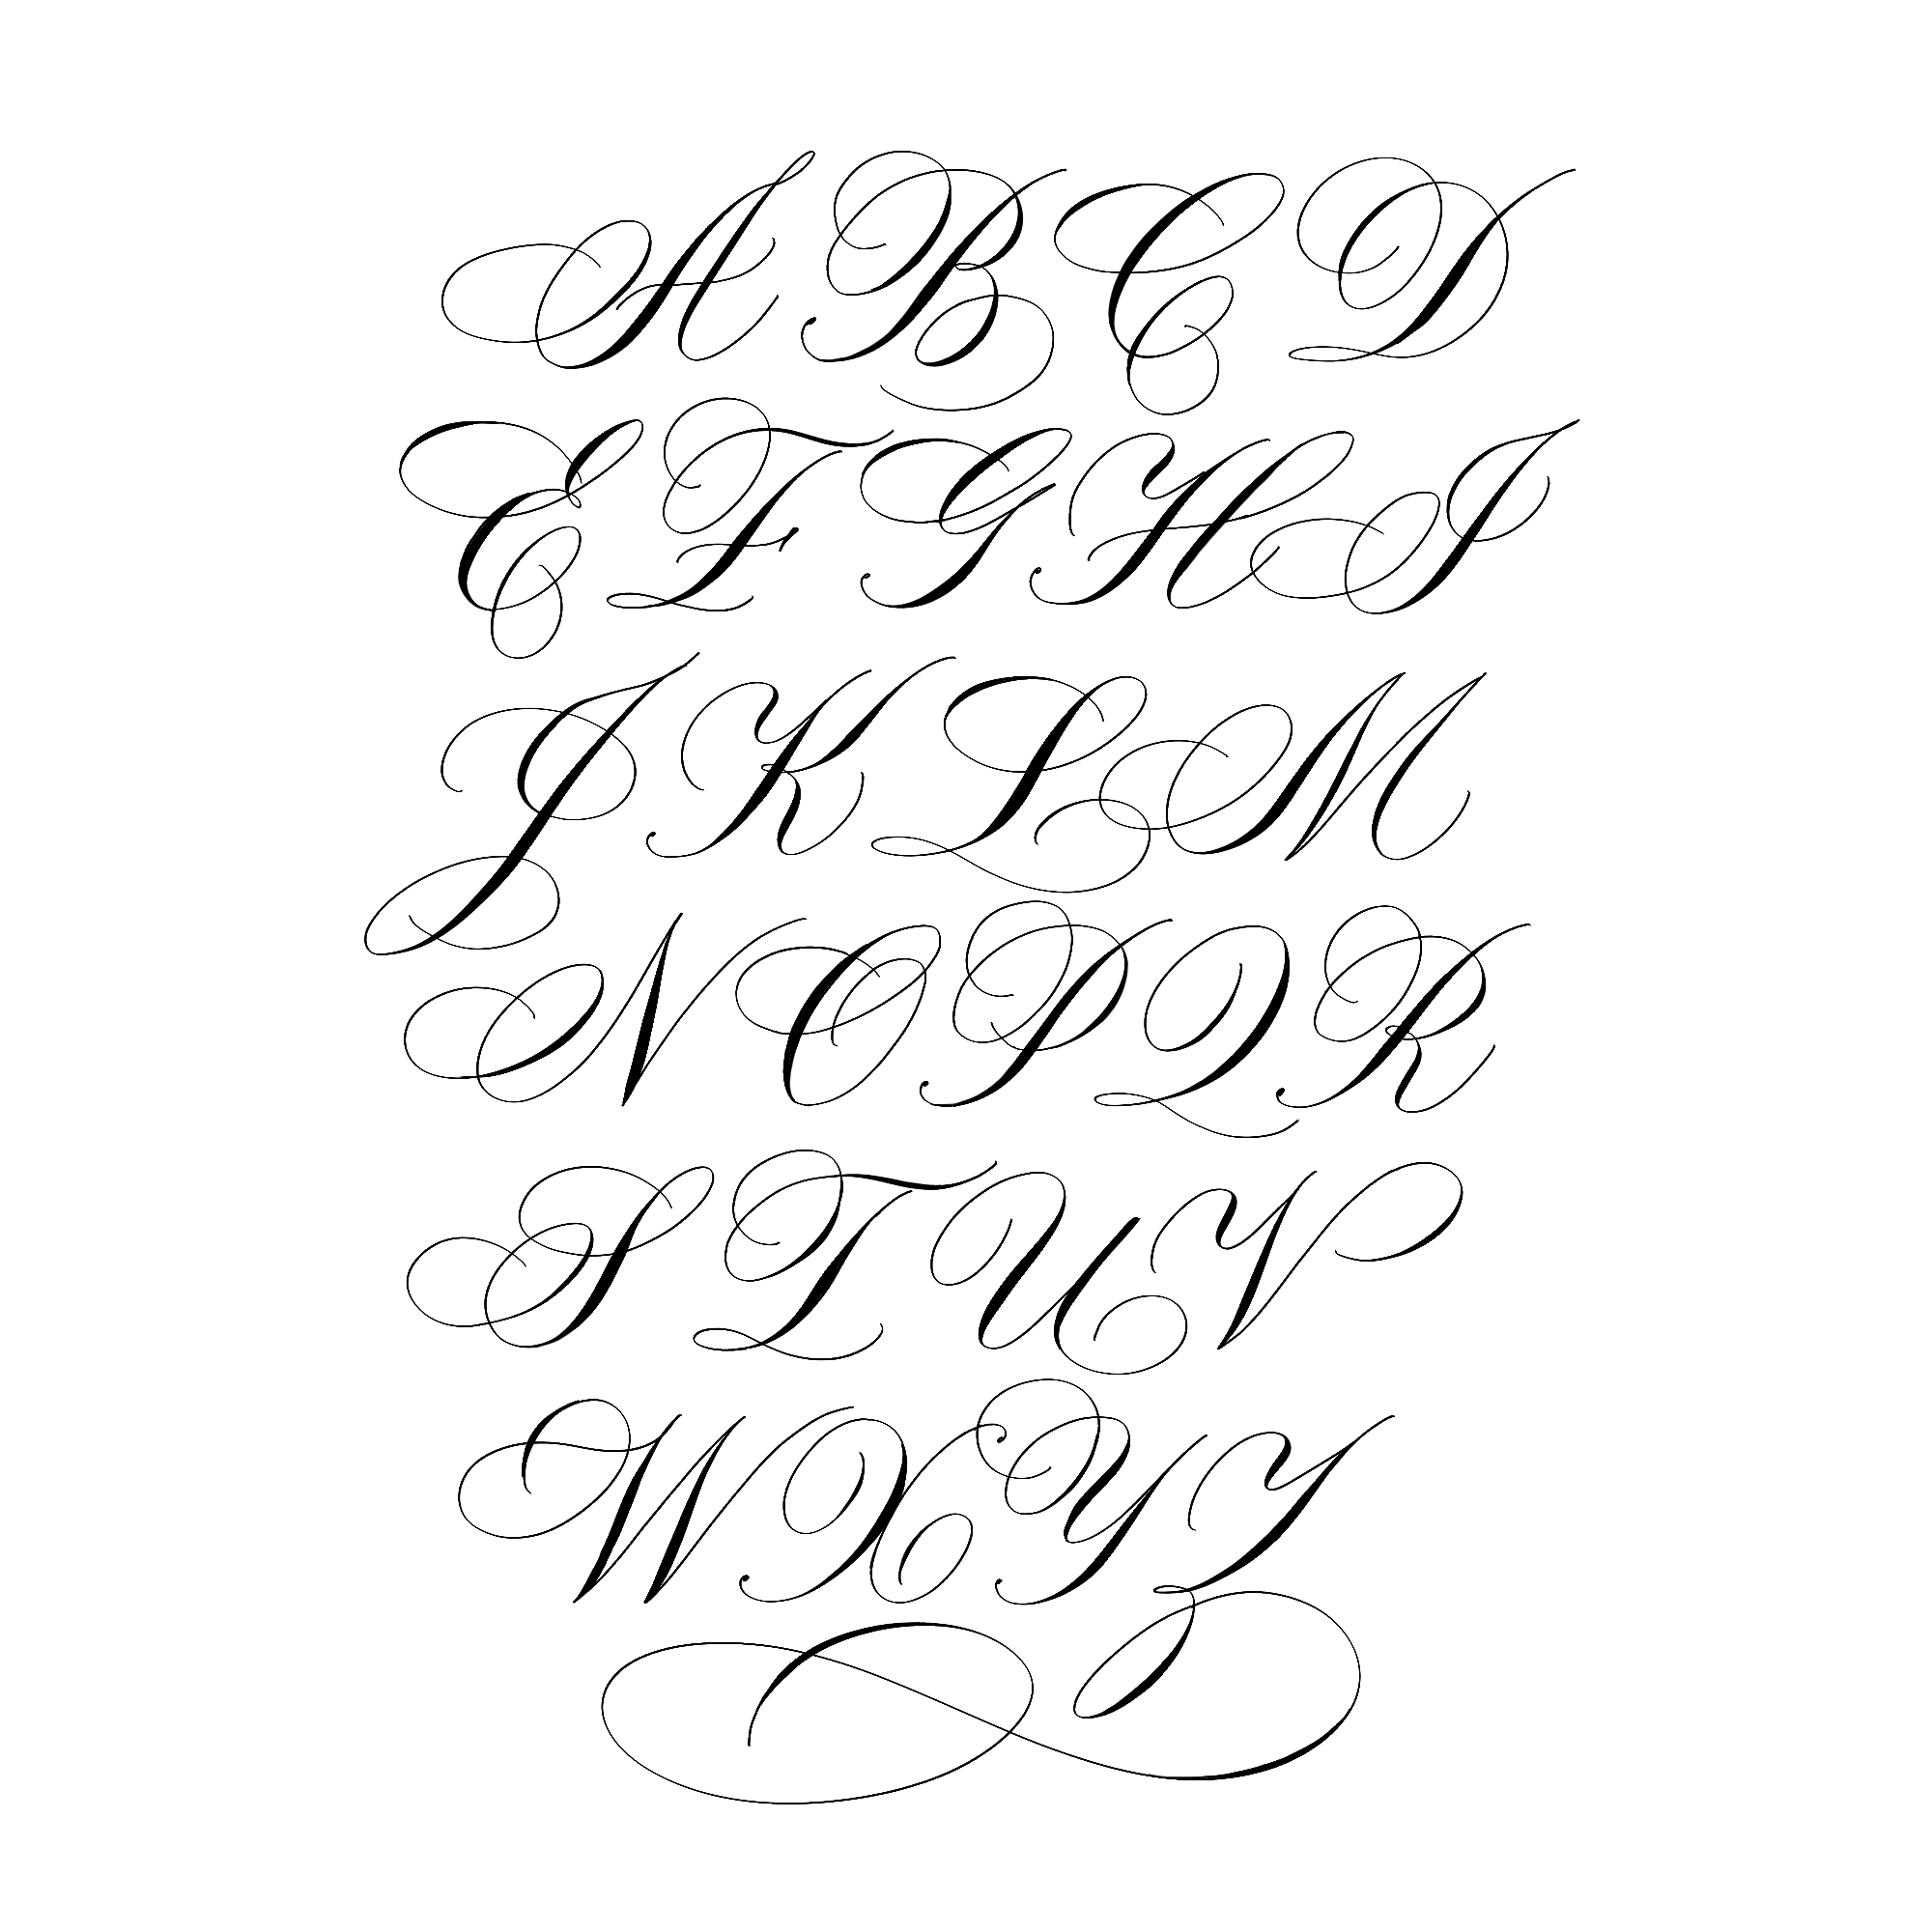
Example of the Copperplate script written with flourishes
You may also like: How To Practice Copperplate Calligraphy
Best Nib For Beginners
Let’s finally cut to the chase, right?? We will always be unapologetically thorough, but we know that this is your #1 burning question!
What are the best calligraphy nibs for beginners? While there truly is no right answer to this question, there are few nibs that are so approachable that they belong in the beginners’ hall of fame. But first…
It’s important to know: Getting started with pointed pen calligraphy comes with a learning curve. No nib choice can give you instant control or confidence.
Unlike a pencil, normal pen, or brush pen, part of the pointed pen nib (the tines) opens and closes to create contrasting strokes. It takes time to get comfortable writing this way.
Before you buy a nib, download our pointed pen practice sheets so that you can practice in a structured way and avoid frustration:
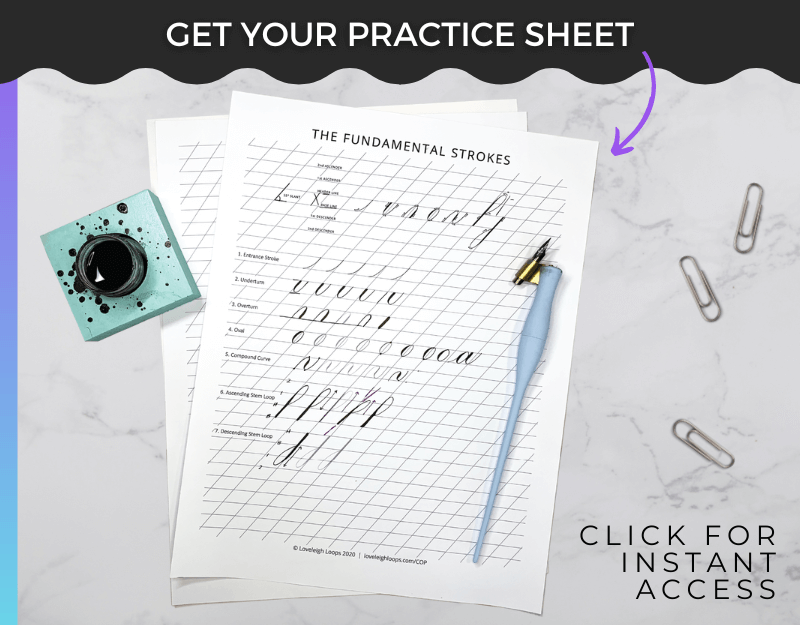
Instant download of our pointed pen practice sheet
Print your practice sheets on paper that’s labeled “smooth” in order to get your best results and avoid frustration.
Rough paper will wreak havoc on your calligraphy nibs, and can cause:
bleeding ink
skipping strokes
shreds of paper to get stuck in your tines
Your choice of paper matters a lot in calligraphy, and it’s especially true for pointed pen calligraphy.
You may also like: 20+ Free Calligraphy Printables
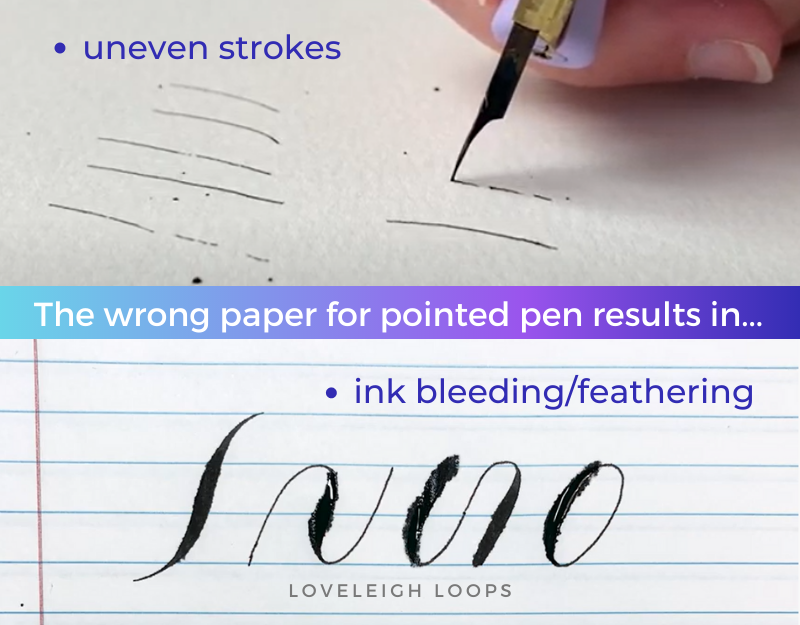
We recommend using HP Premium 32lb Paper
Choosing a nib that’s very flexible will make it easier to create thick lines. However, learning control of the pen is more difficult as even the smallest increase in pressure results in thick strokes.
Likewise, a sharper pen can make beautiful thin strokes yet is more difficult to master. The increased sharpness makes it more difficult to glide over the paper.
For beginners, we recommend picking a nib that’s neither overly sharp nor overly flexible.
While you can definitely start with razor-sharp or super flexible nibs, be aware that they come with a seriously steep learning curve!
You may also like: Most Popular Supplies for Traditional Calligraphy
Popular Nibs For Beginners
Sadly, art stores generally don’t display their nibs in order of sharpness or flexibility which can make it hard for beginners to pick the right one.
This means that the only way to find the perfect nib for your style is through trial and error. Or use us as your cheat sheet.
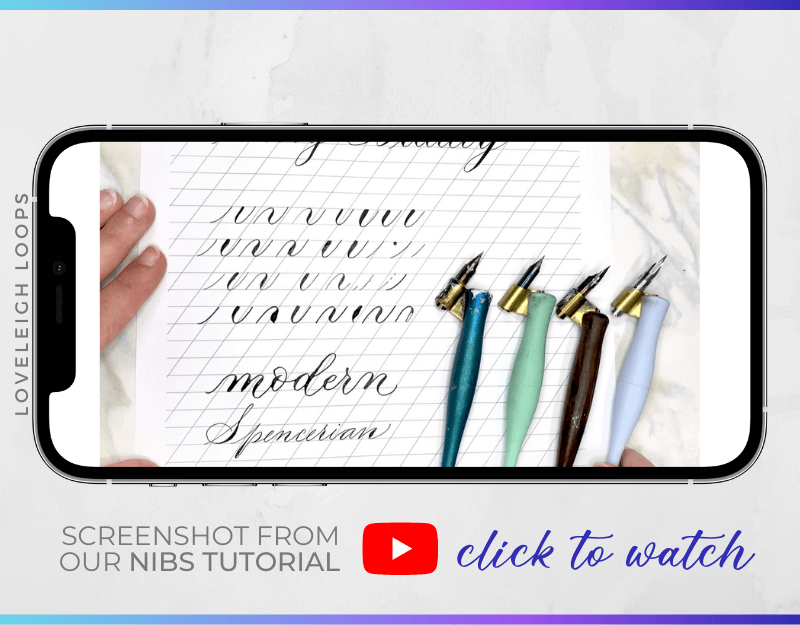
Watch out best calligraphy nibs tutorial on YouTube
Here are some of the most popular nibs that are perfect for beginners.
Nikko G Nib
Let’s start with the Nikko G Nib, our nib of choice for anyone that’s never held a pointed pen before.
In addition to being very beginner-friendly, the Nikko G Nib is also versatile enough for more advanced pointed pen works
The Nikko G can be considered the Goldilocks of nibs as it’s sharp but not too sharp and flexible but not too flexible. It’s right down the middle and it’s exactly these qualities that make it well suited for beginners.
Since the Nikko G isn’t super sharp, it glides over the paper smoothly. Although pointed pen calligraphy works best on smooth paper, you don’t have to go over the top with super fancy paper to make sure it doesn’t get caught in the fibers.
Its nice medium flexibility makes the Nikko G an excellent pen for first-timers. It takes a bit of pressure to create the thicker lines which makes the pen more forgiving than some of the others on the market.

Thicker lines are possible with the Nikko G Nib, but they do require more pressure, making this a more forgiving nib for beginners
While the Nikko G can create thick lines, it’s not particularly well suited for anyone interested in creating a high-contrast script.
You can technically create super thick lines but we’ve found that the amount of pressure required will leave you with hands that are sore and tired after only a few words!
You may also like: Calligraphy Flourishes For Beginners
Consider this choice instead:
Hunt 101 Nib
If you prefer a little less dainty script, then the Hunt 101 Nib could be the nib for you.
When you pick it up for the first time, it quickly becomes clear that this nib is very different from the Nikko G.
The Hunt 101 Nib is significantly sharper than the Nikko G Nib, which gives a very different feel on the paper. Making upstrokes is more difficult as the nib doesn’t glide across the surface of the paper as smoothly.
As a result, it can take a little longer to build up muscle memory and your thin upstrokes can have a tendency to be scratchy until you do.
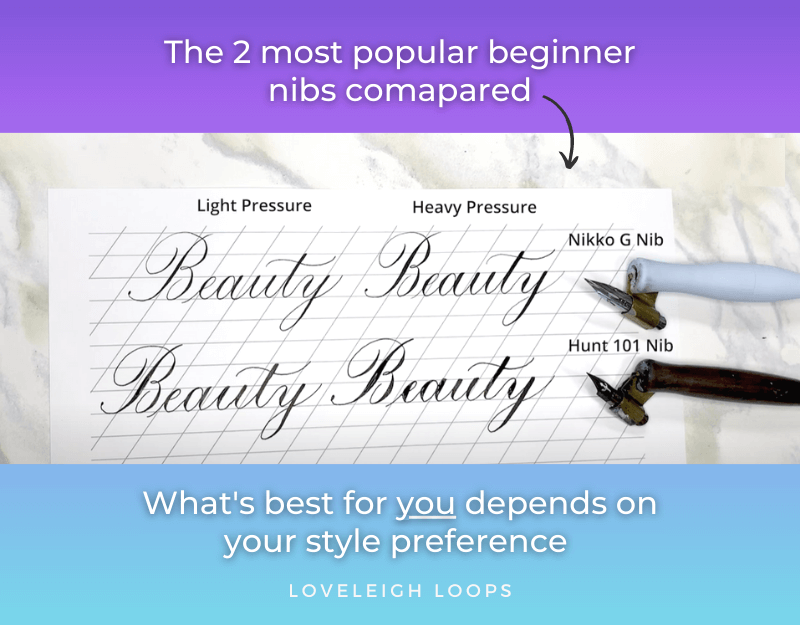
The Nikko G Nib and the Hunt 101 Nib compared
In addition, the Hunt 101 is more flexible than the Nikko G. Creating thick lines requires hardly any additional pressure and often results in lines that are a little thicker than those written with the Nikko G.
To a beginner, these two qualities may result in the pen feeling difficult to get used to. If you’re in the exploratory stages and trying to figure out your style, the Hunt 101 will probably pose a bigger challenge than necessary.
However, if you know that you want your writing to encompass a thicker contrast, then we recommend starting with the Hunt 101!
After all, you will need to get used to a more flexible pen anyway. No need to postpone the learning process.
You may also like: How To Do EASY Calligraphy
These are the 2 most popular calligraphy nibs for beginners. Which one calls to you??
Are you unsure exactly which style you want to pursue? Consider trying both. You can get both the Nikko G Nib AND the Hunt 101 Nib in our beginner calligraphy kit:
Perfect for anyone who wants to take the guesswork out of building their calligraphy supply kit
While these nibs are the favorites of our calligraphy students, there are two other noteworthy mentions that could be perfect for you.
Gillott 303 Nib
This nib finds itself in between the ones we just looked at. Anyone looking for a nib that’s both nice and sharp and still relatively flexible should take a look at the Gillott 303 Nib.
The Gillott 303 is quite a bit sharper, so don’t forget to include some smooth paper in your order! Using ordinary paper, even paper that’s normally well-suited for pointed calligraphy, can get frustrating really quickly as your nib gets stuck.
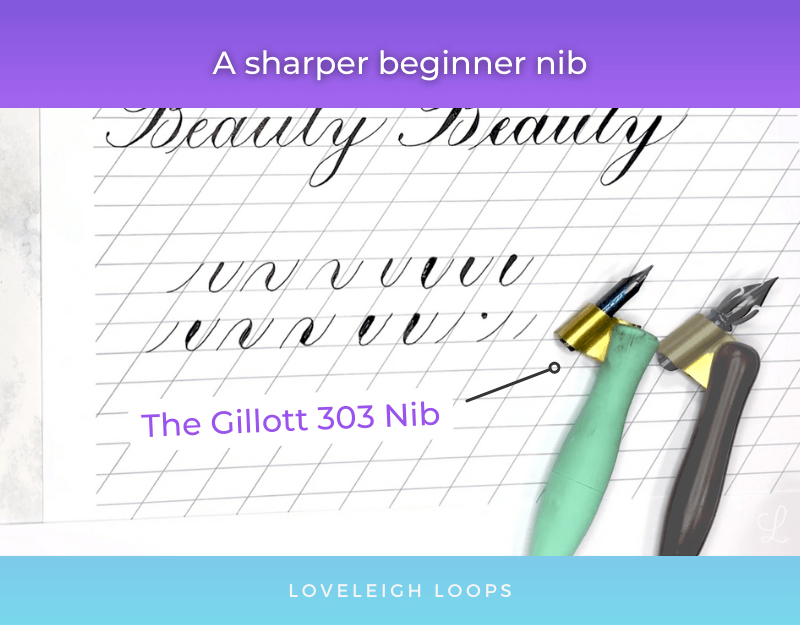
The Gillott 303 nib
While a sharp nib allows for beautiful thin lines, it’s also harder to control. You’ll need both a light touch and a steady hand to create those thin, uninterrupted upstrokes.
Although the Gillott 303 is a lot sharper than both the Nikko G and the Hunt 101, its flexibility falls somewhere in between. It’s more flexible than the Nikko G, yet not as flexible as the Hunt 101.
All in all, the Gillott 303 is a bit more of a specialized nib. Its sharp point and medium flexibility tend to create a specific type of script.
There’s a bit of a learning curve when you first pick up a really sharp nib but don’t be put off by it if you’re pursuing dainty and thin lines. The Gillott 303 remains a popular nib for a reason and anyone can learn to use it, though it will be more challenging for calligraphers with a heavier hand (those upstrokes in particular).
You may also like: The History Of Calligraphy
Blue Pumpkin (Brause Steno) Nib
The Brause Steno Nib, otherwise known as the “blue pumpkin”, is a completely different beast from the ones we just looked at.
Here we have a nib that is so popular, it has its own nickname! And what a nickname at that. Named after its shape and color, this is one of the best calligraphy nibs for beginners who want nice thick lines.
One of the first things you’ll notice when you pick it up is that the blue pumpkin is a lot less sharp than the other three. While a dull tip makes it easy to use and provides thick strokes (even on the upstrokes), it also makes it impossible to get really thin upstrokes.
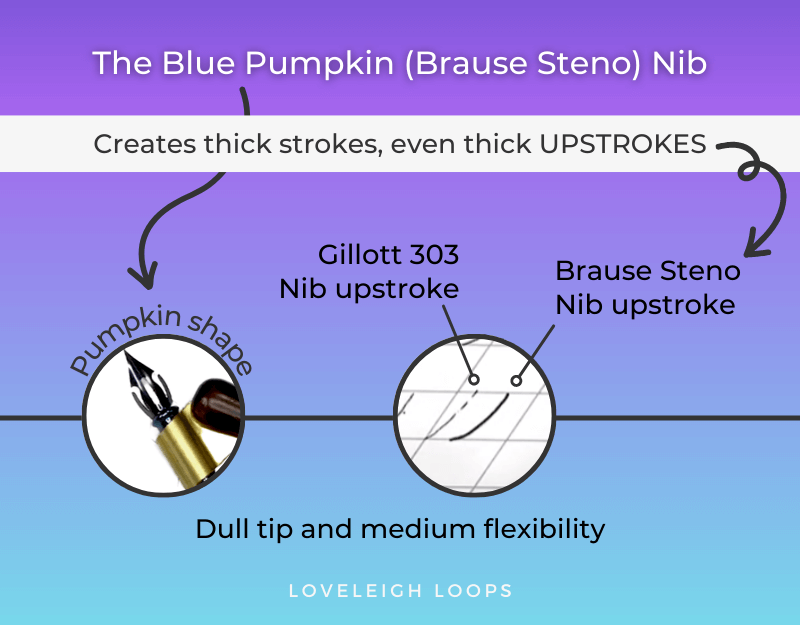
Even upstrokes are quite thick using the blue pumpkin
Can you see that the thin strokes are almost double in thickness?! At first glance, this might seem like a small detail but it has a profound effect on the way your calligraphy looks.
Especially when you combine a lack of sharpness with a nib that can only be described as having medium flexibility.
Does this mean that the Blue Pumpkin is not really capable of doing proper calligraphy?? Not at all.
All it does is give you a different style of lettering that could very well be what you’re looking for.
Out of the four nibs we just looked at, the blue pumpkin could very well be the most beginner-friendly nib. Its dull tip and relative lack of flexibility make this pen both forgiving and easy to work with.
However, it might not create the kind of calligraphy that you’re looking for. What style calls to you?
You may also like: Different Calligraphy Styles, Tools + How To Learn
Style requires different pens
Each nib generally shines in a specific style of calligraphy and this is where personal preference becomes paramount.
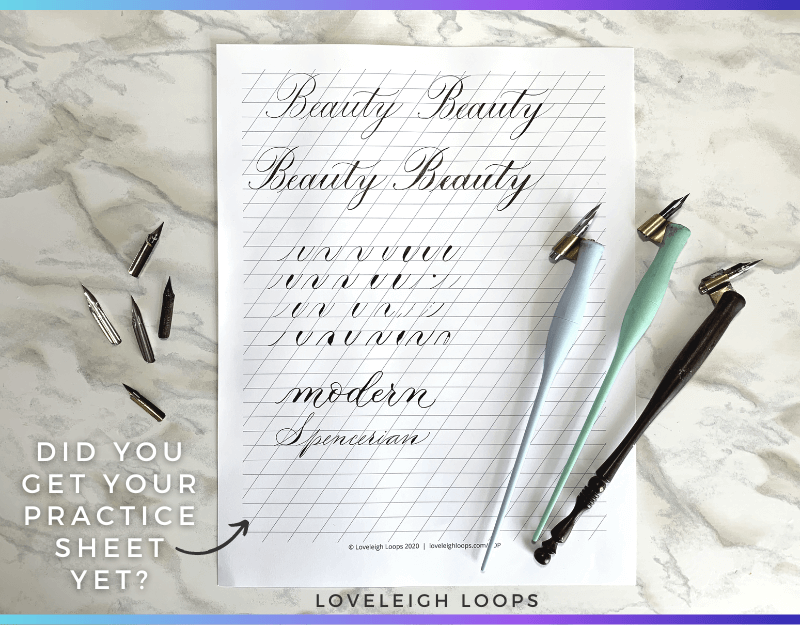
Don’t get started without your free printable practice sheet!
Depending on what kind of calligraphy you want to create, you may either choose a super sharp nib or opt for a nib that’s more on the dull end.
Traditional calligraphy
If you want to learn traditional calligraphy, and especially traditional scripts, you’d better be prepared to follow some rules. I mean, you can’t do traditional calligraphy without following at least SOME of the traditions!
You may like: How To Write The Spencerian Script
As you can see, the lines are incredibly thin and there’s a stark contrast between thick and thin lines.
Your choice in nib is up to you but you will get better results with a nib that’s on the sharper end.
We recommend:
Modern calligraphy
If you believe that the rules that come with learning a traditional script are only there to be broken, then modern calligraphy is right for you.
With modern calligraphy, the aim is to develop a style that’s unique to you. Any rule can be thrown out the window as long as it makes the result feel more like the rebel that you are!
Although modern calligraphy varies from person to person, there are a few things that could influence your choice of nib.
Modern calligraphy uses thicker strokes in general. Compare this to traditional calligraphy and you’ll notice that there’s less contrast between up and downstrokes.
We recommend:
Brause Steno Nib (the blue pumpkin)
How To Use
At first sight, a nib looks pretty indestructible. It’s a piece of metal, what could go wrong, right?!
To be honest, very little… as long as you know what you’re doing!
Here are a few basic maintenance tips that will make your nibs last.
Using And Cleaning Your Calligraphy Nibs
When it comes to the use and maintenance of your carefully chosen pointed pens, you can safely rely on common sense.
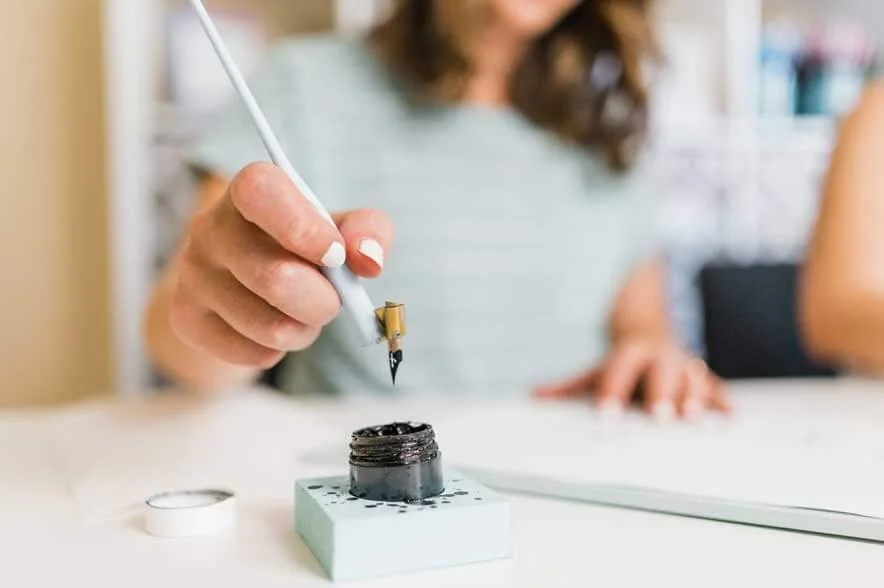
Before using a nib for the first time, you’ll have to “prep” it to remove the protective coating that is applied during manufacturing. There are a few methods for prepping a nib including spraying with a small amount of Windex then rinsing, or repeatedly dipping in the ink and wiping off.
Cleaning your calligraphy nib during use is simple. Just use a paper towel and some water and wipe as much of the ink off as you can. We recommend doing this several times during practice as well as after every session to make sure that no excess ink sticks to the nib.
Without this step, the ink would dry and your nib would be ruined after only a few sessions. Don’t be in such a rush that you have to skip cleaning!
You can reduce the amount of clean-up on your plate by being aware of how far you dip your pen into the ink.
While dipping your pen, don’t dip it too far. Any ink that gets in between the nib and the flange can dry up making it virtually impossible to get your nib out of its holder.
You may also like: Resolving Common Pointed Pen Ink Issues

Take care of your nibs and they’ll last for months of use
How To Store Your Nibs
Once you’ve cleaned your nibs, it’s time to put them away in a proper manner.
Since the nib is made of metal, it’s best to make sure they’re dry before you put them away. Beyond this step, the way you store them is completely up to you!
I prefer to keep the ones I’m currently practicing with their respective pen holder so that they’re a little easier to use. In addition, sometimes I find it hard to see exactly which nib you’re holding as the engravings on them are not always clear.
You may also like: How To Do Copperplate Flourishing
How To Learn Pointed Pen Calligraphy
Now that you’ve found your calligraphy nib, it’s time to get practicing! But do you know which steps you’ll take next?
You can use free resources like our calligraphy blog and YouTube tutorials, or you can get an entire roadmap to follow in one of our calligraphy courses:
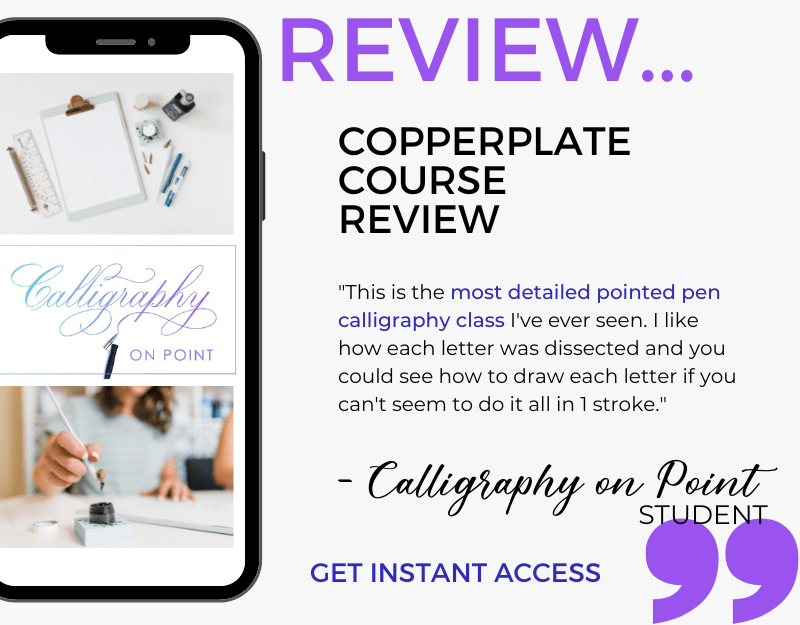
Student testimonial from Copperplate on Point
Which paper and pen calligraphy course sounds most exciting to you?
Can’t make the financial investment right now? We’re still here to support you. Join our Facebook group to meet your new calligraphy friends!
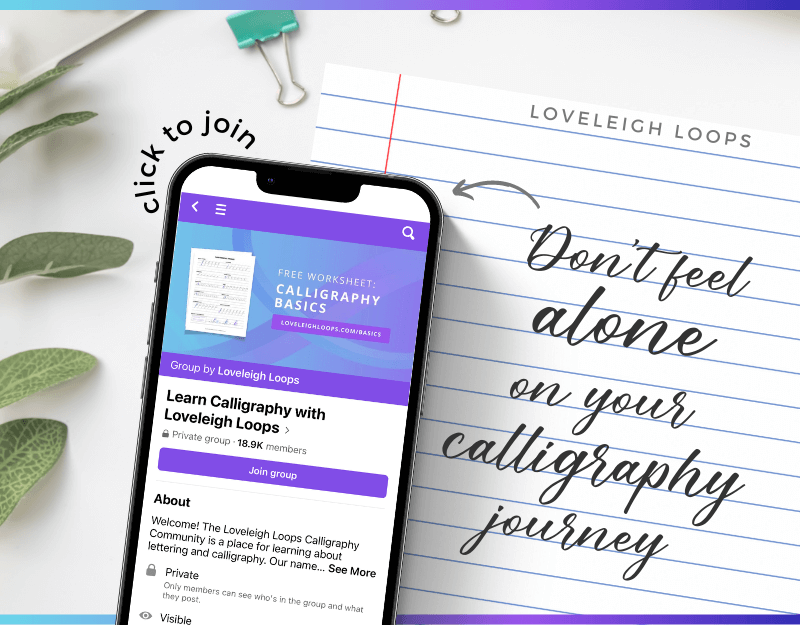
You never have to feel alone on your calligraphy journey. Come join us on Facebook
Final Thoughts
While you could do calligraphy or lettering with markers, fountain pens, pencils, the Apple Pencil, essentially ANY writing utensil, we love that you reached for a pointed pen.
We love modern calligraphy styles and tools, but the classics hold a special place in our hearts.
There really is no such thing as the best calligraphy nib, but we hope that you have a better understanding of what’s best for YOU.
Every nib shines in a different way and choosing a nib that meets your needs is an exciting part of your lettering journey!
Enjoy the ride.
