Calligraphy Flourishes Guide [+ Free Practice Sheets]
Once you’ve mastered the basics of calligraphy, it is time to take your writing to the next level by adding flourishes to your calligraphy!
Calligraphy flourishes are more than just fancy and elaborate twists and curls at the edges of letters. They add elegance to your calligraphy and create an opportunity for individual style and experimentation in your writing.
Let’s go over the basics of calligraphy flourishes so that you’ll understand how to turn your already beautiful calligraphy into a true work of art. Pens out?! Let’s go!
Table of Contents
Pause now and pin this for later ↓
What Is A Decorative Flourish In Calligraphy?
The dictionary definition of a flourish (noun) is “an extravagant gesture,” which is a very poetic way of viewing calligraphy flourishes. Specific to calligraphy, flourishing is the act of adding sweeping, decorative strokes to your writing so it becomes more impressive.
If you’ve dipped your toes into the world of calligraphy before, you may have seen some truly fantastic, eye-catching works of calligraphy. The swirls and curls around the letters that make up your word are what are known as flourishes.
Flourishes come in different shapes, from simple curves and loops to more complex flourishes where curves cross over each other to form more intricate designs. Flourishes can be added to modern calligraphy or traditional styles.
You may also like: All About Traditional Calligraphy Flourishes
At first glance, these elegant embellishments can look like something that’s improvised, organic, or spur of the moment. They certainly do look alive! But now that you’re here pulling back the curtain on calligraphy flourishes with us, you’ll see how meticulously crafted they really are.
Prefer to watch instead of read? ↓
What we love about flourishing is that you can take any basic hand lettering or calligraphy project and make it a really original work of art. Adding flourishes to your work really transforms the look of a word or phrase, and allows you to break away from the basics and really play.
But flourishing isn’t for the brand-new hand letterer or calligrapher. It’s for someone who has learned the rules of the art and is ready to take it to the next level.
You need to know the basic alphabet, lettering terminology, how to hold your pen properly, and which paper and pens work best for specific project types before you can really excel with calligraphy flourishes.
Need some beginner resources to help? Get started here:
Even the seasoned calligrapher will need to get the hang of flourishes when they’re brand new. It’s normal to feel a little off when you first start practicing; the muscle memory that makes calligraphy easier over time needs to be built up. Once you’ve tried your hand at flourishing a few times, the awkwardness will melt away.
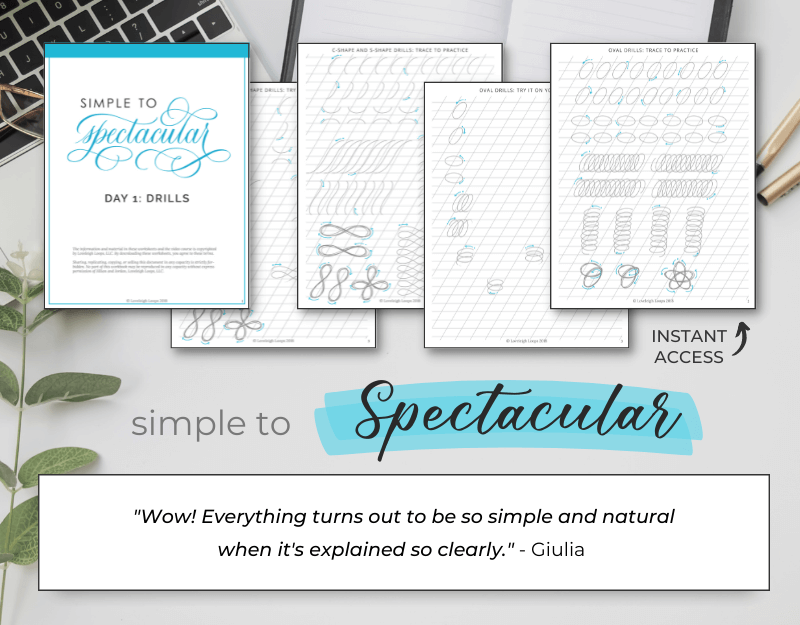
Get your free practice sheets inside of our free Simple to Spectacular flourishing course ↓
Making your embellishments look elegant and graceful takes practice but it’s a great way to add personality to a piece of calligraphy. Ready to dive in?!
What Tools To Practice Flourishes With
There are 3 important tools for learning flourishes:
Writing utensil (specifics in a minute)
Worksheets (in Simple to Spectacular)
Practice
Beginner flourishing artists will want to practice with a monoline pen.
Or, even better for newbies, start with a pencil! That way, you don’t have to worry about adding pressure to certain parts of the flourishes - just keep them all thin.
You’ll really start to feel what it’s like to make the shapes and achieve smooth strokes. Ultimately, many advanced flourishers will prefer to use brush pens or oblique pen holders, but they’re not necessarily the best starting point.
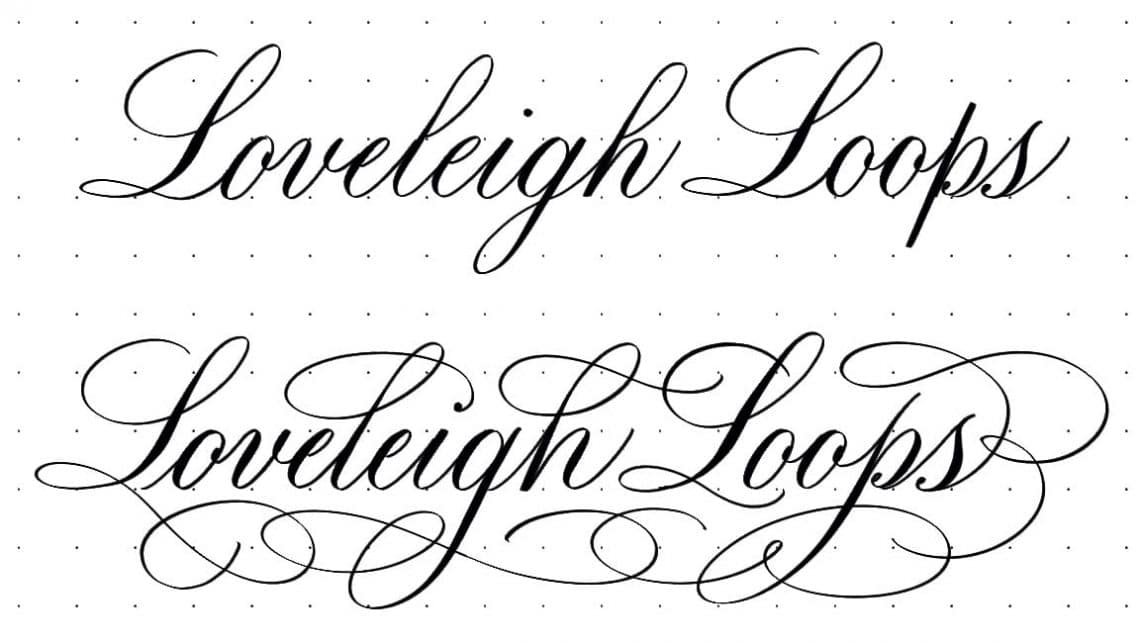
Before you can add flourishes (bottom example) you need to be able to write the top example
You may also like: How to Hold Brush Pens for Lettering
How To Do Calligraphy Flourishes
As a beginner, it can be hard to get started with flourishing in calligraphy because it’s difficult to see whether you’re doing it correctly or not.
Let’s say you’ve been practicing calligraphy for a while. You have the basic strokes down to a tee and you regularly dream of ascending loops and exit strokes. You’re ready to take your calligraphy to the next level!
So you try your hand at those elegant curves and loops that you sometimes see on wedding invitations or even the front page of old books.
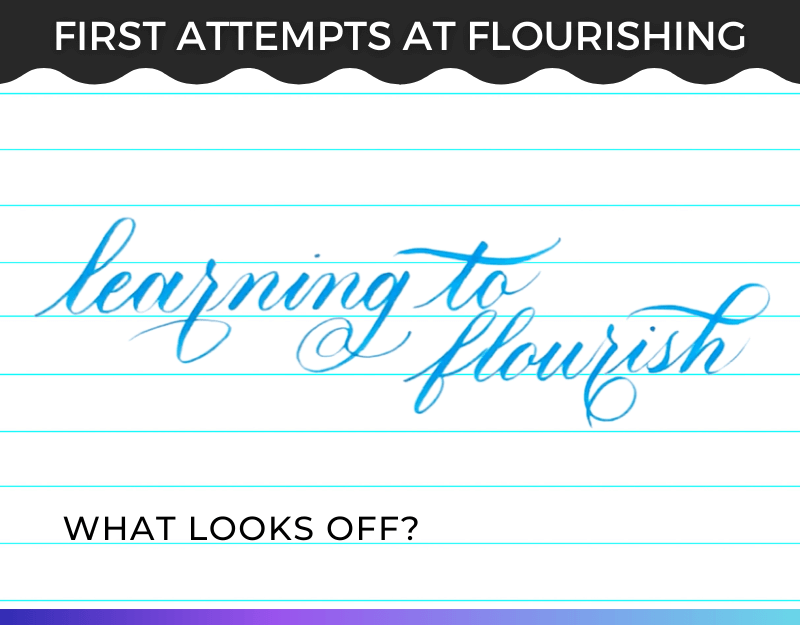
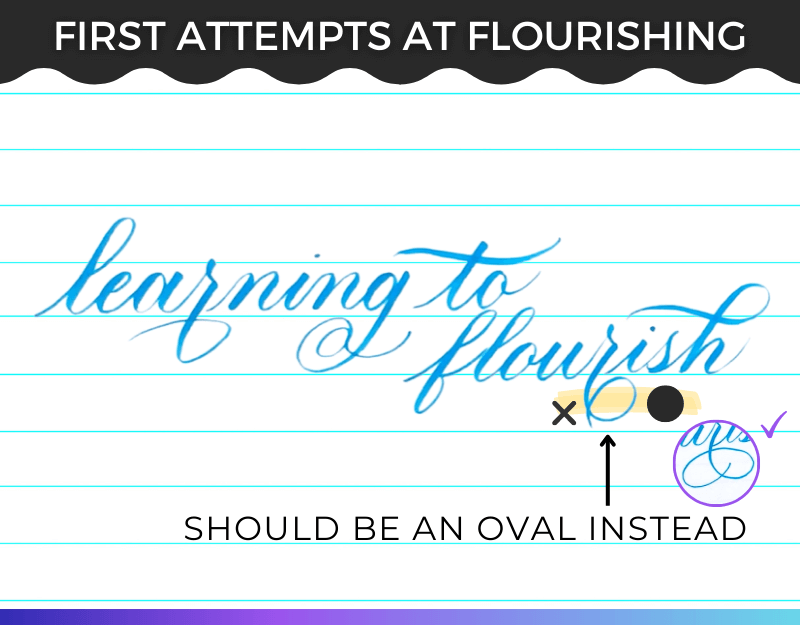
After a few attempts, you may come up with something like this:
Looking at this example, does it feel like some things are off?
Let’s look first at the simplest embellishment: the t-crossbar. A beginner writing this may feel confident making the t-crossbar like this, but somehow this one doesn’t feel quite right.
Similarly, something feels off about the loops in the Rs, G, and H. Some of the curves don’t really work - can you pick one and identify why?
You may also like: Pencil Calligraphy For Beginners
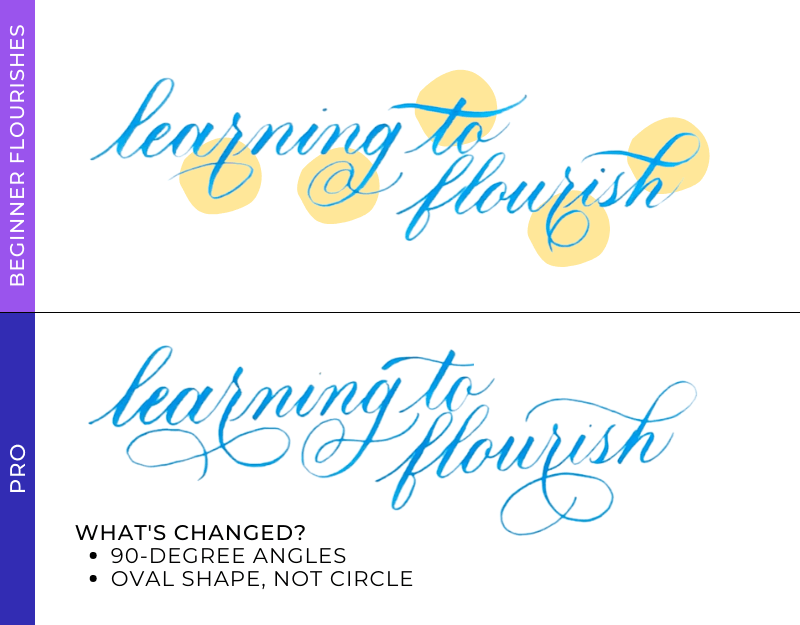
Let’s compare the beginner's attempt to a pro’s take on these same flourishes:
When you look at the two images above, the flow and contrast are clear. Only one of the examples looks elegant and truly enhances the word it embellishes. The other one looks a little clumsy and awkward.
Being clumsy and awkward is a part of being a beginner, so don’t get discouraged!
When it comes to flourishes in calligraphy, there are three general guidelines that will help you make massive strides. Once you get them under your belt, you’ll be able to see the flaws in your flourishes and fix them.
Are you an iPad calligrapher? Get tips specifically for iPad flourishes in our iPad Flourishing 101 Free Training.
Guideline #1: Flourishes Are Based On Ovals
When you look at the example of good flourishing, you can see that none of the loops are perfectly round. Likewise, none of them have any sharp angles in them.
All of them appear as slightly stretched circles and this shape, the oval, is what should be at the heart of all of your flourish designs.
This guideline is the main reason why the first flourish under the letter R doesn’t work. When you look at the example, you can see that the loop is almost triangular in shape.
You may also like: Traditional vs Modern Calligraphy
Flourishes that are triangles or have other angles form a contrast to the writing that is too great to be pleasing to the eye.
The lack of an oval shape is also one of two reasons why the flourish below the second letter R doesn’t work.
In this case, the flourish feels almost circular rather than oval-shaped. Because of its shape, the flourish almost feels more like a circle resting on an extended letter rather than a beautiful embellishment.
The round shape of this particular flourish is a perfect example of the second reason why this flourish doesn’t work, which leads us to guideline #2.
You may also like: Understanding Calligraphy Layout And Composition
Guideline #2: Crosses Happen At 90 Degree Angles
Not every flourish consists of simple curves. Some of them are more complex and have small loops within the flourish or even cross over themselves.
When you design these complex shapes, always aim for an angle of as close to 90 degrees as possible for your crossing lines.
Circling back to our example, we immediately see a minor issue with the letter R in flourish.
You might also like: 20+ Free Calligraphy Worksheets
The embellishment below the letter has an intersection but the angle at which the lines cross isn’t even close to 90 degrees.
Making the shape less circular and changing the angle in the intersection fixes this flourish.
Guideline #3: Never Cross Two Thick Lines
Embellishing the t-crossbar is one of the easiest ways to get started with flourishing. All it takes is a simple line that is just a little wave! Not too hard, right!?
A quick look at the flourish on the letter T in our example will show that this isn't necessarily as effortless as it sounds. The good news is that this mistake is easily fixed by sticking to this simple rule: never cross two thick lines.
You can use both thick and thin lines in your flourishes. Not every curve and loop need to be thin as long as you make sure that at least one line is thin for every intersection.
As you can see, adding a little shading to your flourishes easily creates more depth and sophistication. You just want to avoid adding heaviness and darkness to one spot.
Two thick lines can create a smeary mess if you’re using a pointed pen with real ink. If you were to have an intersection of two thick lines, you’ll find that the eye is drawn to that spot over the other flourishes, which isn’t what you’re aiming for.
These are our three basic flourishing guidelines, but we have two bonus tips for you too.
Bonus Tip 1: Bigger Is Better
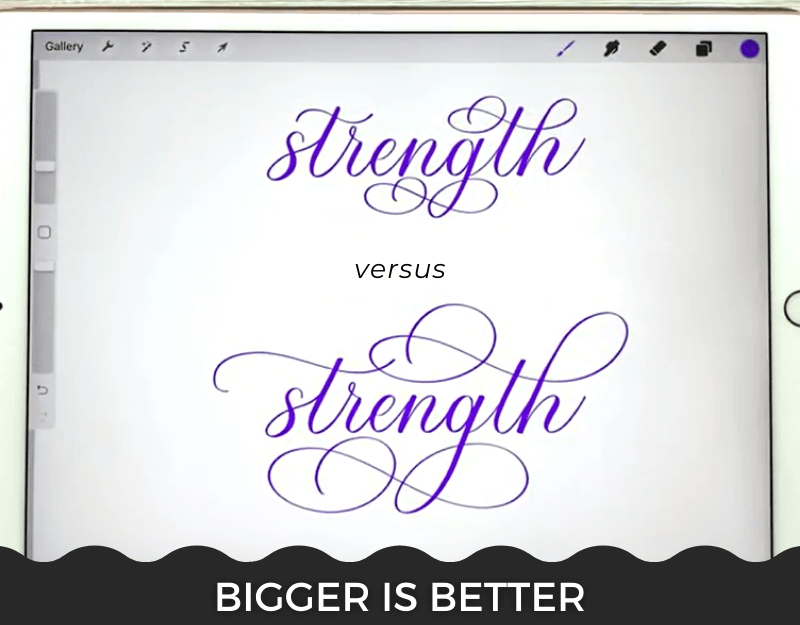
If you look closely at examples of beautiful flourishing, you’ll notice that going bigger is better than making small embellishments. This is more of a bonus tip than a rule since this is only true in most cases but not all.
The biggest thing beginners should avoid is making their flourishes look like they might be a mistake. In our example, the letter R in the word flourishing has the potential to do just that. The small loop below the letter makes it look like it’s part of the writing rather than an embellishment.
You may also like: An Introduction to Pointed Pen Calligraphy
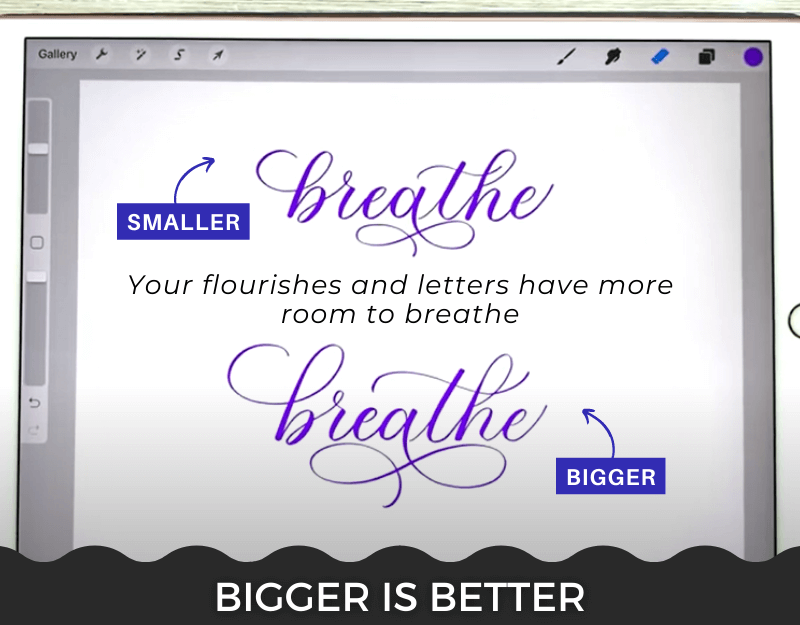
Take a look at these two examples of flourishing below. Here you can see a side-by-side comparison of the effect that different sizes of flourishing have on a piece of calligraphy:
P.s. This screenshot is from our flourishing playlist on YouTube. Have 20 minutes to get lost in some flourishing fun?! This is for you.
Making the flourishes bigger and more intentional allows them to breathe. By increasing their size, you take away any interference with the legibility of the word itself.
Flourishing challenge: for fun, try writing the same word three times and increase the size of the flourishes every time you write it. You’ll see how the effect of flourishes changes the overall look of your calligraphy!
Bonus Tip 2: Less Is More
In that last bonus tip, we said that bigger was better, not that MORE was better. That sounds more confusing than it actually is, so let’s break it down.
Now that you have the basic rules of flourishing down, it might be tempting to flourish each letter in every word. While we LOVE that enthusiasm, it’s not the most beautiful use for calligraphy flourishes.
Overdoing the embellishments creates a very crowded and even potentially confusing piece of writing. Instead, it’s better to practice a little restraint as you’re working towards a sense of balance in your calligraphy.
One question remains: if there’s such a thing as too much or unbalanced flourishing, how do you know where to put them?
Where Do I Put My Flourishes?
Some places are better suited than others when it comes to placing flourishes and there are very clear reasons why.
Before we dive into why this is, let’s look at two examples of a poor flourishing choice.
Can you read the word? At first glance, it looks like the word flourish has been split up into two words. This is because the flourish on the letter u creates a spacing between letters that’s not part of the word.
Similarly, the flourish on the letter s also causes confusion.
The problem here is that the flourish is too small and it interferes with the legibility of the letter. The letters have become confusing and as a result, the word is now hard to read.
When placing calligraphy flourishes, there are five places where they really work well and add the elegance and beauty that you’re looking for.
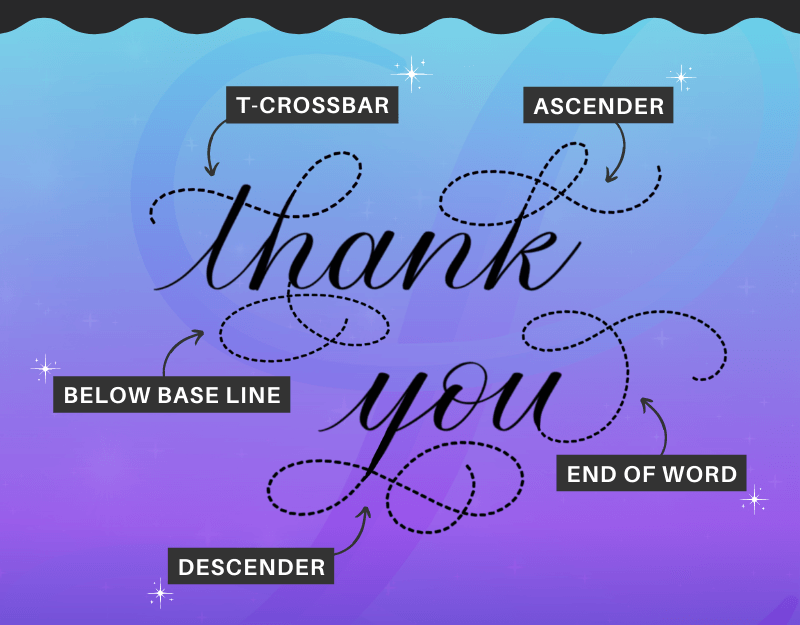
To give you an idea, here’s an overview of the best opportunities to add flourishes in a given word.
As you can see, there are plenty of embellishments and extensions in this example, yet the word flourishing is still perfectly easy to read.
Ascending Loops
Any lowercase letter with an ascending loop that reaches above the waistline is an opportunity for flourishing. This means that every time you use a lowercase H, L, or F, you have the option to embellish!
Descending Loops
For even more flourishing examples, watch our flourishing workshop.
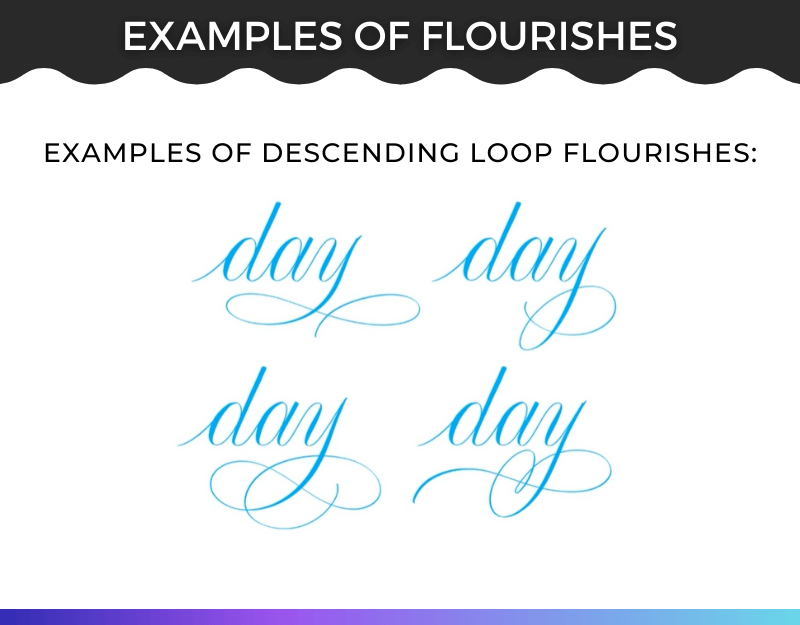
Lowercase letters with a descending loop (one that goes below the baseline and reaches to the descender line) present a spot where flourishing works well. Any lowercase G, J, or Y deserves your creative attention!
Each flourish in the example above gives a slightly different feeling to the design.
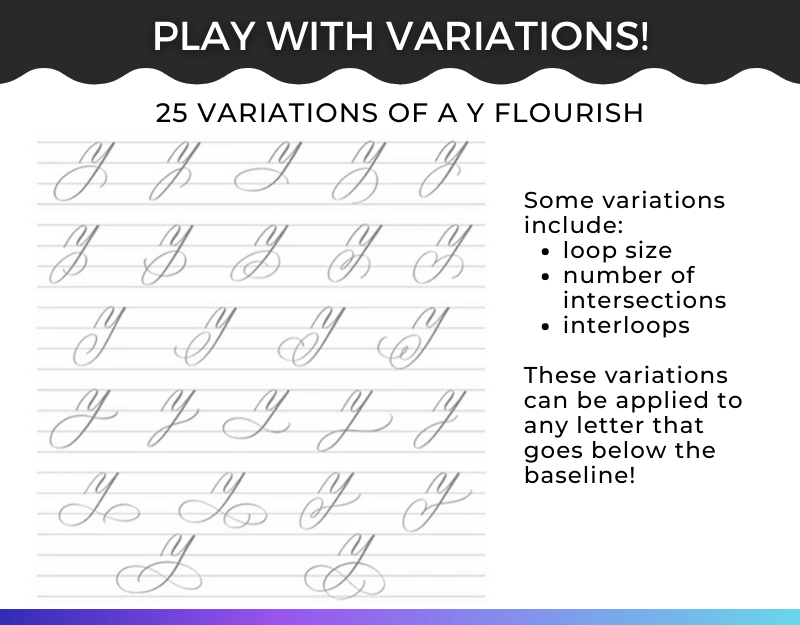
Just to give you an idea of how limitless flourishing can be, here you can see 25 different options for the letter Y.
Once you get comfortable with calligraphy flourishes, the sky’s the limit.
T-Crossbars
The T-crossbar is an easy spot to add some embellishments to your writing. You can limit yourself to just the t-crossbar but why stop there?
In the case of a TH, why not add a little extra playfulness by connecting it to the following letter?
End Of A Word
Ending a piece of writing strongly with a bold flourish adds a sense of style to whatever you’re writing. Since there is no spacing or legibility to mess up, you can go all out!
In The Middle Of A Word
Remember that one of the uses of flourishing is to fill up empty space. Therefore, any time you have significant space between two descending loops, you can add a little embellishment to one of the lowercase letters.
How To Practice Flourishing
At its core, calligraphy flourishing isn’t as mysterious as it might seem. There are clear reasons why some embellishments work and some of them don’t in any given design.
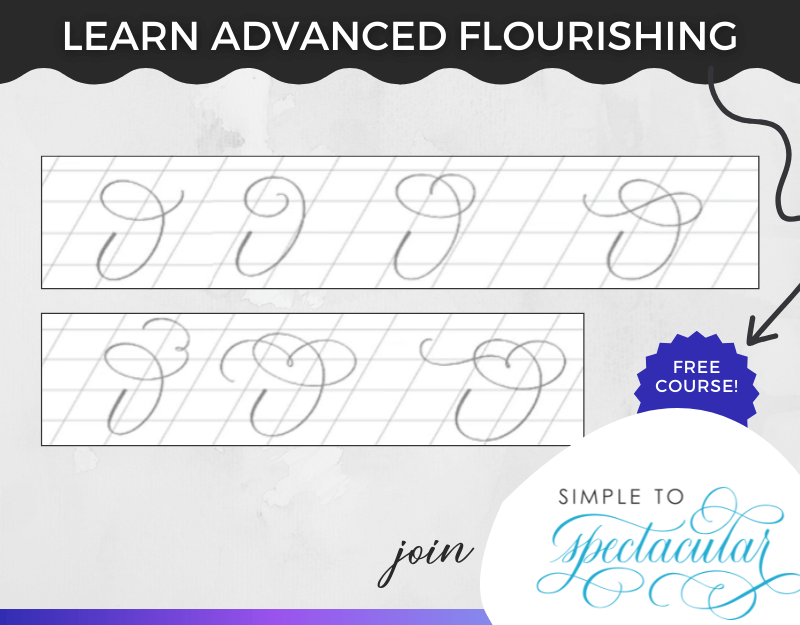
If you genuinely want to improve your calligraphy flourishes, then join our free Simple to Spectacular calligraphy course!
Even though we’ve covered a lot in this blog post, we’re really only just getting warmed up.
Through a series of video lessons and worksheets, you’ll learn how to go from simple calligraphy flourishes to more complex ones:
Browse ALL of our free courses in our calligraphy course directory.
You’ll learn how to flourish with intention and confidence. Even on your first day of practice in your free workbooks (!!), you’ll see improvement.
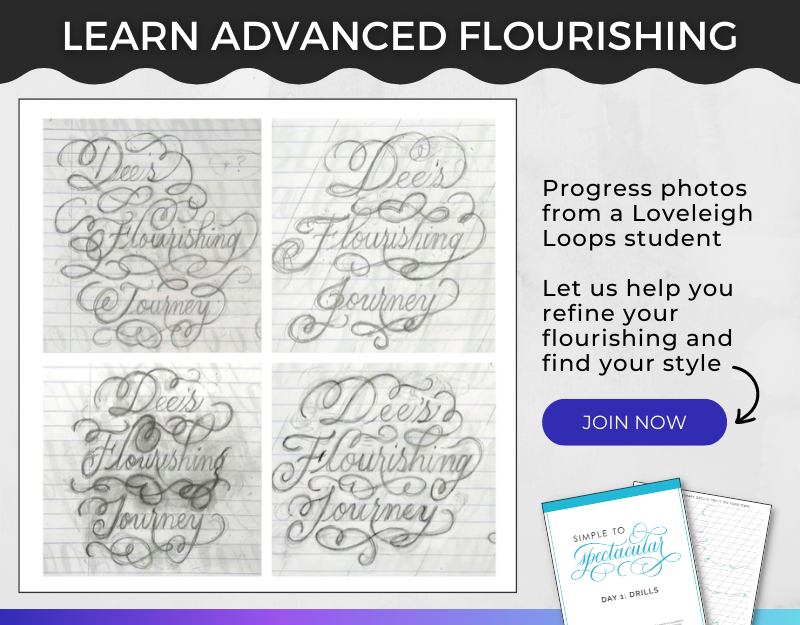
As a final example, let’s go over some progress shots from one of our students. Note that these are flourishes that we didn’t teach her. She designed these all by herself after learning the fundamentals in our full online course!
You can get started today with our free lessons in our Simple to Spectacular class.
One reviewer called Simple to Spectacular “one of the best online courses” they’ve ever taken. We don’t mess around with our calligraphy courses! Get instant access and find out for yourself.
Final Thoughts
Can we confess something? We know that modern calligraphy and hand lettering are mega popular right now, but we love that you’re interested in the classic flourish game. We love it, too.
And we know that calligraphy flourishes are a hard thing to master on your own.
It’s easy to overdo it, not understand your mistakes, and create a piece of writing that just feels off.
But there are very clear principles that, with guided practice, will help you master the art of embellishing your calligraphy. Let us help demystify it for you and give you workbooks and trainings that will be the lightbulb moment you need to SHINE at calligraphy flourishes.
There’s no better free resource out there. Join Simple to Spectacular now - we can’t wait to see you in there!!


